OctoPrint is a software that allows you to control and monitor your 3D printer remotely. you’re able to start and stop, adjust 3D printing settings, and even view the live progress of your 3D prints via a camera. The software supports various plugins, each designed to address specific needs, and allows you to tailor the software based on your requirements. If you own one of thebest 3D printersand want to create timelapses, you must install Octolapse.
Some plugins can help you organize print files on OctoPrint and automate routine tasks like bed leveling or filament changes. Others focus on analytics and reporting to offer insights on print time by analyzing the G-code as well as the performance of the 3D printer. We look at the best five plugins for OctoPrint. But before that, let’s look at how to access and install the plugins in OctoPrint.
How to Access and Install Plugins in OctoPrint
Access and Install OctoPrint Plugins
Accessing and installing plugins on OctoPrint is straightforward if you have already managed to set up the software. Follow the steps below.
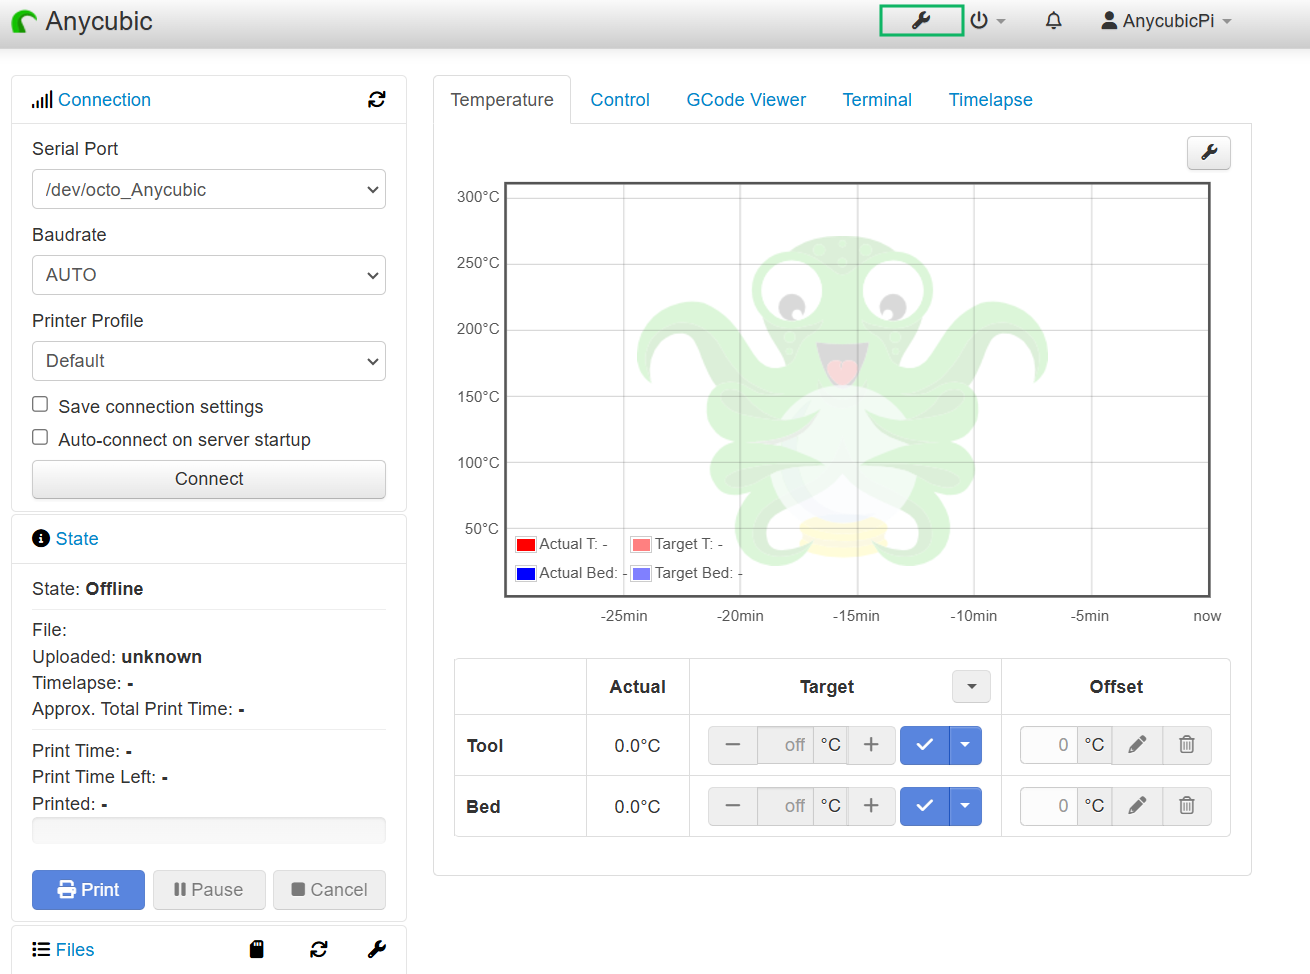
1.Log into OctoPrint interface in your browser.
2.Clickthe wrench icon on the top-right corner to access the settings menu.
3.Locateandclick Plugin ManagerunderOCTOPRINTsection. This enables you to search, install, and manage plugins.
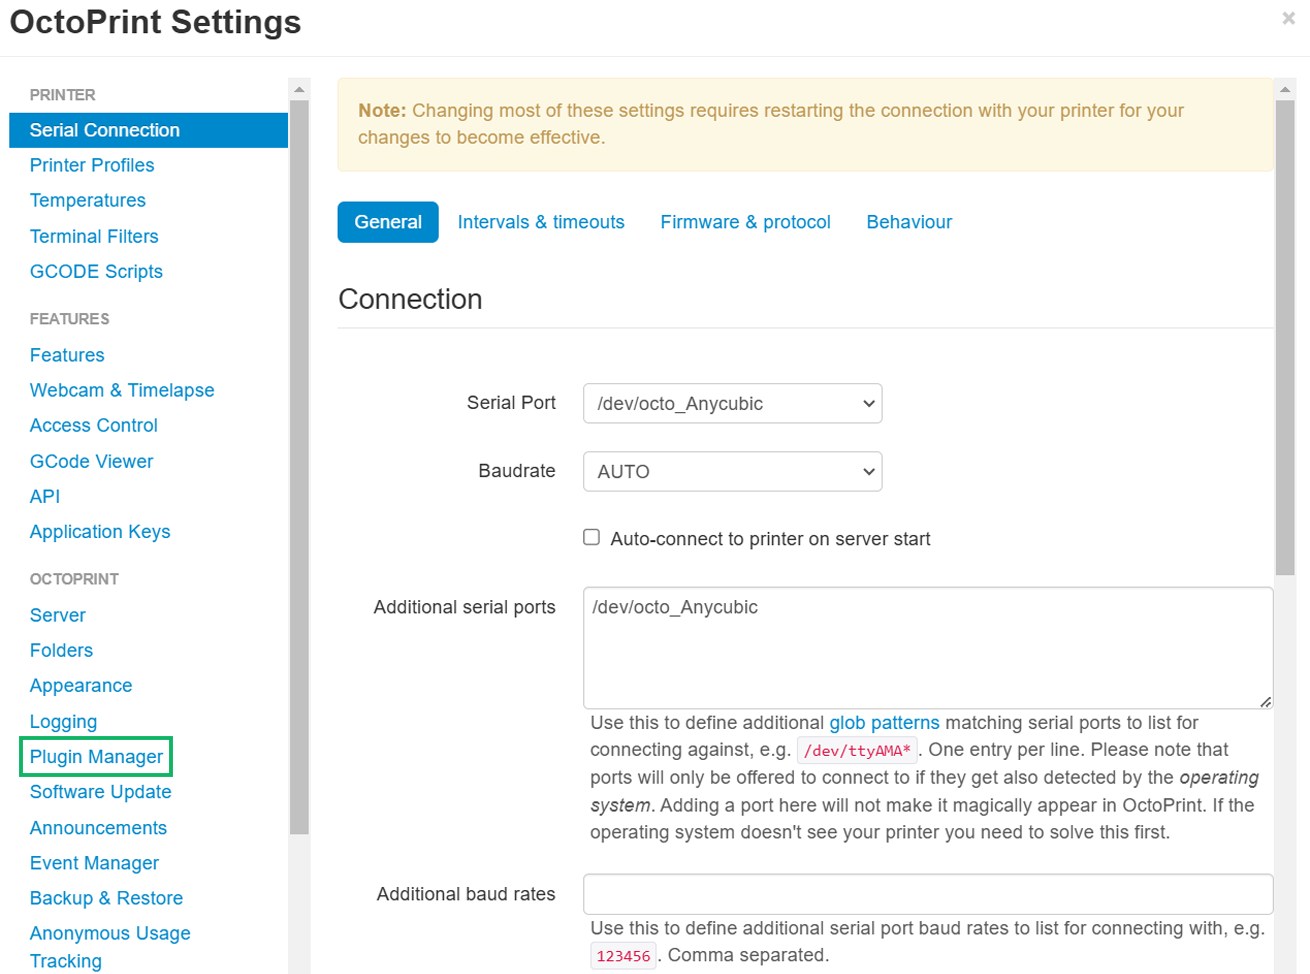
You will be able to see the plugins already installed. To look for more, clickGet More.
Get Tom’s Hardware’s best news and in-depth reviews, straight to your inbox.

Best Octoprint Plugins
Let’s now have a look at the best OctoPrint plugins to install.
Octolapse
1. Octolapse (Plugin for Creating 3D Printing Timelapses)
Octolapse is the first plugin on our list. If you have ever come across short, interesting 3D printing time-lapses where the print looks like it’s growing steadily from the print bed, this is the plugin that can be used to create them. It captures snapshots at various stages of the printing process and synchronizes the camera’s movement with the print head. Octolapse is completely free, and all you need to have is a Raspberry Pi and a camera, which can be a webcam, Pi camera, or DSLR. Follow the steps below to install and use it.
1.Search for Octolapseon the search bar in the settings section, theninstall it.

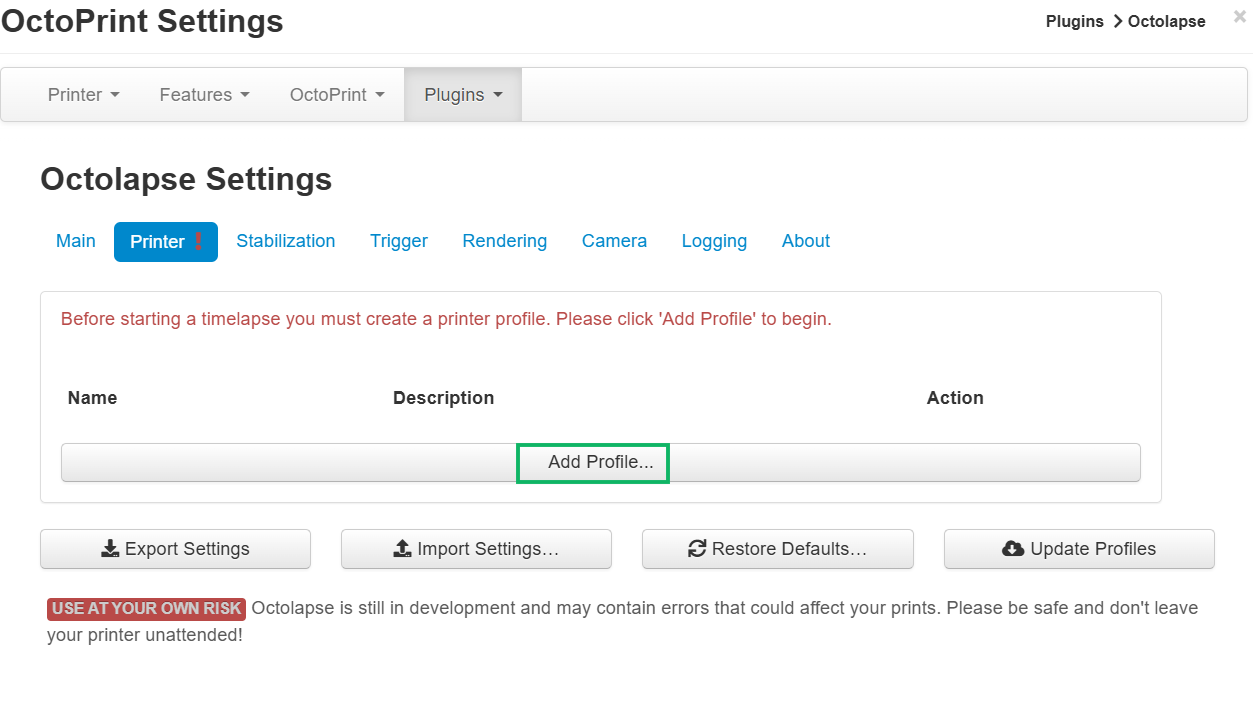
2.Restart OctoPrint,andthenadd your 3D printer profileusing theAdd Profilesection. Then,connectit to OctoPrint using a USB cable.
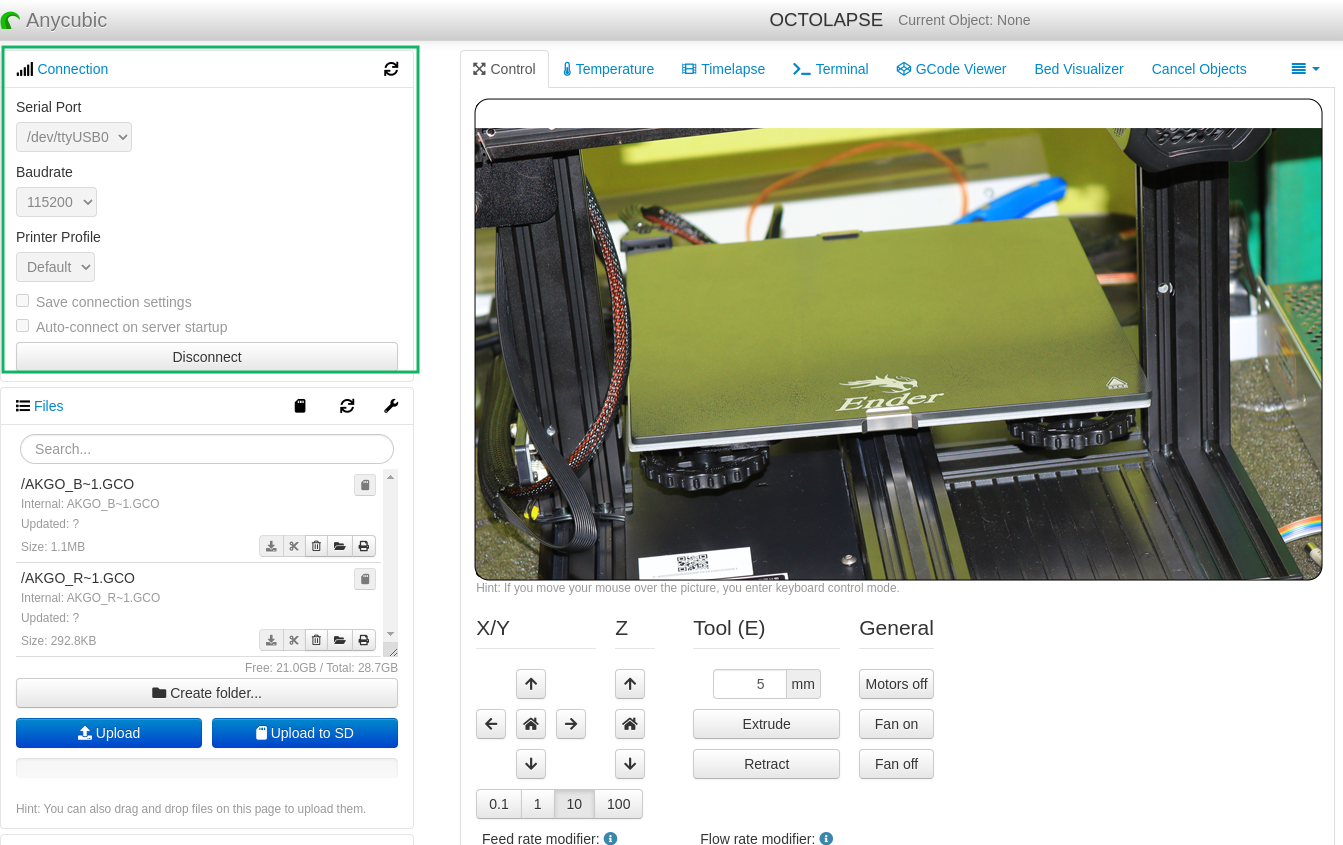
3.Startthe3D printer connectionbyclickingonConnecton the left section of the interface.
you may then go ahead and set up your camera settings.
When you finish, start your 3D print and you will see the snapshots of your timelapses in the videos and images section. You can choose to download or delete them from there.
Bed Visualizer
2. Bed Visualizer (Bed Adjustment Plugin)
Bed leveling is an important and difficult process, especially if your 3D printer doesn’t have automatic bed leveling features. Even auto-bed leveling features might not be accurate sometimes, and your 3D prints can fail if there is a part that is not well-leveled. The bed visualizer plugin is a great tool to help you properly level your bed. It integrates with the 3D printer firmware to gather the details of the bed and then it generates a 3D mesh visualization.
The visualization highlights high and low points in the X, Y, and Z axes. This helps point out the areas that can cause issues and this enables you to make the necessary adjustments. To set up the plugin, your 3D printer must be running on compatible firmware like Marlin, PrusaFirmware, Klipper, or Smoothieware.
Follow the steps below to learn how to use it.
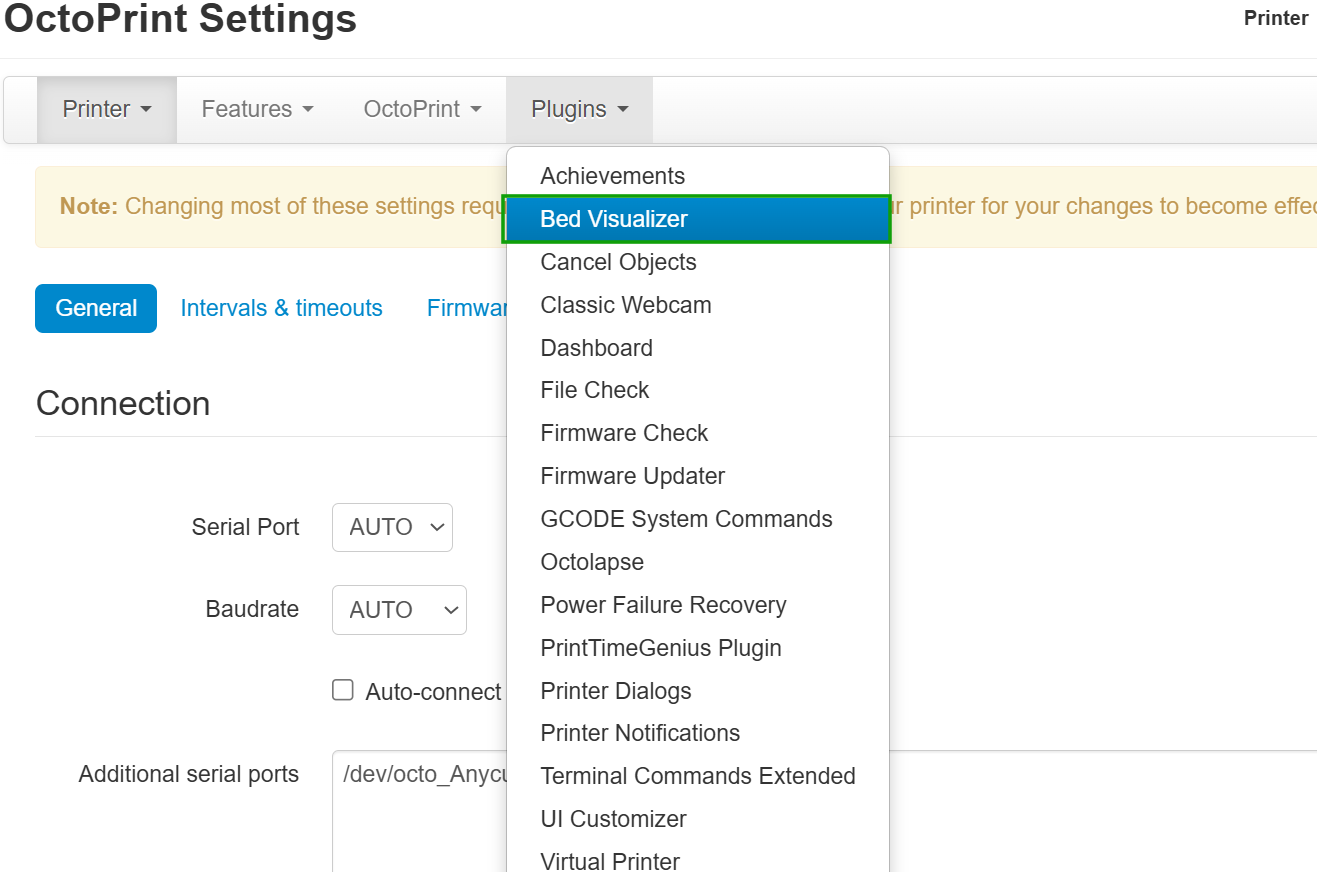
1.Go tothesettingssection, thenPlugins > Bed Visualizer. If you don’t see it, go toGet More,then search for it there.
Sometimes, it might fail to install due to missing system dependencies. If that happens, you will need to SSH to your Raspberry Pi, then run the commandsudo apt install libatlas3-baseso that the plugin can load.

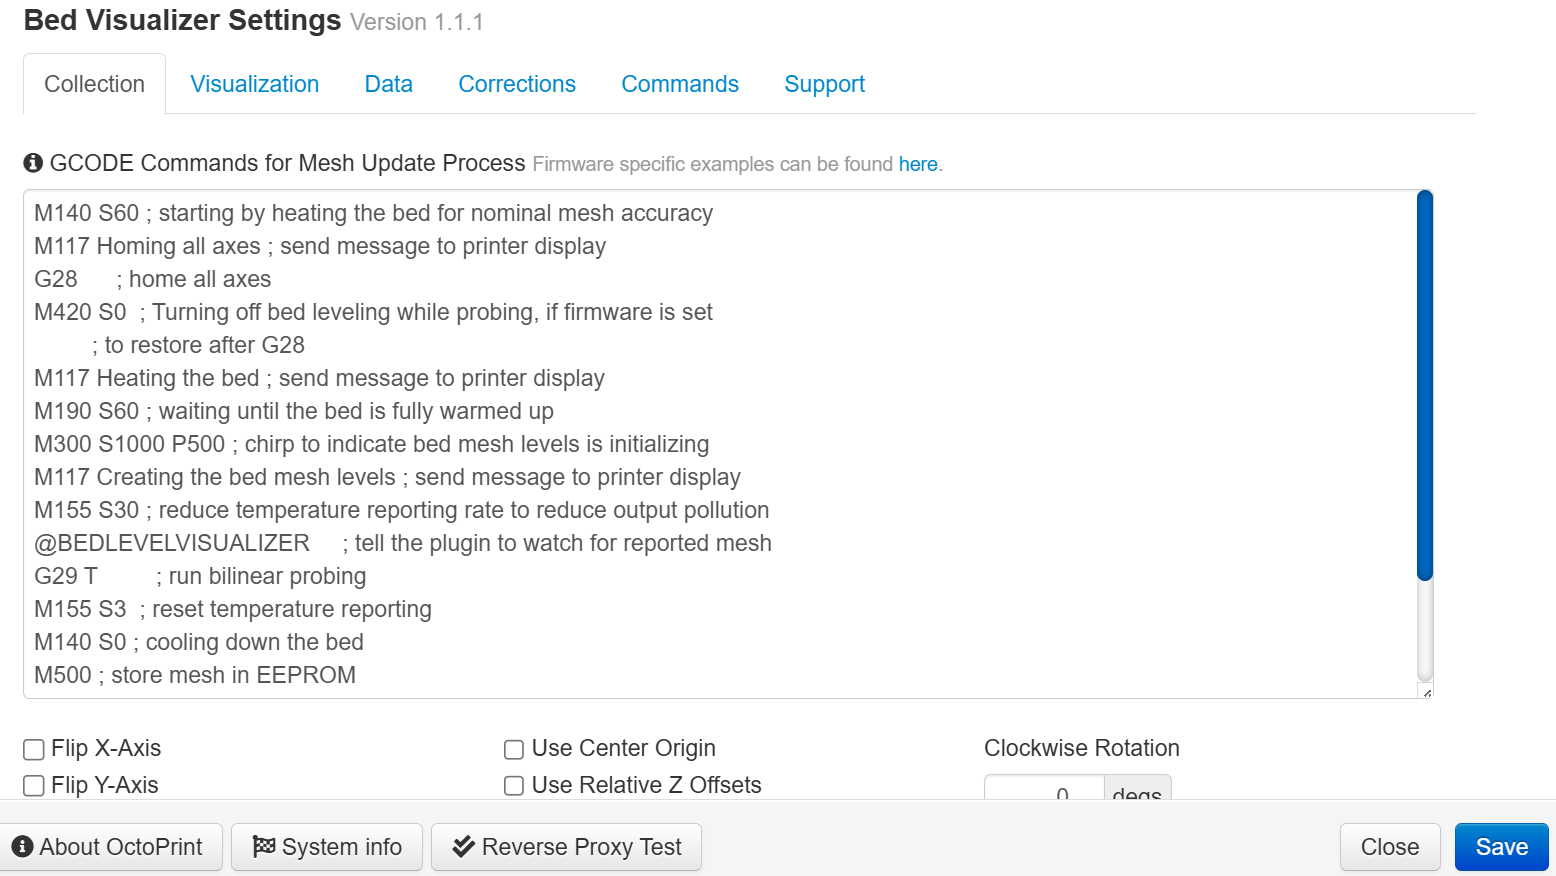
2.Click on the plugin, and you will need to set the Gcode commands for it to work. you’re able to find the firmware-specific examples onGitHub. You can then enter them in the Gcode section.
- When you enter the example,save, and update the Mesh, you will see your 3D printer moving as the plugin retrieves the current mesh, as shown below.
You will see a visualization of your bed when it finishes, as shown below.
4.Click the settings iconon the right to get more details on your 3D printer bed. When you go to theCorrectionssection and hover your mouse over the numbers, you will see how much the points needs to be adjusted in relation to the point that you click.
PrintTimeGenius
3. PrintTimeGenius (Time Estimate Plugin)
As the name suggests, PrintTimeGenius helps estimate the time it takes to 3D print your file. It analyzes the actual Gc-code instead of relying on the predictions of the 3D printer, which is not perfect. The good thing about this plugin is that it learns over time by comparing actual print durations with its predictions, and this improves the accuracy after each print. You can find it already installed on the plugins section. Follow the steps below to use it.
1.Adjust the settingsaccordingly after clicking on it. The default settings works well for most people.ClickSave.

2.Upload a G-codeto OctoPrint, thenclick the load and print iconjust above the upload option.
Cancel Objects
4. Cancel Objects (Cancel Models in Individual Basis)
When 3D printing multiple objects at once, if something goes wrong and you would like to cancel one of the objects, it can be hard to do so without disrupting the others. Cancel Ojects makes it easier to cancel specific objects mid-print without restarting the entire print job. This is helpful as it prevents the failed objects from interfering with the other objects, saving time and material. To use it, follow the steps below.
1.Go to the pluginssection andclick Cancel Objects. If it’s not there already,go to Get Moreand search for it there. you’re able to also get it onGitHub.
- Upload multiple objects, thenselect Cancel Objectsoption on the drop-down menu near Terminal.
3.Load the filesfrom the left section of the interface and you will see them appearing and there is an option to cancel them.
- When youclick cancelon an individual model, a window will launch, asking if you are sure to cancel. Proceed to accept.
Obico
5. Obico (3D Print Failure Detector)
Obico, formerly known as The Spaghetti Detective, uses AI to detect potential print failures in real time. It monitors the progress of the print, identifies issues like filament tangles or spaghetti-like tangles, and alerts you. Obico also integrates with webcams, allowing you to visually monitor prints through your phone or computer. It also supports notifications through SMS, email, or push alerts. Get to know how to use it in the steps below.
3.Click Setup Pluginto start setting up Obico.
- Choose whether tosetup with a mobile app or web browser.
6.Link your 3D printerto Obico by clicking onLink Printer.
7.Select OctoPrintin the window that launches thenclickNext. It will start scanning for your 3D printer. For it to find your 3D printer, it must be powered on and if you are connecting it via a Raspberry Pi, ensure it’s powered on. you may also link it manually byclicking on Switch to Manual Linking.
8.Copythe 6-digit verification code that will be generated.
9.Go backto the previous page in the Obico plugin in OctoPrint andclick continue.
10.Pastethe verification code and Obico will be set up successfully.
- Go back to Obico web application and you can rename your 3D printer, check the 3D printer feed, add a phone number, and even change the 3D printer settings.
You can also go ahead and connect the 3D printer at the serial port.
You can also upload your G-code to the platform and start 3D printing on Obico.
You can also download designs from the 3D models section, slice them on the platform, choose your 3D printer, and then confirm. You can find the 3D print failure option when you scroll down in the 3D printer section.
If you have connected the camera, you will be able to view 3D printing process live in the right section.
