ViperIDE, created by Volodymyr Shymanskyy, is an extremely useful tool for those of us who write MicroPython code and want to do so from a variety of devices. Being browser-based means that ViperIDE will work on many different machines, from your laptop and desktop, all the way down to smartphones and Chromebooks (we tested this out on our own Lenovo Chromebook and all went well.)
Shymanskyy was recently a guest on our Raspberry Pi-themed show, “The Pi Cast,” and gave a live demo on ViperIDE. This free piece of software is easy to use, and for this how-to we are going to walk you through using the great editor by hacking around with aRaspberry Pi Picoand MicroPython.You are not limited to just these two selections. ViperIDE also works with CircuitPython, and ESP boards, Adafruit, Seeed, and micro:bit microcontrollers.
For this project you will need
1.Flash the latest version of MicroPython to your Raspberry Pi Picoby following the first three steps inthis guide.
2.Open a browser and visit theViperIDE website.

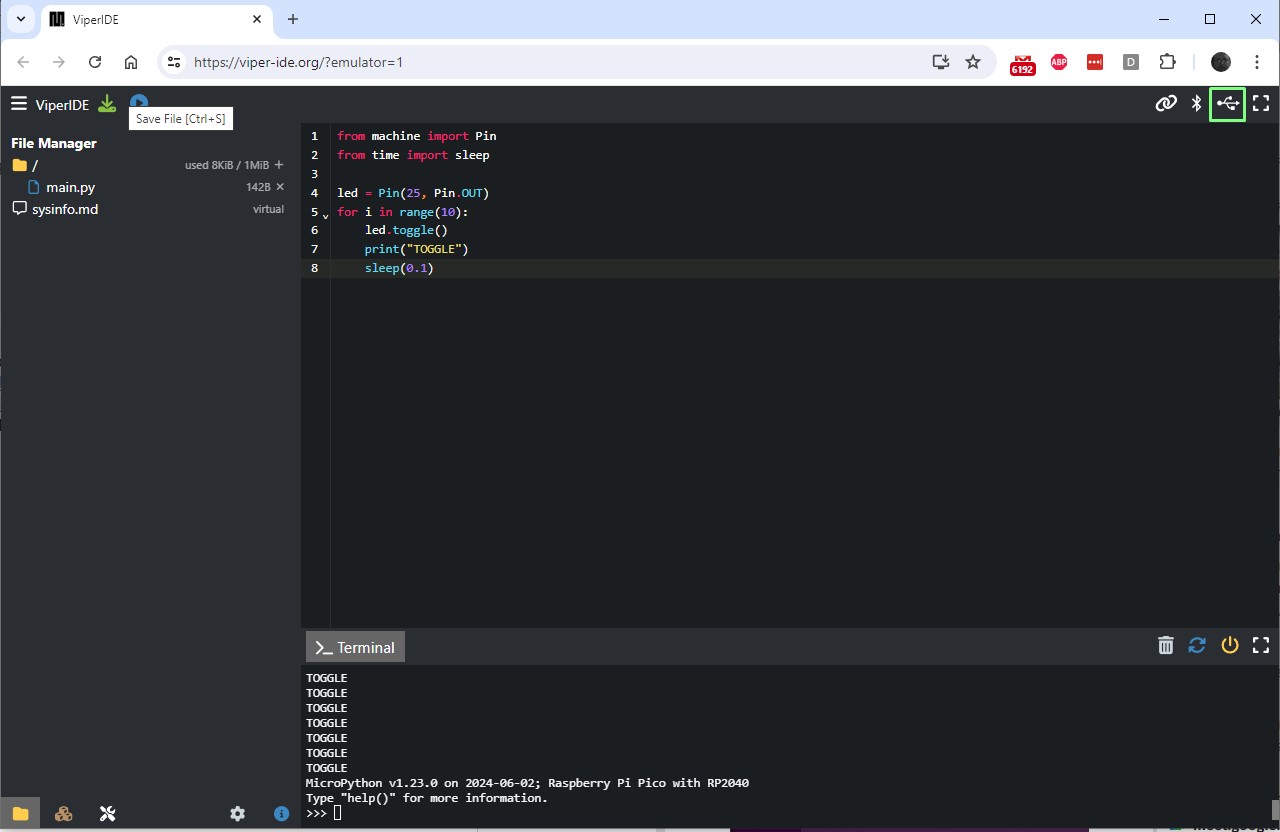
3.Ensure that your Raspberry Pi Pico is connected and click on the USB iconin the top right corner.
4.From the menu, select the correct device, typically Board CDC, and click Connect.After a few seconds, ViperIDE will connect.
The Viper User Interface
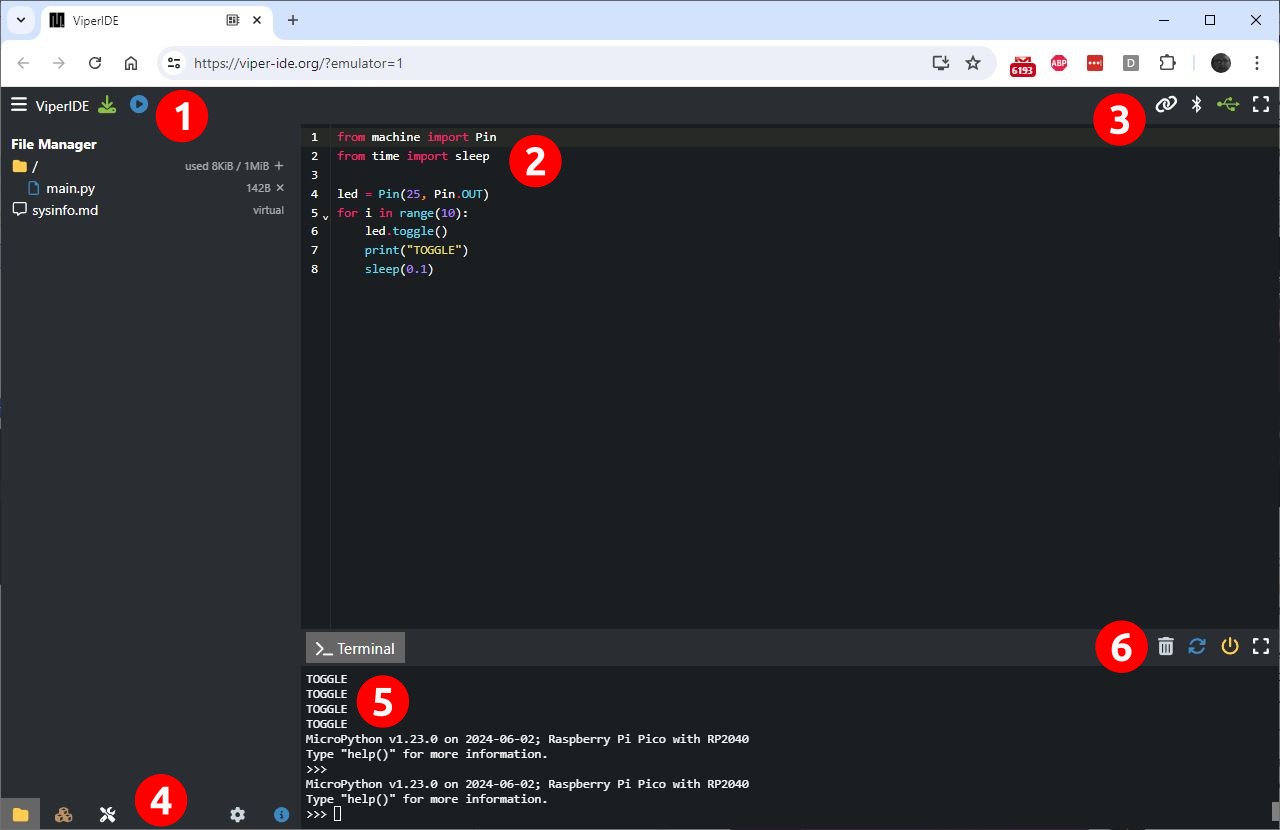
The ViperIDE’s user interface is broken down into six key areas.
Get Tom’s Hardware’s best news and in-depth reviews, straight to your inbox.
Let’s take our first steps with a simple LED blink. The Raspberry Pi Pico and Pico W both have an onboard LED that we can blink on and off as a means to prove that we can communicate and control the board.
1.In the code editor (2), import two modules.The first is “machine,” and from that we import Pin. This module enables us to use the GPIO. The second module is time, and from that we import the sleep function, which is used to add delays to our code.
2.Create an object called “led” and in there create a reference to the GPIO pin used for the LED and set the pin to be an output.The older Raspberry Pi Pico used GPIO25 for the onboard LED. This changed with the Pico W, and the “LED” reference works for both boards. Setting the pin to an output means that current will flow to the LED, causing it to light up.
3.Add a for loop to iterate the code ten times.Code inside of the for loop is run ten times, then the loop will exit and the code stops executing.
4.Turn the LED on / off, print a message to the Terminal, and then pause the codefor 0.1 seconds. The toggle() function switches the GPIO pins state, so off becomes on, and vice versa. The print function is there to show that the code is running in the Terminal, handy if our LED isn’t blinking. The sleep prevents the MicroPython code from executing everything at once.
5.Click on the Save button (1) and then click on Run (1)to execute the code on the Pico. The onboard LED will turn on and off until the loop finishes.
ViperIDE’s package manager is a useful tool for installing extra MicroPython modules (sometimes called libraries) of pre-written code. These modules enable us to use extra components. To demonstrate, we will use a NeoPixel stick. Our stick has eight RGB LEDs, that can each be controlled using the NeoPixel module.
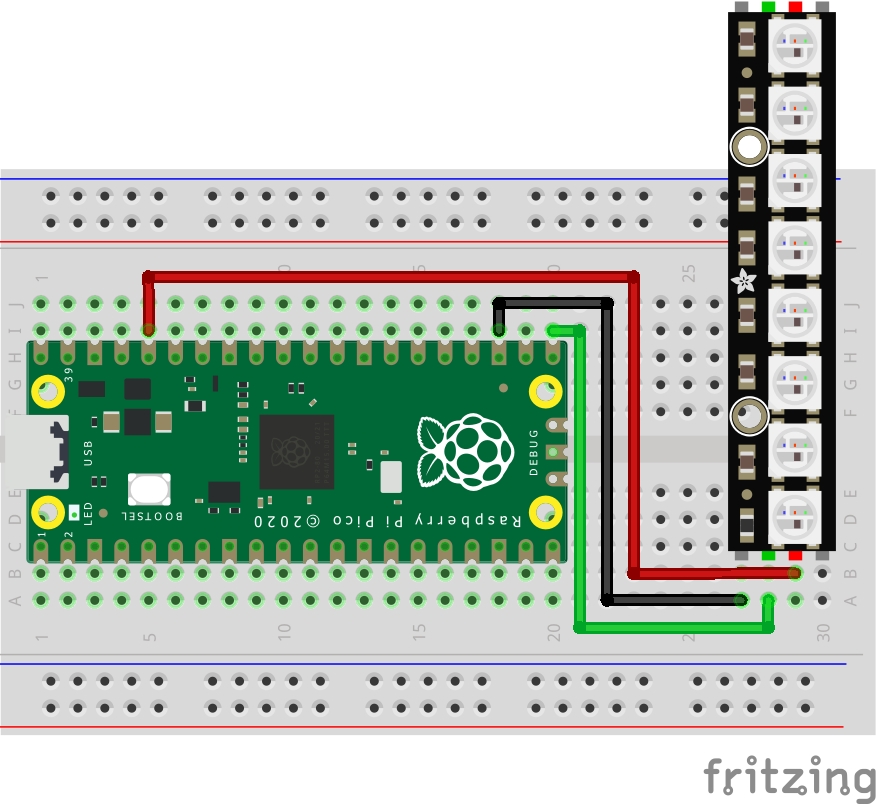
Before you write any code, you’ll need to wire up your NeoPixels as per this diagram. We’ve chosen to use GPIO 16 on the Raspberry Pi Pico as it is accessible and provides a tidy wiring example.
1.Click on the Package Manager and from the list find Neopixel. Click on the download arrow to the right of its entry.The installation process will install a file called neopixel.mpy into the lib folder on your Pico.
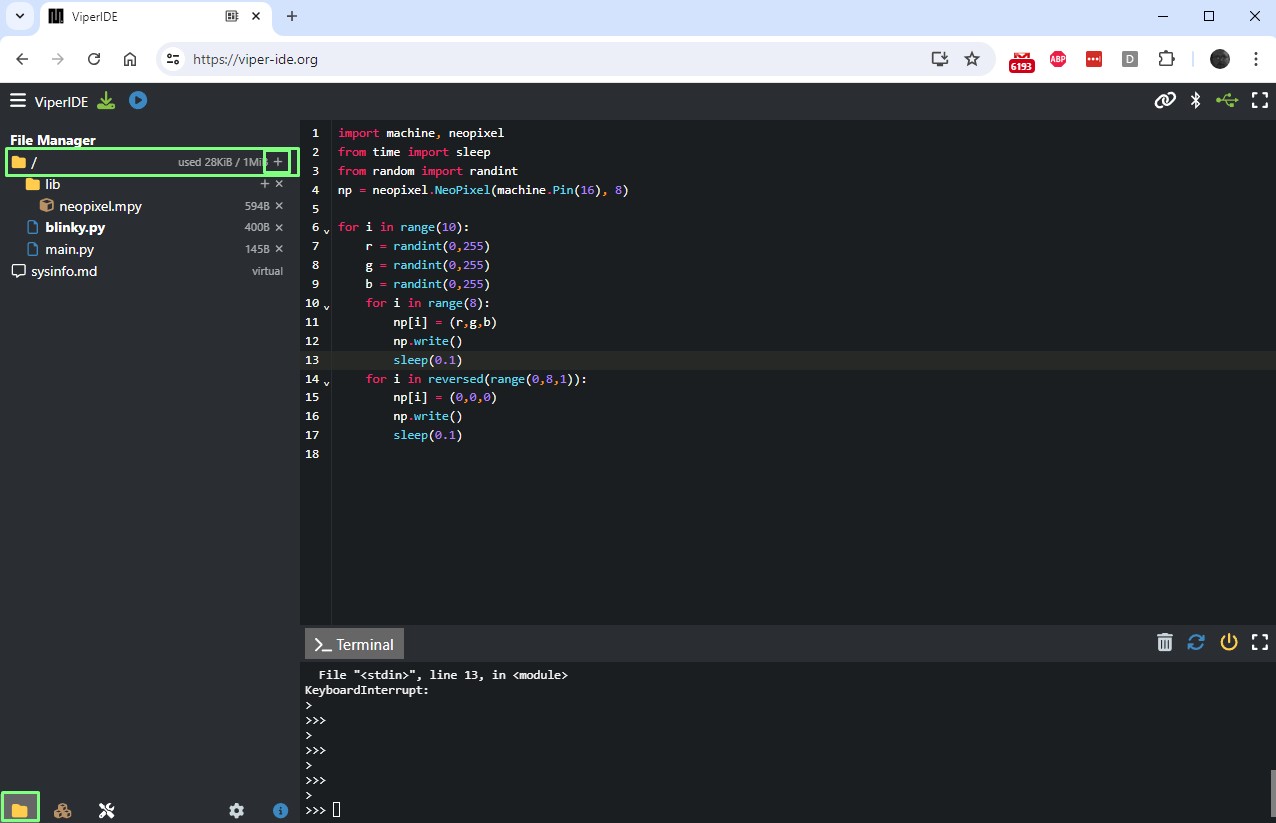
2.Click on the File Manager icon (4) and look for the / in the file manager. Click on the + sign and create a new file called blinky.py

3.Ensuring that blinky.py is selected, import four modules of code. Machine is our connection to the GPIO.NeoPixel is a module to make working with NeoPixels easier. Sleep is again used to add delays to the code. Finally, we import a pseudo-random number generator (randint) from the random module.
4.Create an object, np to link our code to the NeoPixels. Tell the Pico that the NeoPixels are connected to GPIO16 and that we have eight of them.Change the final number of LEDs to match the number you have.
5.In a for loop that iterates ten times, create three objects, r,g,b to represent the colors red, green and blue. Use the randint function to create a random number.Each of these objects will store a random number between 0 and 255. Zero being off, and 255 being full brightness. Each time this for loop iterates, ten times, the r,g,b values will change to produce a random color.
6.Using another for loop, iterate over all of the LEDs in the NeoPixels, in this case eight.We use the i variable to store our position as we move through the LEDs. It starts at zero and ends at seven. So i = 0, i = 1, i = 2…
7.Each time the loop iterates, set the current pixel (i) to the randomly chosen values stored in r,g,b.
8.Write the changes so that we can see the NeoPixels change color, add a 0.1 second pause to keep the transition smooth.
9.Using another for loop, this time reversed to count backward from eight to zero, set all of the pixels to off.By reversing the range, we can count backward from eight to zero, but we need to tell the range how many steps to take each time it counts backward.
10.Click on the Save button (1) and then click on Run (1) to execute the code on the Pico.The NeoPixels should count up and down, each time showing a different color.
Complete Code Listing
Les Pounder is an associate editor at Tom’s Hardware. He is a creative technologist and for seven years has created projects to educate and inspire minds both young and old. He has worked with the Raspberry Pi Foundation to write and deliver their teacher training program “Picademy”.
