Meshmixer is a free 3D printing software that you can use to edit and prepare designs for 3D printing. The software has a simple, user-friendly interface and is compatible with Windows and MacOS. Even if you use one of thebest 3D printers, design flaws can complicate printing and lead to print failure. Hence, inspecting and analyzing the file before you slice it or hit the print button to ensure no errors is always essential. Also, if you have 3D scans that you would like to 3D print, you will need to clean them up, as there can be surfaces or objects that the scanner might have captured that are not part of the object. That’s where Meshmixer comes into play.
Meshmixer provides various tools that you can use to analyze, identify, and fix common geometric design problems, such as non-manifold edges and intersecting faces. It also allows you to fill your 3D models, add supports, and even split or scale them.

The software is easy to use, and it has a user-friendly interface. Below, we cover everything you need to know about using this software to prepare your 3D models or 3D scans for 3D printing. But before that,download Meshmixerinstall and launch it.
Importing and Editing the 3D Model
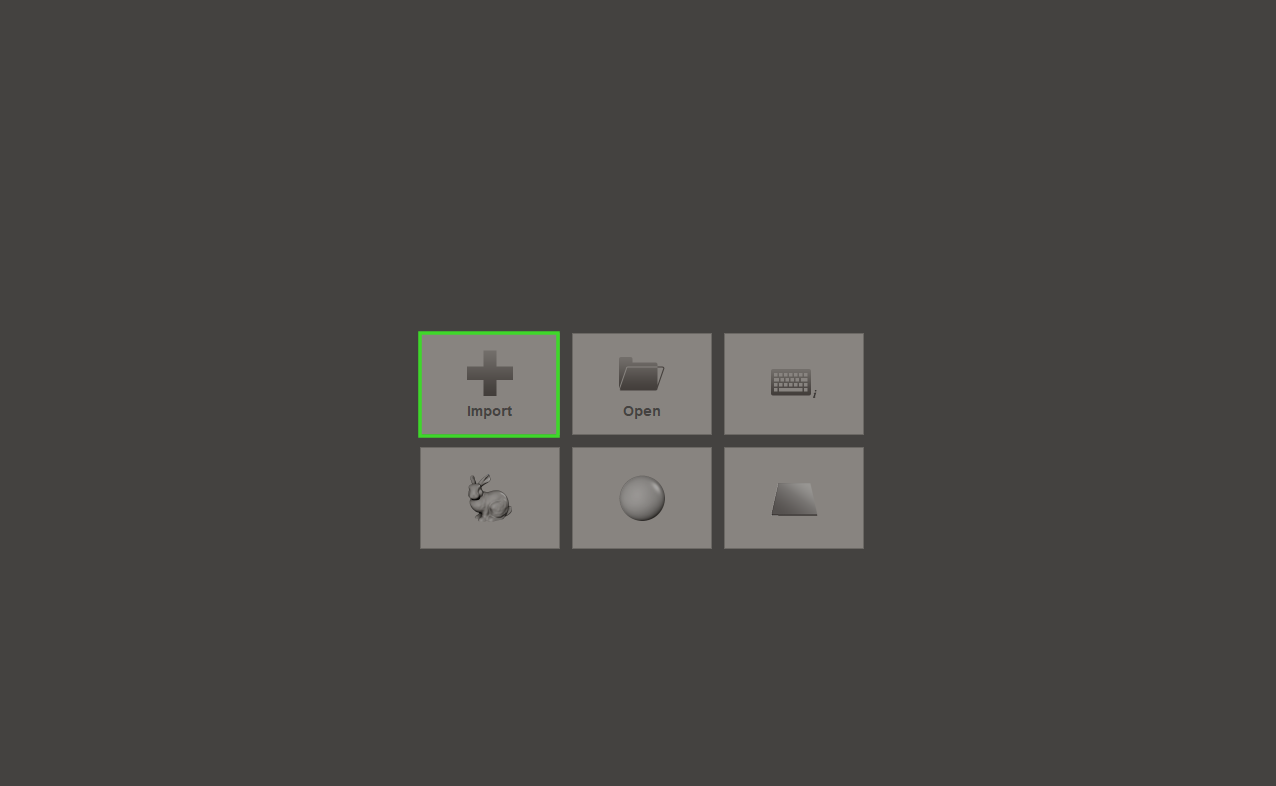
1.Clickthe“Import”button. This will take you to your computer, where you can go to where you have stored your file and import it. Meshmixer supports the majority of common file formats.
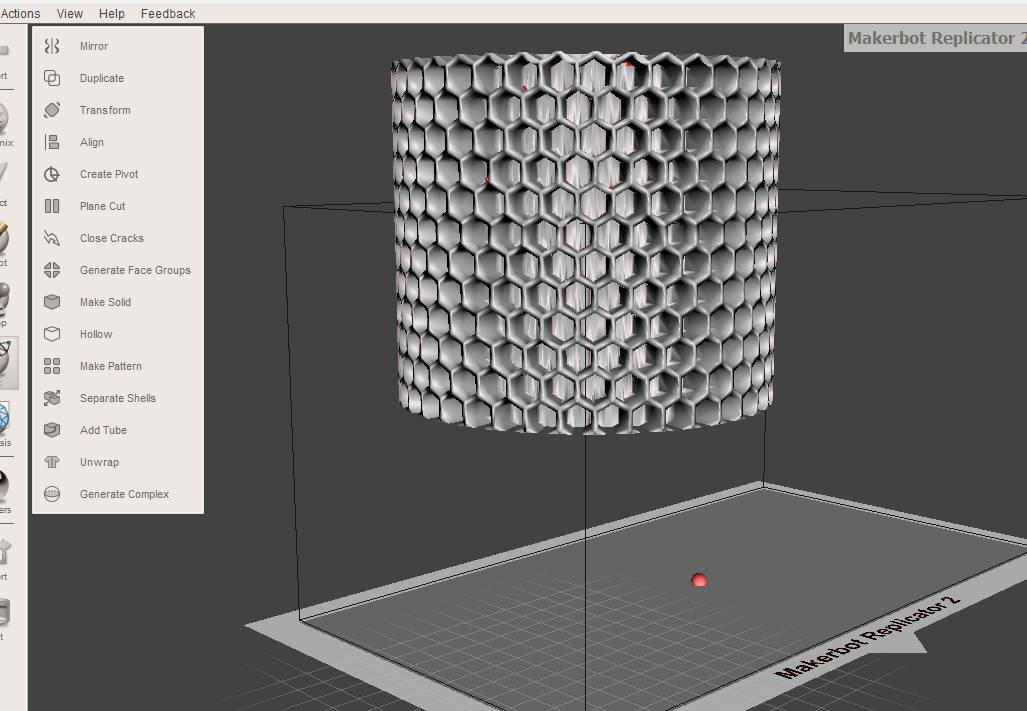
- To start editing your 3D model,go to the Edit tab and click it. A new window will launch where you can find various tools for editing your file, like scaling, rotating, orienting, splitting, aligning, making the model hollow and solid, and many other operations. TheMirrorandDuplicateoptions are the first on the Edit tab’s top section. The mirror function allows you to create a symmetrical copy of your 3D model or a selected part of it along your chosen axis. The duplicate option enables you to create an exact copy or duplicate of your entire model or a selected part. This helps replicate the design or testing modifications without changing the original file.
After the Duplicate option, you find theTransformoption, which contains various options for adjusting the geometry of your 3D model. When you click on it, you will see an option to rotate, scale, or even resize the model. This is crucial for preparing your model for specific print dimensions and ensuring that your design is appropriately oriented to minimize the need for3D printing supports.
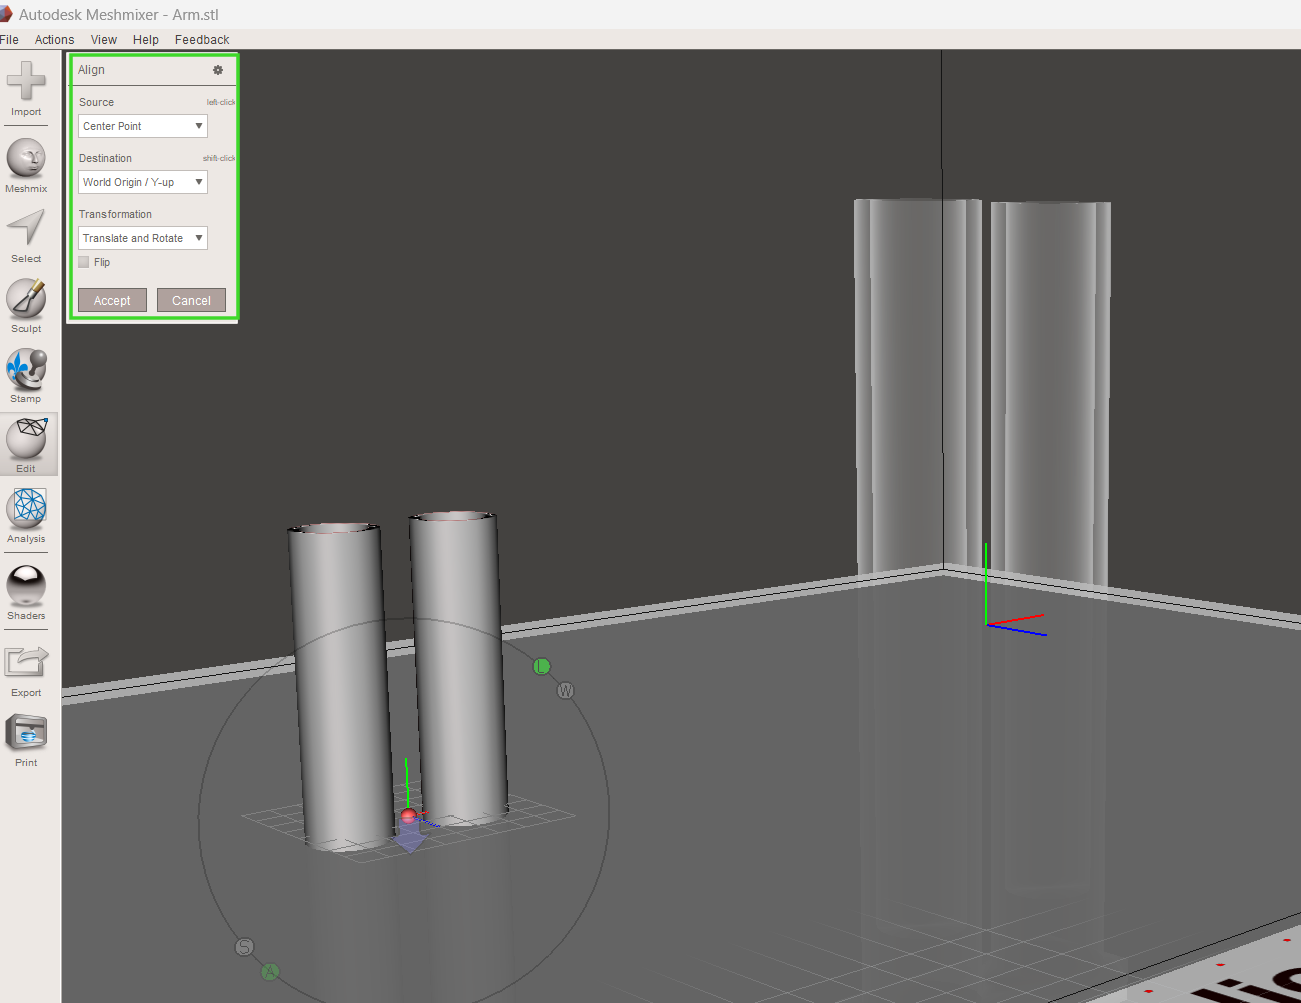
TheAlignoption follows the Transform option. It helps you position and orient multiple parts or objects relative to each other within the workspace. This is helpful when you want to assemble complex models from various components and ensure they fit together correctly.
Get Tom’s Hardware’s best news and in-depth reviews, straight to your inbox.
When you click on this tool, you will see several options: Source of alignment, destination, and transformation.
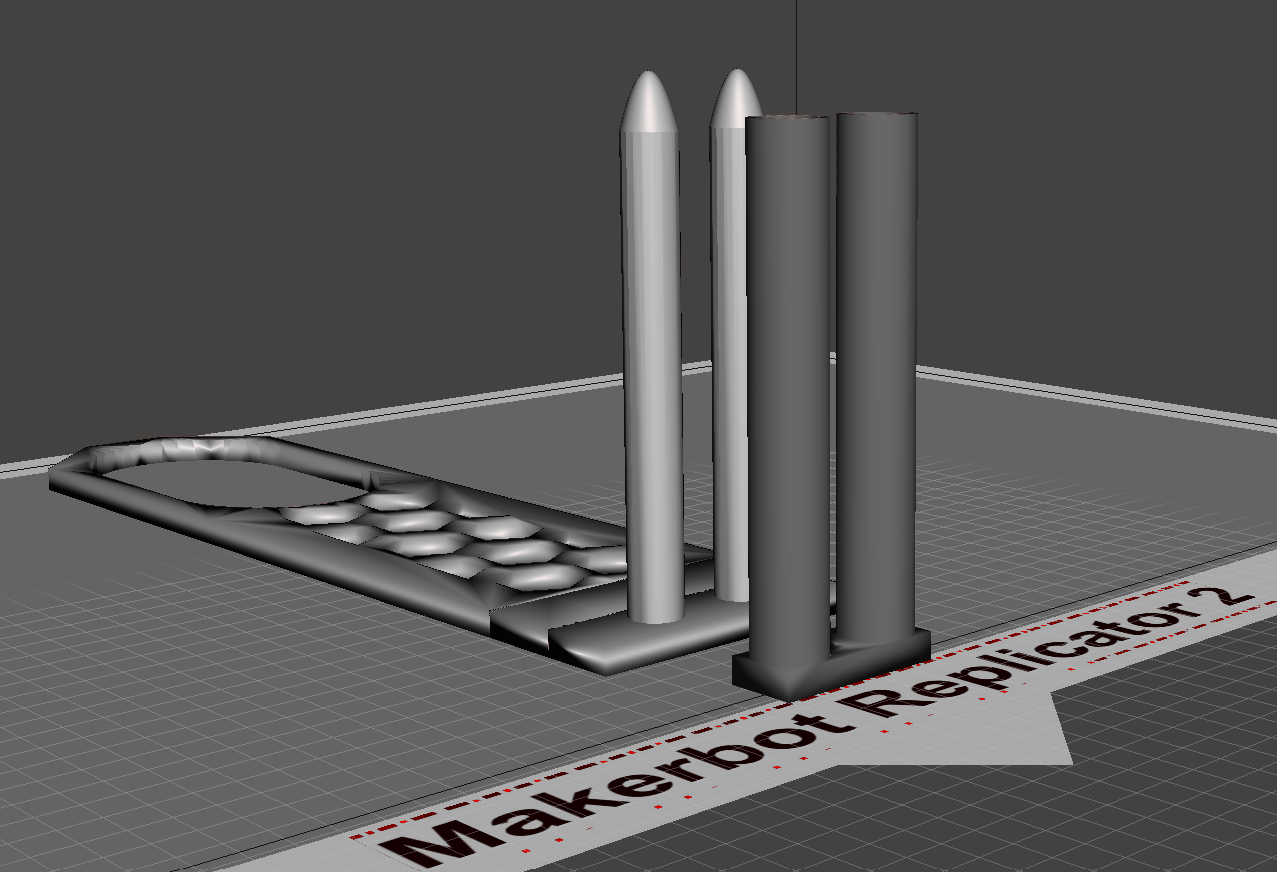
In the source option, you can align using a reference point like base point, center point (the default option), surface point, surface scribble, or pivot. We shall use the files below to demonstrate how each option works.
When you chooseBase Point, the model will be aligned using the base as the reference point. You might not be able to see many changes, especially when aligned like our example above, but it is helpful when you want to ensure that the bottom surfaces of the multiple objects are level and aligned on the same plane. This ensures that the objects rest firmly on the build plate when 3D printing.
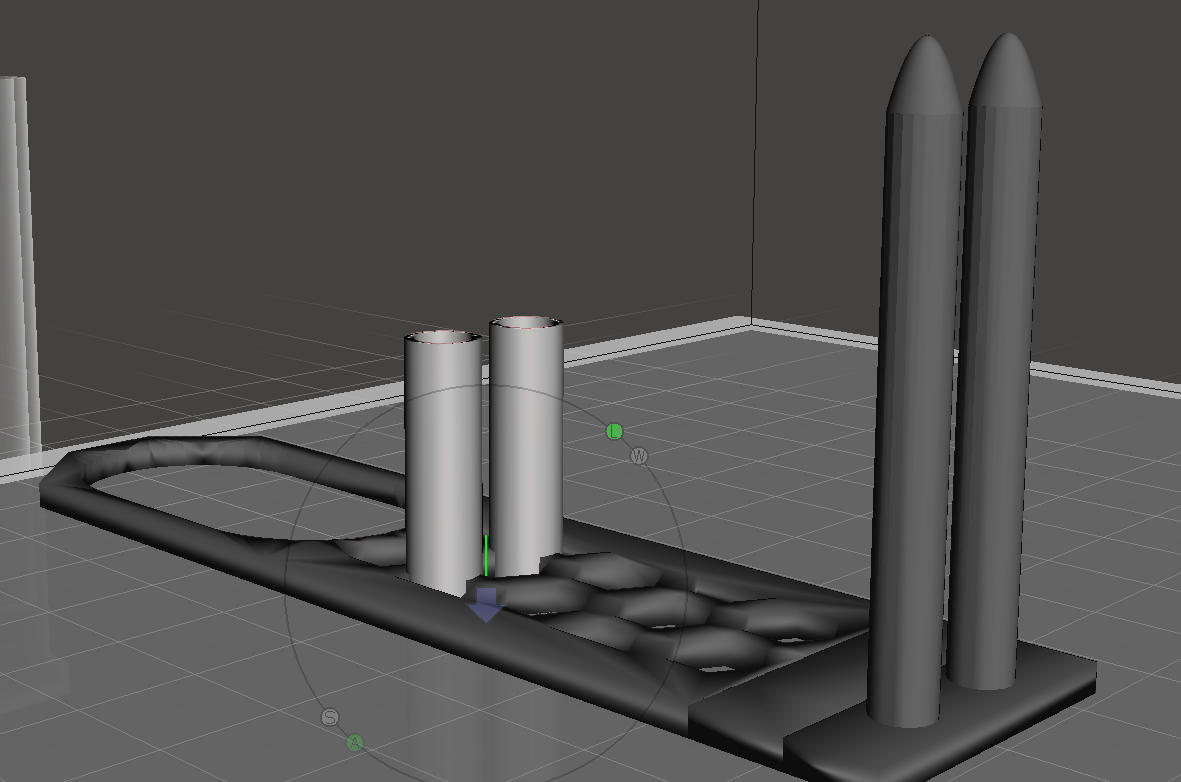
Center Pointis the default option that aligns the objects based on their geometric centers. This is helpful when you need to ensure that the central points of multiple objects are aligned.
InSurface Point,Meshmixer aligns the objects using a specific point on the model’s surface. This is helpful when you want to align complex shapes or even position one part precisely relative to a particular feature in the design. You can select any point on the surface to serve as the alignment reference.
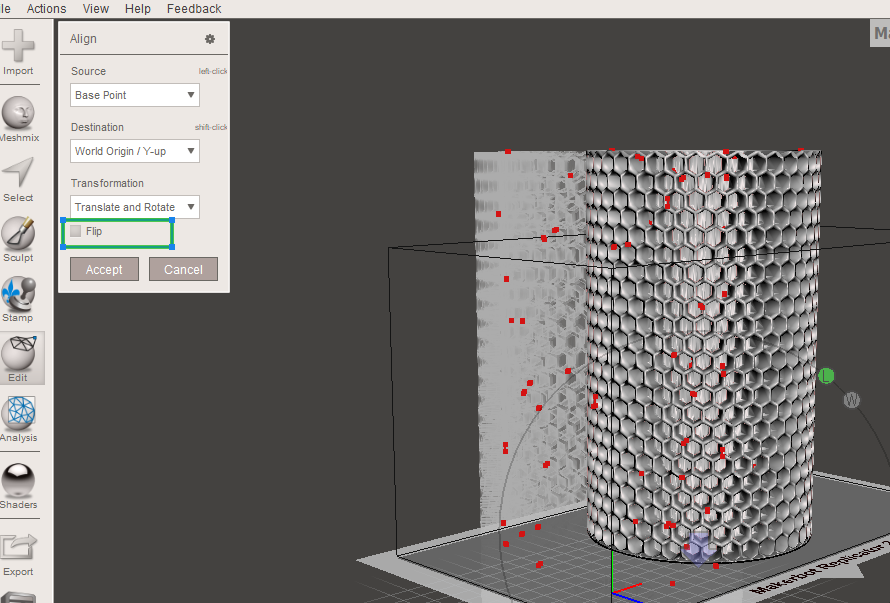
Surface Scribbleenables you to align the objects using a drawn scribble on the design’s surface. You start by drawing a scribble on the surface of your design that you need to align, and then the software will match these scribbles to align the parts. This is useful if your model has a flat surface and you want it to lay flat. To align it, we shall select the Surface Scripple option, then draw a circle on the flat surface and release it. If the design is flipped, you click on the check box writtenFlip.
The final option is thePivot,which uses the model’s pivot point as a reference for alignment. Each reference point provides different levels of control and precision, allowing you to align models in ways that best suit your specific design and printing needs. Other edit options in Meshmixer are discussed below.
Using Plane Cut to Split 3D Models in Meshmixer
You might need to split your 3D model for various reasons. One is to have the model fit in your built plate, as many 3D printers have size limitations. Also, if your file has overhangs and you don’t want to use supports, you can choose to split it. Follow the steps below to learn how to use the plane cut tool to achieve that.
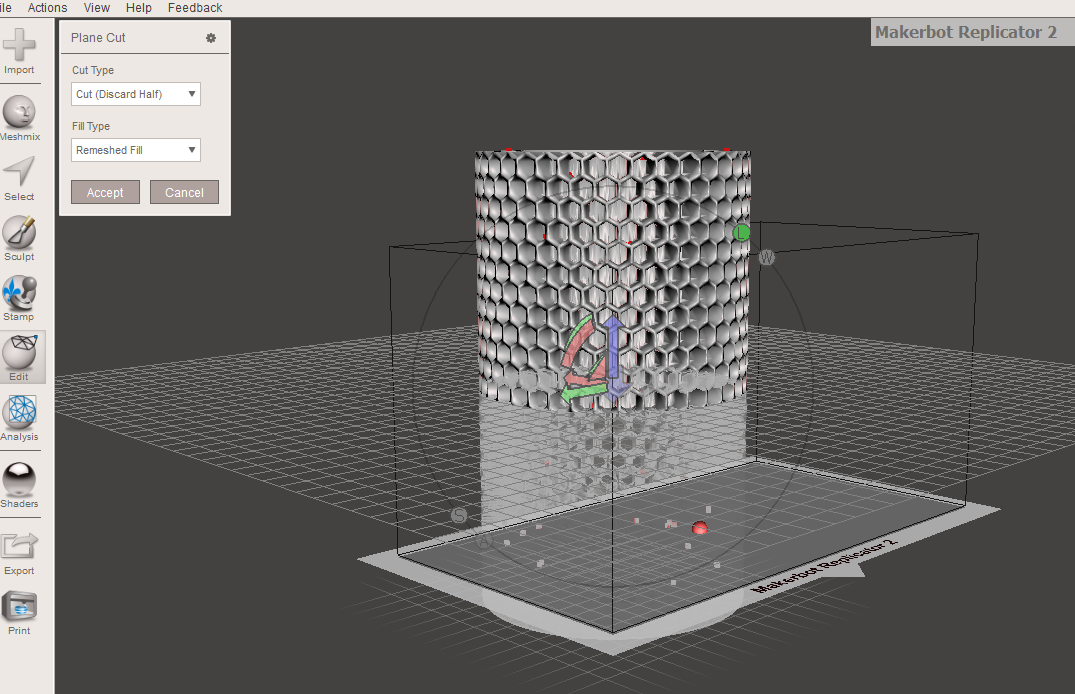
1.Go to Edit,thenChoose Plane Cut.You will see a plane appearing that you can move using the points until the section you would like to cut or split from.
In theCut Typesection, you cankeep both files or only one.For this demonstration, I have chosen to discard one and then confirm the cut.
You can alsoadjust the plane’s positionbyclicking and dragging the arrows and ringsthat appear on the model. For example, after rotating and accepting the cut for the above, I got the design below.
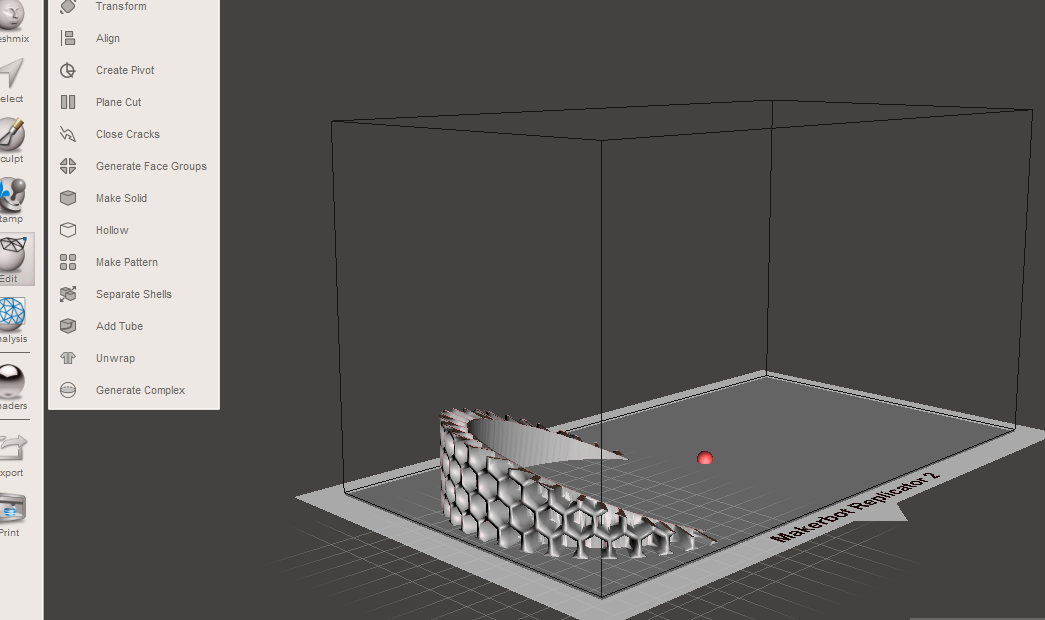
- If you had chosen to retain the other half when performing the cut,go toEdit,then chooseSeparate Shells. After clicking on it, select one part of your design, thengo toExportand save it on your computer. You can also do the same to the other half.
Hollowing and Making the 3D Model Solid
Hollowing a 3D model reduces the material needed for 3D printing, which can also help with cost savings, especially for large models. Also, hollow designs are typically lighter, and handling them is easier. To follow the 3D model;
1.Go toEdit > Hollowandwait a few secondsas the Meshmixer processes. It will automatically add a thickness to your model based on the default parameters.
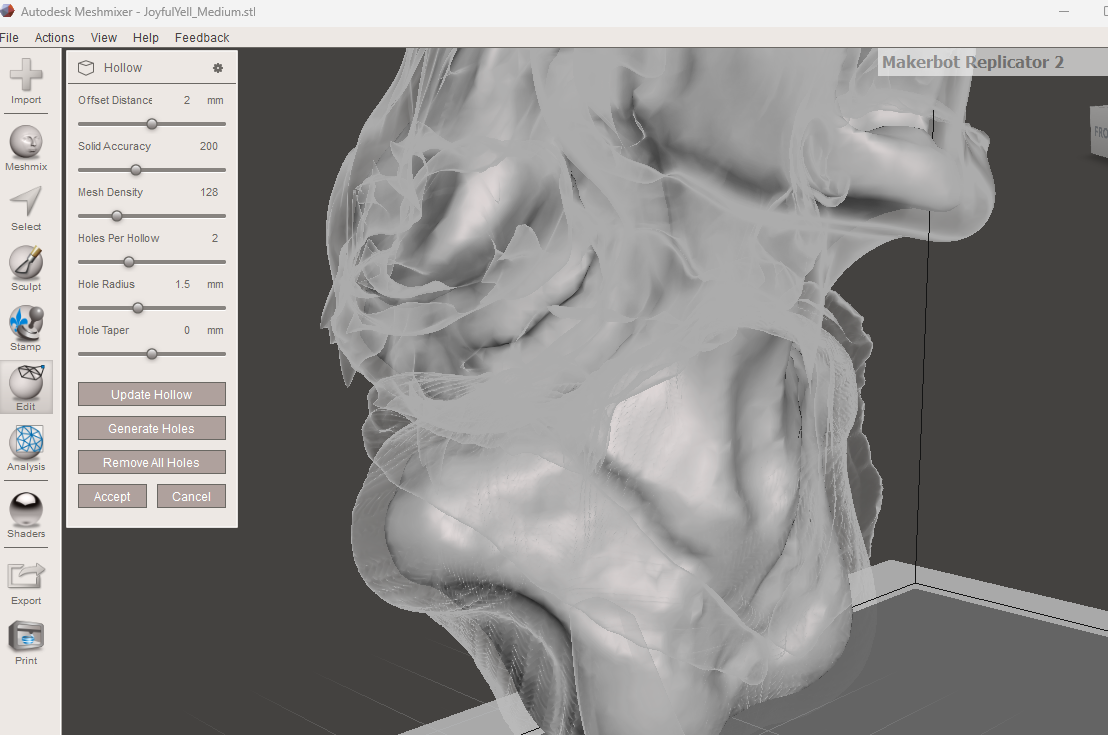
2.Adjust the wall thicknessusing theOffset Distanceoption in the new window that launches. This determines the volume of the hollowed part, and the default value is 2mm. As you adjust the wall thickness, you must remember that walls that are too thin will make your model fragile, especially large ones, as there will be no internal structure in the hollow print. It’s recommended to use a value between 1 and 2mm
3. Preview the hollow settings by clicking on theUpdate Hollowoption.
4.Solid AccuracyandMesh Densityoptions specify the inner surfaces' details and accuracy. you’re able to retain the default values.
You canadd holesbyclicking on the Generate Holesoption and then specifying their size by adjusting theHoles radiusvalues. These escape holes are helpful when you are 3D printing with resin, as the resin will escape from those places.
You canmanually position the holesbyclicking and dragging the red sphereson the model.
Making the Model Solid
Making a 3D model solid is essential in ensuring that the integrity and accuracy of the model are maintained, as it captures the complete geometry of the object. It also eliminates internal weaknesses and voids that compromise the strength of the design. To make the model solid in Meshmixer,
1.Go to Edit,thenMake Solid.
In the window that launches,choose a solidify type.There are four options:Blocky, Fast, Accurate,andSharp Edge Preserve.
The Blocky option creates a solid model that is blocky in appearance and has a low resolution. It is fast and the results are less accurate, and it is suitable for designs in which many details are not needed.
Fastoption is useful when you need a model quickly, and even though it creates a solid, it may not be as watertight as the accurate option.Accurateoption is the most recommended option as it generates a high-quality and watertight design. It takes a lot of time to process, but it produces the model with a better resolution and quality, as shown below.
Sharp Edge Preservemaintains the sharp edges and details in the model while making it solid. This is useful when working on architectural or mechanical parts models.
- You can adjust other settings, such asSolid AccuracyandMesh Density, then clickUpdate. When you are satisfied with the settings, clickFinalize.
Inspecting the Model and Fixing Meshes
Meshmixer comes withInspectortool that helps identify and repair issues in 3D models. It analyzes the design and detects any potential problems that can prevent it from successful 3D printing. These issues include gaps and holes, issues with the geometry, or even thin walls. It highlights these issues with colored pins or spheres.
Follow the steps below to analyze and fix 3D models in Meshmixer.
1.Go to the Analysistab, which is found on the left toolbar, and thenselect Inspector. You will see a new window launching on the top-left section of the interface.
After checking the design, you will see if there are any issues. In my case, the area with an issue is highlighted using Magento color, as shown below.
You can choose theHole Fill Modefrom the top left window. Three options are available:Minimal Fill, Flat Fill,andSmooth Fill. As the name suggests, Minimal Fill fills the holes with the minimum amount of geometry. It is the fastest method, though it might not blend well with the surrounding geometry. Flat Fill creates a flat fill that matches the surrounding, and Smooth Fill creates a blended fill that matches the surrounding mesh. It is the most recommended.
Tofix the error, you can eitherclick the colored sphere marker, or you canclickAuto Repair All.
Working With Supports in Meshmixer
1.Properly position your 3D modelin the workspace by going toViewand thenclicking Show Printer Bed.
- Check if your design needs supports by going toAnalysis,thenOverhangs.
The tool will highlight the areas of the model that have overhangs and require supports using red and blue colors.
3. ClickGenerate Supportto automaticallyadd support structuresto your 3D model.
You cancustomize the supportsbased on your requirements. For example, to add custom support, you left-click and drag from an overhang area or existing support to the build plate and hold the shift key on your keyboard before releasing.
You candelete the supportsbyholding the CTRL or CMD keyon your keyboard and clicking on them.
3D Sculpting in Meshmixer
Meshmixer comes with powerful sculpting tools that you can use to refine the details of the model. To sculpt your files, follow the steps below.
1.Click Sculptoption to open the sculpting workspace.
2.Select a brushfrom the sculpting toolbar. There are several available, and each one serves a specific purpose. There are those for smoothing, pinching, drawing, moving, and many others.
3.Adjust the brush sizeby moving theSizeslider in thePropertiessection. A smaller brush is better for detailed work, and a larger one is good when working on a more extensive area. TheStrengthoption controls the intensity of the effect of the brush. you’re able to control the amount of material added or removed when you use the brush by adjusting theDepthoption.Lazinesssetting, on the other hand, helps smooth out the brush strokes.
4.Start sculptingwhen you are comfortable with the settings. As you sculpt, zoom in and rotate your design to focus on specific areas. You can also switch between different brushes until you achieve your intended design.
In addition to the above tools, Meshmixer has other tools likeStampthat allow you to add patterns or shapes on the surface of your 3D model. There is also3D printoption in which several 3D printing services are available to send your file and have it printed.
