Updating the BIOSnot only fixes bugs and errors in the system but also makes the motherboard compatible with newer hardware devices. So everyone should update their BIOS right?
Well, updating the BIOS on any motherboard or laptop is risky if you do not know the exact steps, especially if you are doing it for the first time.
Any errors/interruptions during a BIOS update couldrender the entire motherboard useless. The same goes for Dell laptops and motherboards. You need to follow each step carefully.
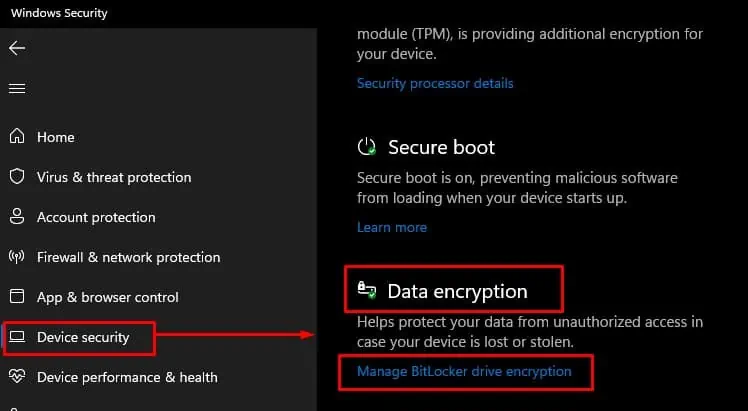
Suspend BitLocker Drive Encryption
If you are running Windows 10 or 11 with Windows edition Pro, Enterprise, or Education, you need tosuspend BitLocker. Bitlocker encrypts files on a hard disk and decrypts them when the system starts.
BitLocker uses TPM (Trusted Platform Module) that is integrated into the motherboard to store its encryption keys.When you update BIOS, your system will not accept the BitLocker key. If this happens, you will not be able to Boot into your Windows after a BIOS update.
To avoid such a situation, we recommend you suspend BitLocker Drive Encryption before you start the BIOS update process.
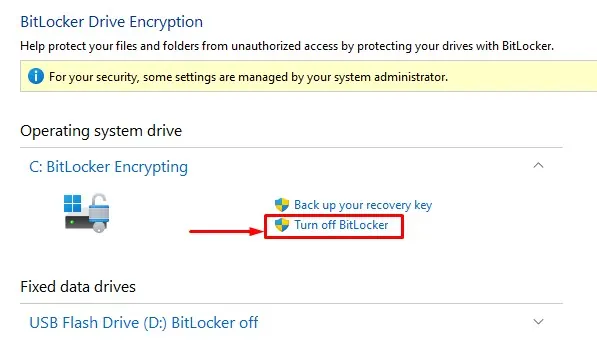
Once you turn off BitLocker on all your drivers, you can now start updating the BIOS.
Updating BIOS on Dell
To update your BIOS, you first need to download the BIOS update executable file from Dell’s official support page. Once you have the required executable file, simply run the file to start the BIOS update process.
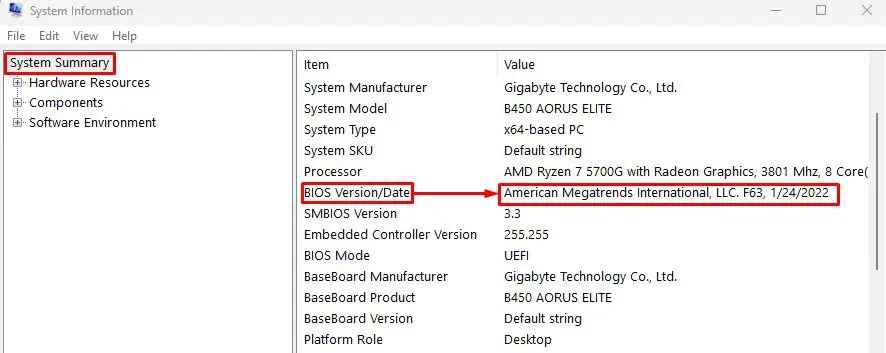
Before updating your BIOS make sure you know the current version of your motherboard’s BIOS.
Check the Current BIOS version on a Dell
System Information contains information about all hardware components connected to your system. And this includes thedata about the motherboard’s manufacturer, BIOS version, etc.
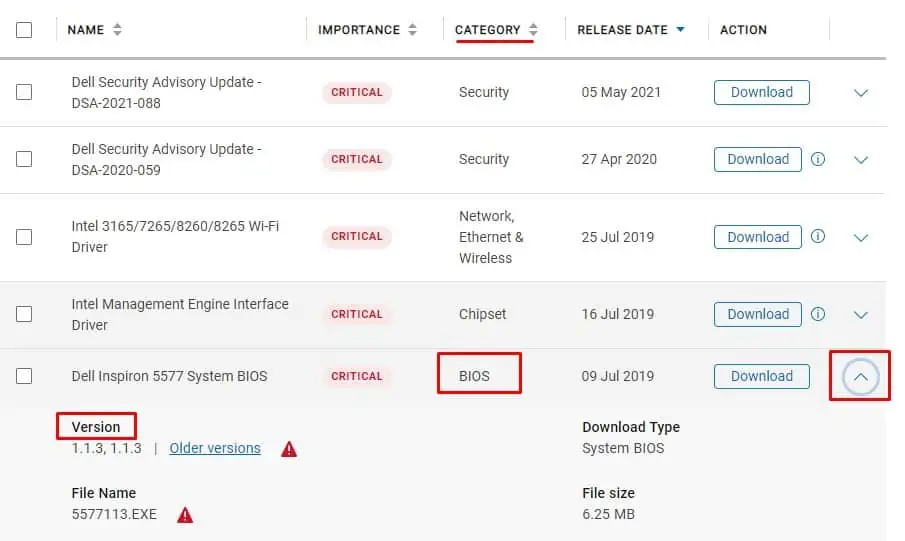
Download the Latest Available BIOS version
Once you have the current BIOS version, you need to search for the latest BIOS version released for your Dell laptop/motherboard.
Compare your system’s BIOS version and the latest BIOS version on Dell’s support page. If the latestBIOS versionon Dell’s support page matches the BIOS version from System Information, it means that you already have the latest BIOS installed.

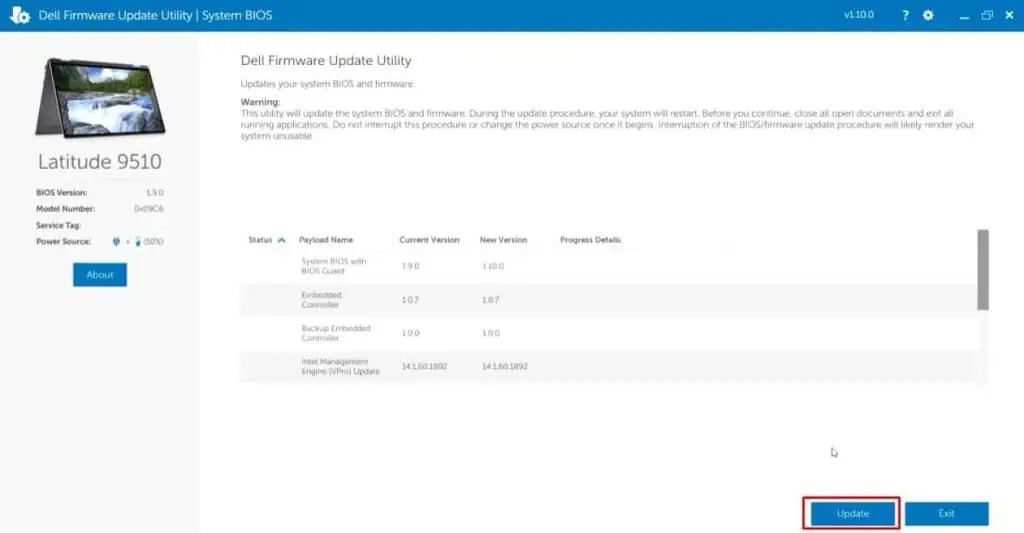
Install BIOS Update
Once the download process completes, it is now time to install the BIOS update
Again, if you are gradually updating the BIOS through different versions make sure you suspend BitLocker each time you complete the BIOS update.
Updating BIOS on Dell Using USB drive
You cannot perform a BIOS update using the above method if you cannot access the Operating System. In such a case, you need to update the BIOS using a bootable BIOS update USB flash drive.
Install DDDP
To create a bootable USB that contains a BIOS update file, you needDell’s official Dell Diagnostic Distribution Package (DDDP)Application.
Install the Diagnostic Package to a USB drive
Once you have deleted said files,plug in a blank USB drive in your computerand follow the steps below.
Download and Copy the BIOS Update File
Once you install the Diagnostic package to a USB drive, the USB drive size should sink to around 2GB.
Now that you have a bootable USB that contains the BIOS update file, you can install the update by booting the system using said USB drive. To boot the system using a USB drive, you need toselect the boot device on your computer.