After building a new system or even just changing some major component, it’s important to set up the BIOS properly. For instance, far too many people install high-end RAM modules but end up running them at low speeds because they forget to turn on XMP in the BIOS.
The GigabyteBIOS/UEFIinterface lets youmodify various hardware configurationsfrom overclocking your CPU and RAM to managing the boot order and updating the BIOS version.

The best part is that the most useful settings also tend to be very accessible for beginners. If you’re able to easily squeeze out more performance from your Gigabyte system, or customize it according to your preferences, might as well give it a go.
Accessing the Gigabyte BIOS
When powering on your PC, repeatedly pressF2orDeltoenter the Gigabyte BIOS.
You can also directly access other BIOS features from the POST screen:
If the BIOS key doesn’t work, you can also use the restart button to reboot your PC 3 times in a row. This should boot your system into the recovery environment. There, you can selectTroubleshoot>Advanced Options>UEFI Firmware Settings.
Gigabyte BIOS Interfaces
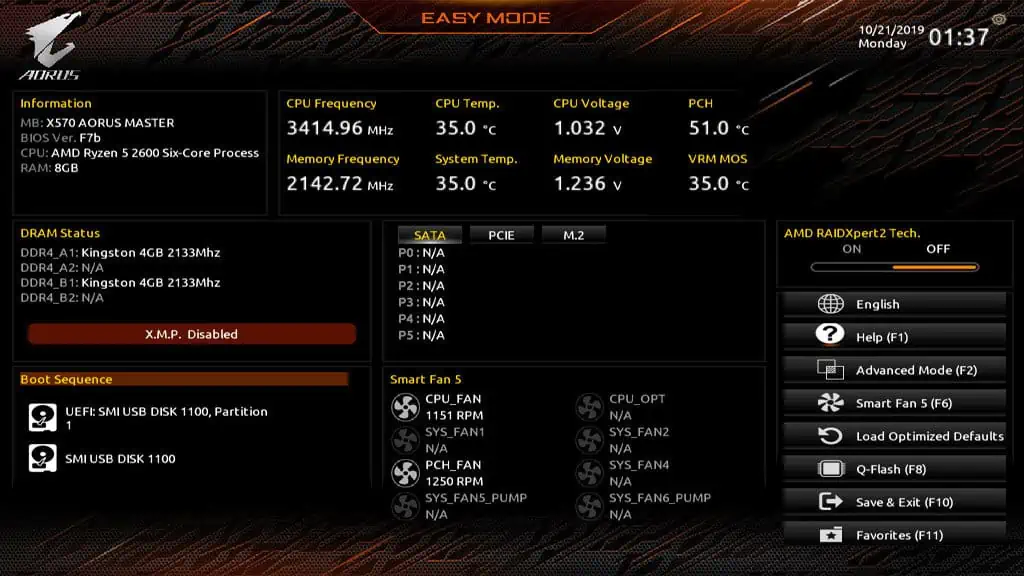
Older Gigabyte boards use the classicBlack-and-Redinterface while the latest boards come with the revampedOrange/YellowBIOS UI.
As the classic UI is more commonly used at the moment, I’ll use it for demonstration in this article. For the most part, only the location of the settings differs between the two. So, even if your system uses the updated UI, you can still follow this guide to set up the BIOS.
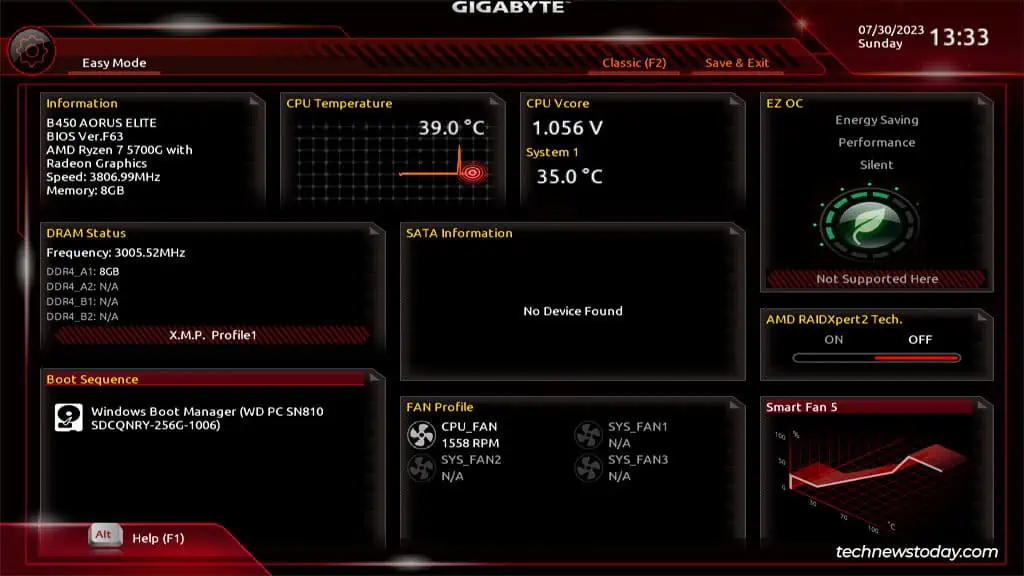
Moving on, both of the UI versions have two modes –EasyandAdvanced. You can pressF2to switch between these.
Easy Modemakes the most used BIOS settings and stats accessible from a single page. And when you need to configure anything not available there, you can switch toAdvanced Mode.
Finding the System Info
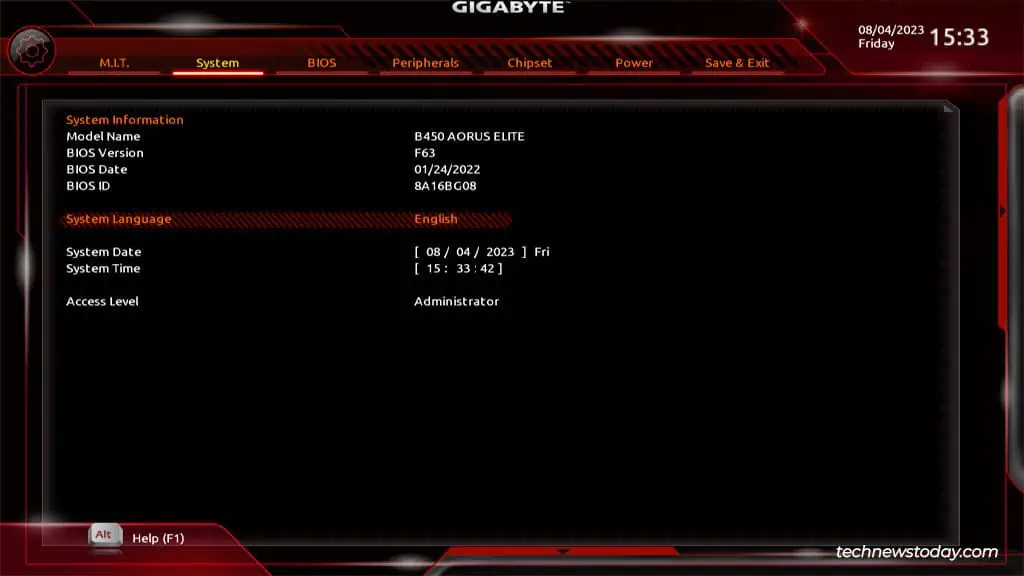
TheSystemtab displays important system details like themotherboard modelandBIOS version.
You can also check and configure settings like theSystem LanguageandTimefrom here.
This usually isn’t important as most systems sync the time to an online server. But when an internet connection isn’t available, your system will use theBIOS date and time.

Overclocking Your System
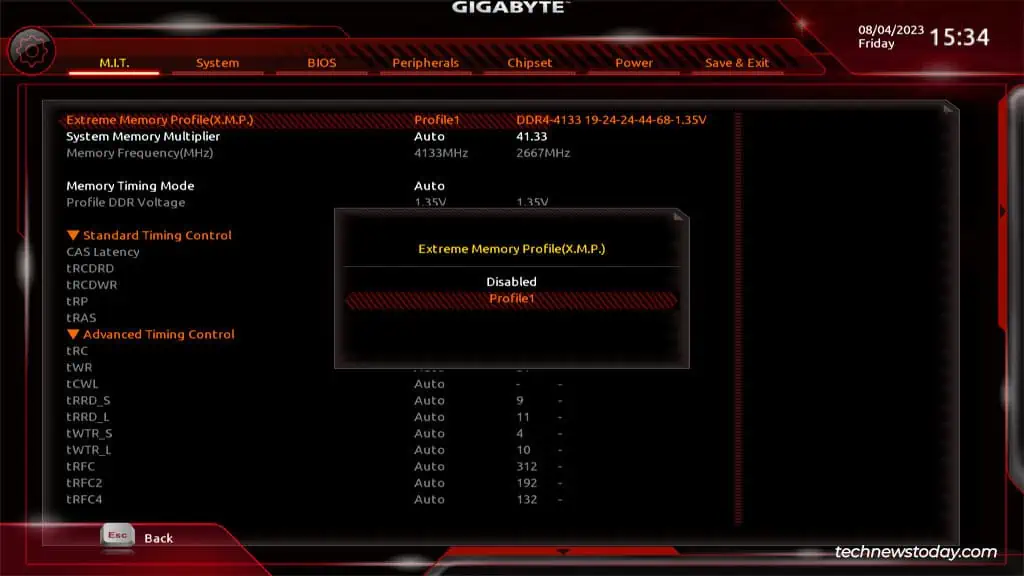
While overclocking is an enthusiast’s domain, even beginners can use the preset profiles in the Gigabyte BIOS. These will safely improve system performance at the click of a button. To check these out, go to theM.I.T.tab.
RAM Profiles (XMP)
The most useful one isExtreme Memory Profile (XMP)in theAdvanced Memory Settingssection. By default, most RAM modules run at lower frequencies than advertised. XMP lets you use safe and tested overclock values to run the modules at higher speeds.
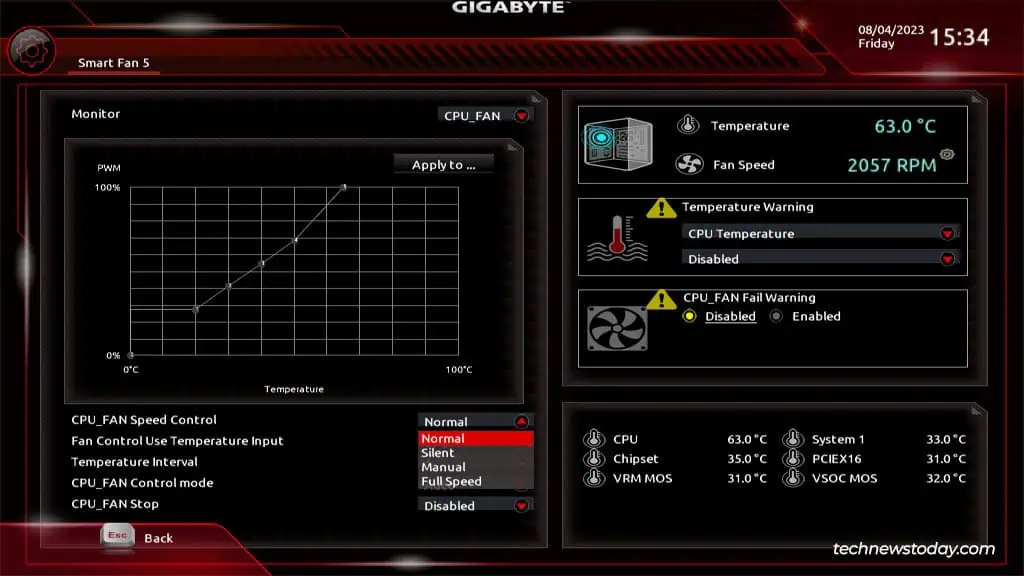
Fan Speed Control
You can useSmart Fan 5to select different fan profiles and run your system fans at different speeds. If you don’t push your system too hard, you can select the Silent profile to run the fans quietly.
On the other hand, I regularly use my system for intensive tasks. So, I prefer to run the fans at full speed as thatprevents my system from overheatingand improves the component lifespan.
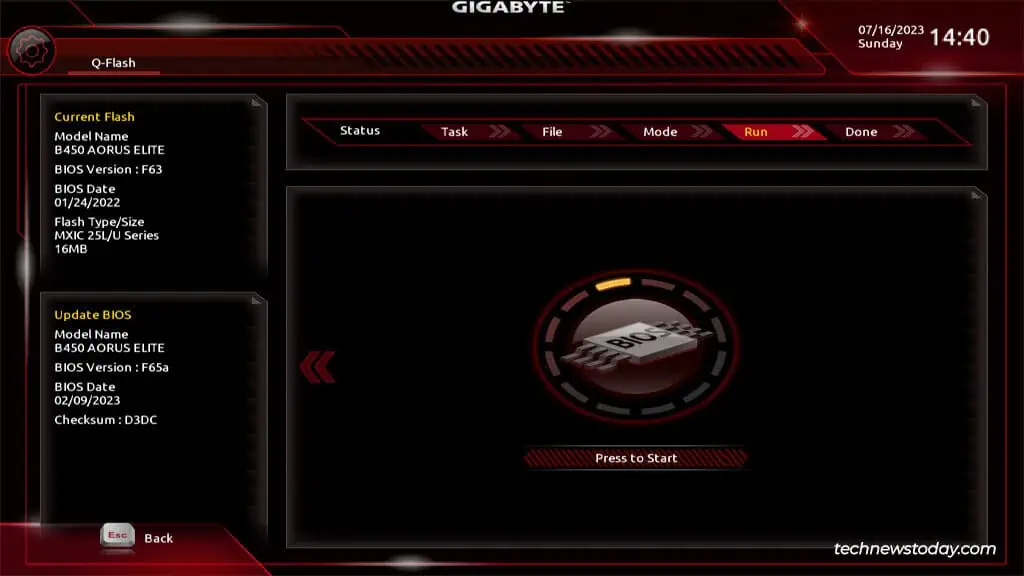
BIOS Update (Q-Flash)
Q-Flash, Gigabyte’s proprietary BIOS flash utility, is also located in this tab. You can follow my guide toupdate the BIOS versionusing Q-Flash if you ever need it.
If yourboard supports DualBIOS, you can even update the backup BIOS using Q-Flash.
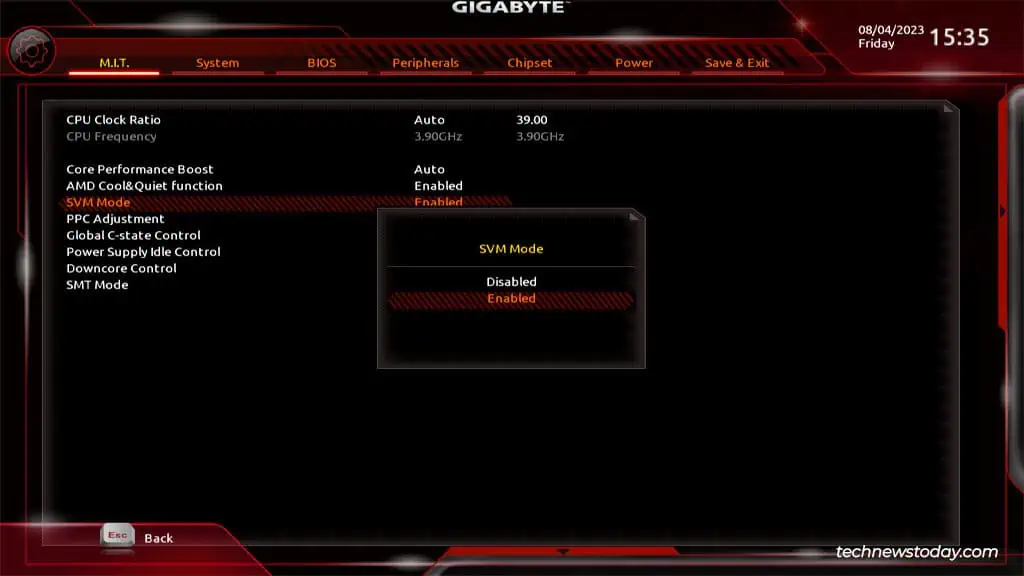
Virtualization
Lastly, you can alsoenable hardware virtualization(SVM or VT-x) fromAdvanced Frequency Settings>Advanced CPU Settings.
This is necessary for running a 64-bit guest OS. Without it, you’ll encounter errors likeAMD-V Is Disabled In The BIOS. Even the 32-bit guests that do work won’t perform very well without hardware virtualization.
Configuring Boot Options
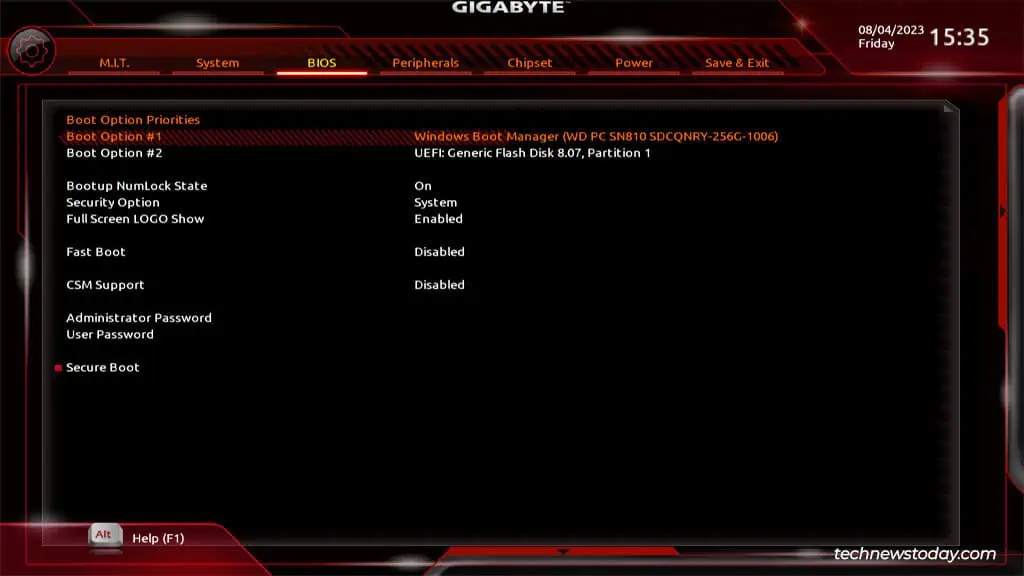
TheBIOStab contains boot-related settings such as the boot priority order, fast boot, CSM, etc.
Boot Order
TheBoot Option Priorityis particularly important for beginners. If you’re running a dual-boot setup, or you need toboot from a USB, you may select the desired boot entry as the first priority from here.
CSM
CSM Supportcan be situationally important. You’ll need to enable this compatibility feature to boot from a legacy MBR-partitioned drive. On the other hand, if you want modern UEFI features like Secure Boot, you must disable this.
Fast Boot
Next, there’sFast Boot. It speeds up your boot time by skipping or delaying certainPOST checks. This is an especially useful feature on lower-end systems as it can improve the boot time a lot.
But it can also cause certain headaches likepreventing you from entering the BIOSor booting from a USB while it’s enabled. So, you’ll have to give it a try and decide whether it’s worth enabling.
Improving System Security
Gigabyte boards provide security features like Secure Boot, TPM, BIOS passwords, etc.
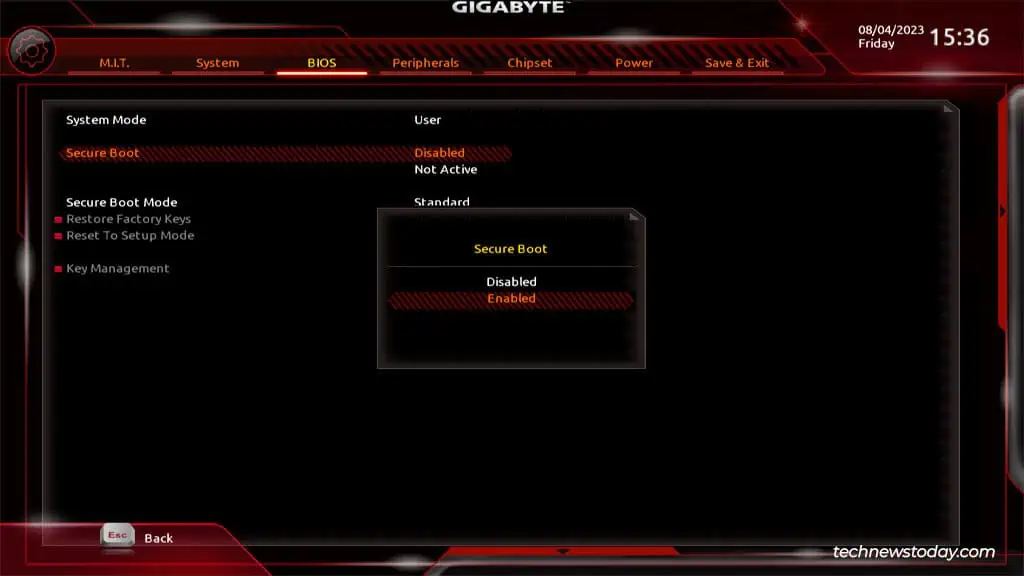
Secure Boot
you may configureSecure Bootfrom the sameBIOStab. If enabled, the system will only boot from devices with valid digital signatures. Any unsigned drives or OS drivers won’t be chosen as boot devices, thus improving security.
BIOS Password
Similarly, theAdmin and User Passwordsare also optional but useful features for managing access levels. If multiple people use a system, the admin can set the admin password. Then, users can individually set the user passwords.
After doing so, you’ll need to enter the admin or user password at system startup or when entering the BIOS. When you access the BIOS with the user password, you can only configure some settings like the boot options, fast boot, CSM, etc. The rest will be greyed out and only accessible in Admin mode.
TPM
Finally, you’ll find theTPM option (fTPM or PTT)in thePeripheralstab. Besides TPM 2.0 being an official requirement for Windows 11, you may want to enable TPM for security benefits like measured boot and brute-force protection.
Managing Display Preferences
Continuing in the Peripherals tab, you’ll find theInitial Display Outputoption. This lets you select which GPU (integrated or external card on a specific PCIe slot) to use as the first display.
If you switch to theChipsettab, you’ll be able toconfigure Integrated Graphics.
If you don’t have a dedicated GPU, or you need more display ports for yourmulti-monitor setup, you’ll want toenablethis feature. When enabled, you’ll also have access to additional settings like UMA Frame Buffer Size (iGPU memory) and display resolution.
Alternatively, if you do have a dedicated GPU and don’t want to bother settingwhich GPU each program should use, it’ll be convenient to justdisablethe iGPU.

Setting Storage Modes
The storage-related settings are scattered across different tabs. If CSM is enabled, you can start in theBIOStab. TheStorage Boot Option Controllets you use either UEFI drives, Legacy drives, or both as usable boot options.
In thePeripheralstab, you’re able to configureUSB Mass Storage Driver Support. If it’s disabled, USB storage devices won’t be supported.
Users oftencan’t boot from certain devicesas they’re not detected. If you ever face this problem yourself, these are the two settings to check first.
Besides this, you have yourSATA and NVMe operation modesin theChipsettab.
As a beginner, you can just leave this to default. But if you ever want tobuild RAID arrays, this is where you can configure onboard RAID from. Just something worth knowing.
Managing Power Preferences
ThePowertab lets you configure a lot of low-impact optional preferences like powering on the system with a keystroke, through mouse movement, using a password, and so on.
I personally use theResume by Alarmfeature to automatically power on my PC at the start of the workday. I also useWake on LANto network boot my laptop sometimes. As I said, low-impact, but the few seconds these save tend to add up over time.
Saving & Resetting BIOS Settings
TheSave & Exittab should be self-explanatory. You cansave the changesmade so far and exit the BIOS. TheF10key also works as a shortcut for this.
Or, you canExit the BIOS without savinganything. You can pressEscmultiple times if you prefer using the shortcut.
TheBoot Overridefeature is like the Boot Options menu in that it lets you select the device to immediately start the next session with. It’s a one-time selection.
you may also selectLoad Optimized Defaultstoreset the BIOS settingsto factory defaults. On that note, keep in mind that resets aren’t always voluntary.
When myCMOS battery died, my BIOS settings reset and I lost the configsincluding my overclock. You could learn from my experience andsave the BIOS profileto a storage device, then simply load it when required.
