Setting up a TP-Link Router is very straightforward, thanks to the Quick Setup wizard, which pretty much automates most of the process.
Depending on the exact router in question, you might see the old green UI, the new blue UI, or the red gaming UI. However, even if the user interface differs, the process of setting up the router remains the same. This is true for the most part, even if you use the Tether app instead of the web interface.
And finally, even after the basic setup is complete and your internet is up and running, you might want to try additional configurations like MAC Filtering or using multiple routers. We’ve covered all of this and more in this article.
How to Setup TP-Link Router via Web UI?
The entire process of setting up a TP-Link router involves connecting the cables and powering on the router/modem, accessing the router dashboard, configuring internet access, and finally, the wireless settings.
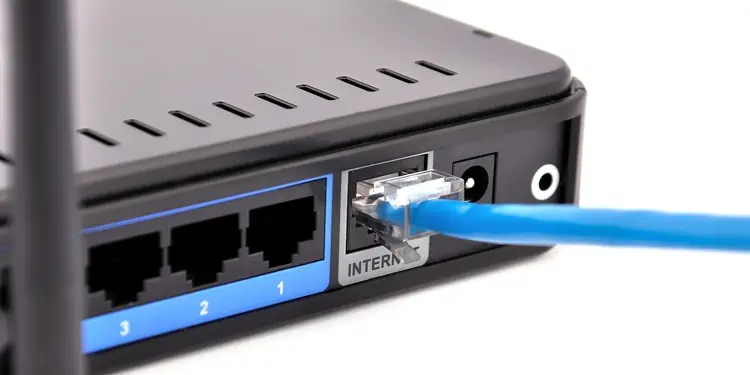
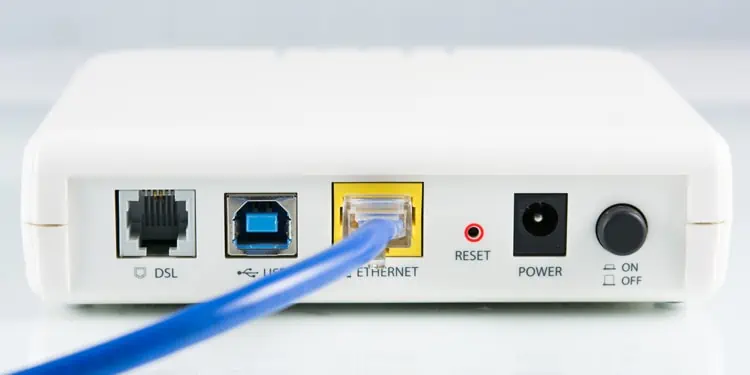
Step 1: Connect Network Cables
Before you start, if you’re trying to reconfigure an old TP-Link router, werecommend resetting it. Additionally, unplug and power off all the devices before following the steps shown below:
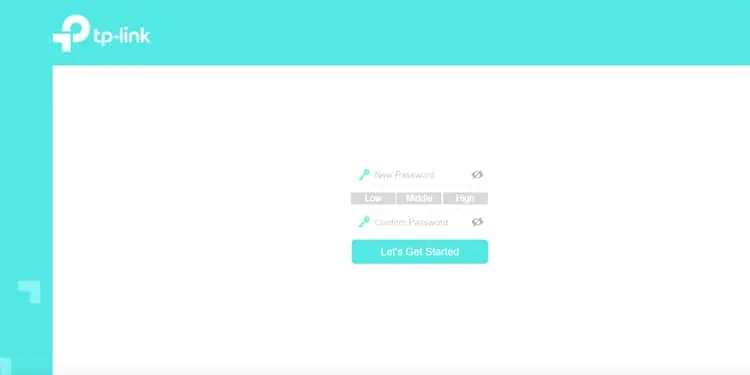
Step 2: Log in to Router Dashboard
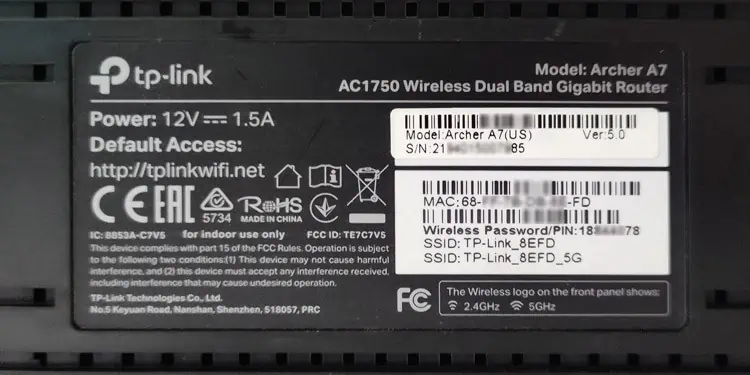
You canaccess the setup pagefor TP-Link routers attplinkwifi.net. Sometimes, this address may not work, though. Here’s how you’re able to log in to the router setup page in such cases:
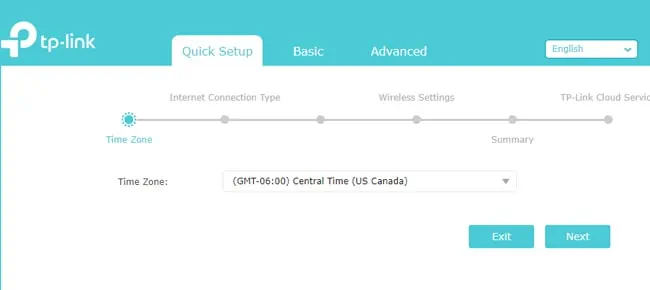
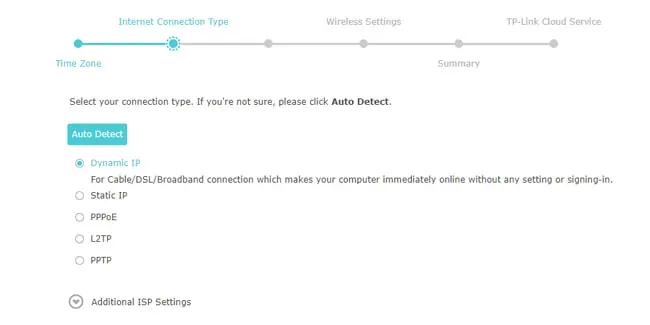
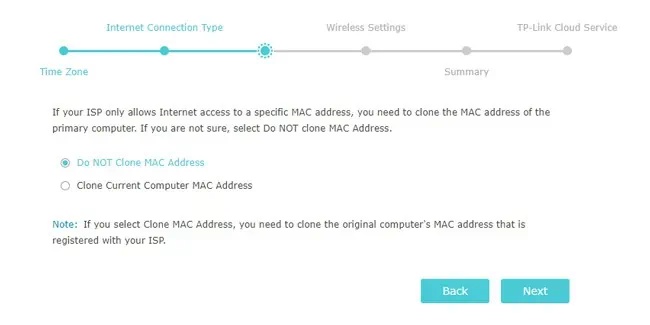
Step 3: Internet Configuration
After logging into the router dashboard, you should land directly on the quick setup page. If not, manually go to the setup tab and follow the steps listed below:
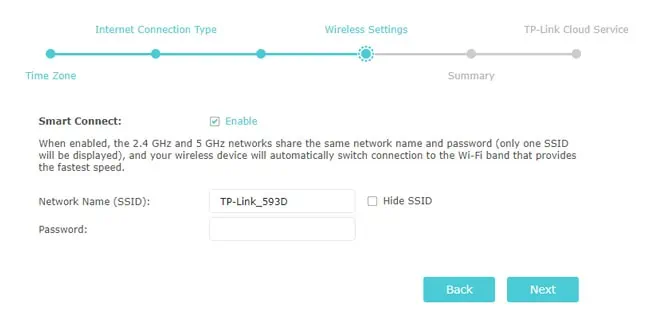
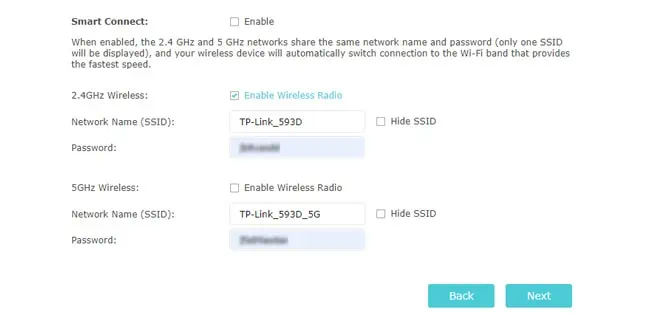
Step 4: Wireless Configuration
After the previous steps, your router should already have internet access for wired connections. The next step is to configure the wireless settings, i.e., the Wi-Fi. Here are the necessary steps:
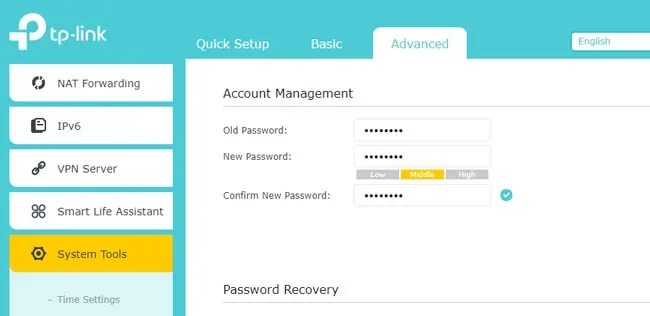
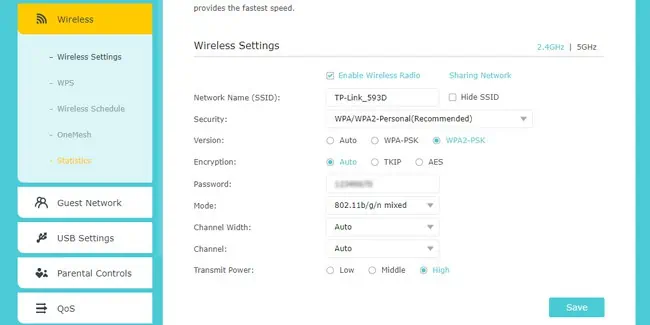
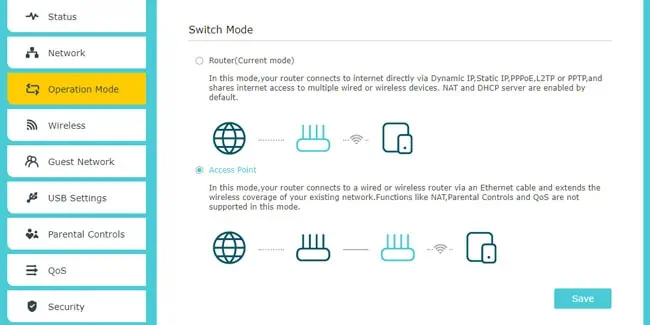
Step 5: Additional Configurations
Once you’ve completed the steps shown so far, the basic setup process is complete. However, some additional configurations still remain. Some, like securing the router and Wi-Fi, are very important, while others are optional. Either way, here’s what we recommend:
Aside from these, some further customizations are available if you’re interested.
How to Setup with TP-Link Tether?
you’re able to also use TP-Link’s Tether app toset up compatible routerswithout using the web interface. To start, please check theStep 1heading if you need help setting up the router cables. After the router is powered on and running, follow the steps listed below:
As you may see, Tether’s UI may be different, but the setup process is the same as that of the web interface. If you need further help withStep 4, we recommend checking the steps from the web interface section for reference.
Troubleshooting Problems After Setup
Problems like invalid WAN parameters or no internet access are fairly common after setting up a router. Power cycling the router and modem is generally helpful in such situations. More specifically, though, we’ve listed some common scenarios like these as well as the most effective fixes below:
Valid WAN IP But No Internet Access