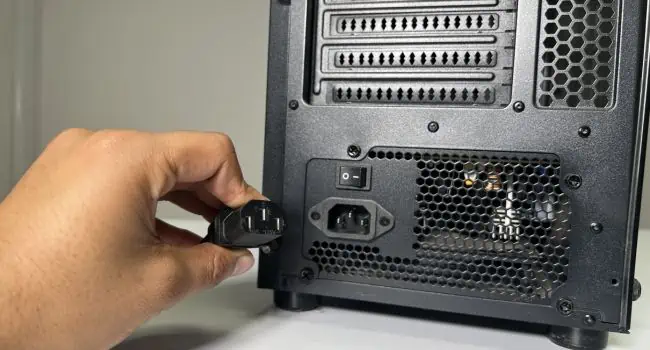
Whether it’s a bad overclocking or failed BIOS update, you could end up with an unstable system, or in the worst case, your PC might refuse to boot up. In such scenarios, you should always initiate the troubleshooting by resetting your motherboard.
If you can access the BIOS page, directlyload the default BIOS configurationfrom its dedicated section. However, if you’re failing to reach the power-on screen, you need toclear the CMOS values.
While the general concept ofresetting BIOS on every motherboardis quite similar, the steps may slightly vary based on what the manufacturer recommends. After following my detailed guide, you should be able to apply factory settings on every ASRock motherboard series.
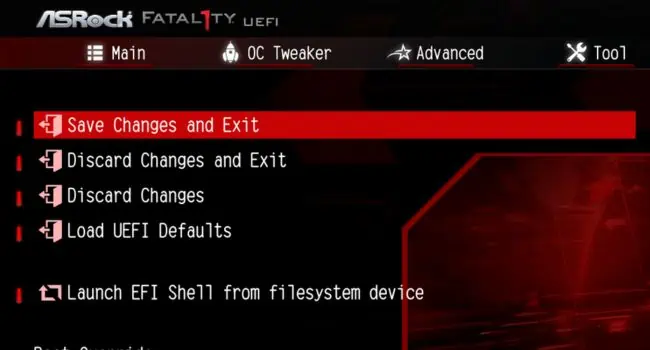
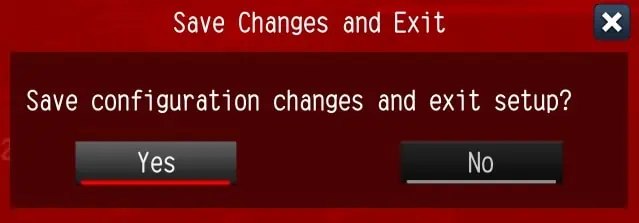
Method 1: Loading Default BIOS Settings
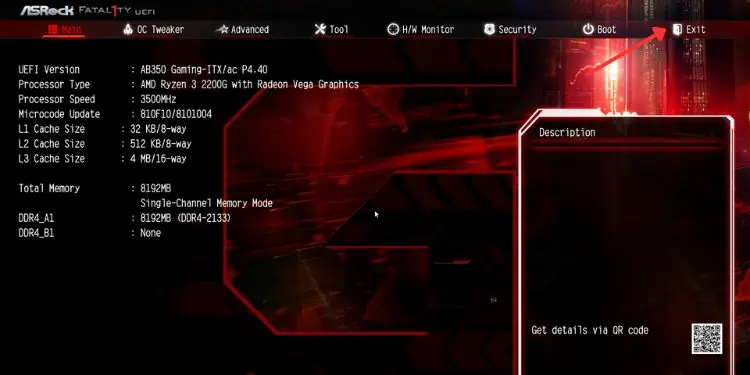
Misconfigured BIOS settings can lead to frequent crashes and significant degradation in the system performance. If you’renot facing a boot/system failureand your PC passes thePower-On-Self-Test (POST), you can likely access the UEFI settings and directly load the factory values.
So, before moving forward, find out the dedicated key that lets you access the BIOS page. For most models, it’sDelorF2, but this could be different for your motherboard. You may look up the user manual or search for it on the internet.
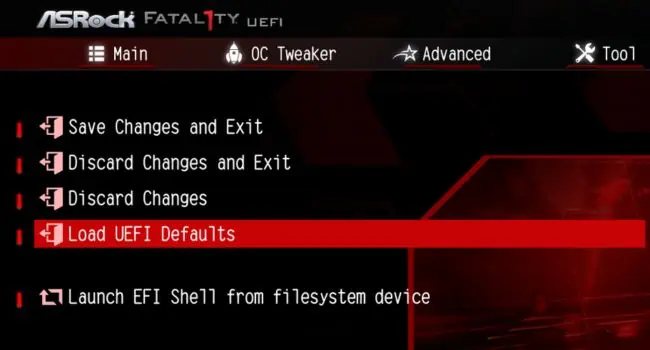
Once that’s done, follow the step-by-step guide below to learn how to enterASRock UEFI Setup Utilityand load the default BIOS configuration:
Additional Tip:If your computer is set tolegacy mode, access the BIOS first and use the dedicated keys (indicated in the right pane). Usually, it’sF9to apply the default values andF10to save the changes.

Method 2: Using Clear CMOS Button
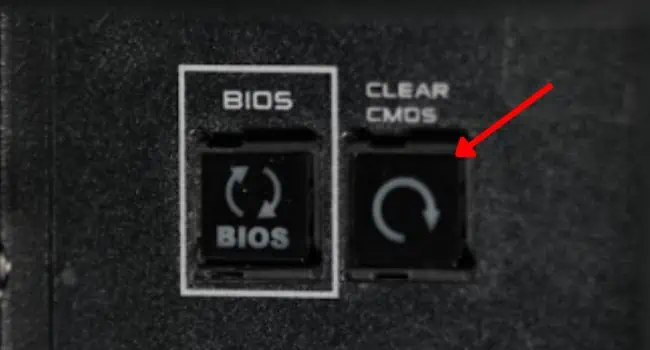
Whether you own a high-endTaichi,Fatal1ty,Aqua, or any other motherboard from ASRock, you’re likely going to find a button that lets you clear the CMOS values. This is the quickest method to reset BIOS and can help even when you’re getting ablack screen after a failed/corrupted updateor some other hardware faults.
In most ASRock models, the Clear CMOS button is included in therear motherboard panel. However, you could even find this on the system board as a‘smart’ switch. While the former is easy to locate, the latter may require a user manual. Look forCLRCBTN1or similar indications.
Also, note that just pressing this button won’t restore the BIOS configuration. Basically, you’re onlyerasing the RTC RAM. So, once you’re able toaccess the UEFI interface, you have to load the factory values as discussed earlier.
Method 3: Removing CMOS Battery
For many ASRock users, the Clear CMOS button didn’t helpreset the BIOS password. Also, this dedicated switch is unavailable on most mid-end and low-end system boards.
On the other hand, the CMOS battery is included on every motherboard. Its sole purpose is tocontinuously power theNVRAM chipthat stores all the BIOS settings, system date/time, checksum, and other hardware parameters. Moreover, this technique can even help erase forgotten or unknown BIOS passwords.
Once you remove this cell, the power supply is cut off and the chip no longer retains the applied settings. The next time you start your computer, it boots up with the factory values, or in some models, you have to manually do it.
Method 4: Shorting the CMOS Jumper Pins
Another effective way to clear the RTC RAM or CMOS values is tomake two jumper pins short-circuit. Most ASRock models support either 2-pin or 3-pin headers.
To confirm this, I suggest inspecting the user manual first. If you do not have the physical book available, you may find yours on the officialASRock support page. Usually, the jumper pins are labeledCLRCMOS1and are positioned somewhere near the CMOS battery.
you’re able to utilize a jumper cap (a small metal clip covered by plastic) or any otherconducting metal object. The cap method is more useful for motherboards with three pins as it is placed in the first two pins by default.
All you have to do is shift the cap and wait for a certain time (as indicated in your manual). When there’s no cap above the pins, it means that thejumper is openand when the cap is placed, thejumper is short. Follow the general guidelines below to learn this in more detail: