Hard drives are one of the most important components as they store all your computer’s essential data. One way or another, you might have thought of upgrading or replacing this storage device.
But before jumping into this, you’ll first need to know the proper technique for hard disk removal. This procedure can differ based on the make and model of your notebook PC. Nonetheless, the basic idea remains identical on almost every laptop.

How Can I Remove Hard Drive From a Laptop?
There can be several reasons you’re trying to remove the hard drive from your laptop. You may have encountered the “Hard drive not installed” error and wish to fix it. Likewise, you might also want to replace a damaged HDD or wish to use this drive on a new laptop.
Backup Important Data
Since the hard drive stores all your files, documents, pictures, applications, etc., removing it willdelete all the contentfrom your laptop. Moreover, any mistakes while performing this can possibly erode your valuable data.
Therefore, the first thing we recommend is toback up all your data.You can use any online backup tools (Google Drive, OneDrive, etc.) or even the built-in System Image Backup feature.

Gather Necessary Tools
Now that you’ve backed up your important data, you may get ready with the necessary materials to remove your laptop’s hard drive.
Unplug All Connections
Once you’ve gathered the necessary tools, let’s begin the process of hard drive removal.
Shut down your computer, wait some time andstart removing all the connections on your laptop. This includes the power cord, USB, and HDMI cables.

Caution:Touching internal laptop components (including hard drive) or naked wires when the power is being supplied can injure you or, in the worst case, get electrocuted.
Remove Bottom Casing & Battery Connection
After unplugging all the connections, it’s good to wait a few minutes to ensure all thepower is drainedfrom your device. Now, if your laptop has an external battery, we highly recommend removing it.
For demonstration purposes, we have used the Lenovo G40-80 model. But the procedure is identical to other laptops. So, without further delay, kindly follow the below instructions to get the basic idea of removing a laptop’s external battery:

After that, we suggest pressing the power button for at least10 to 20 secondsto flush out the remaining charge on your laptop.
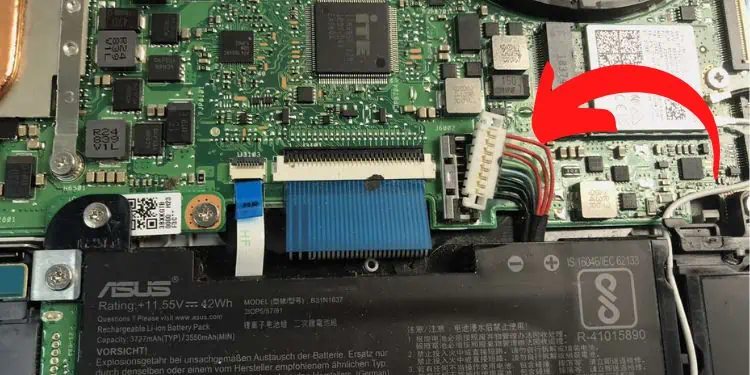
If your laptopdoesn’t have an external battery, you’ll need to remove the power connection of the internal battery.But before that, you need to take off its bottom casing.

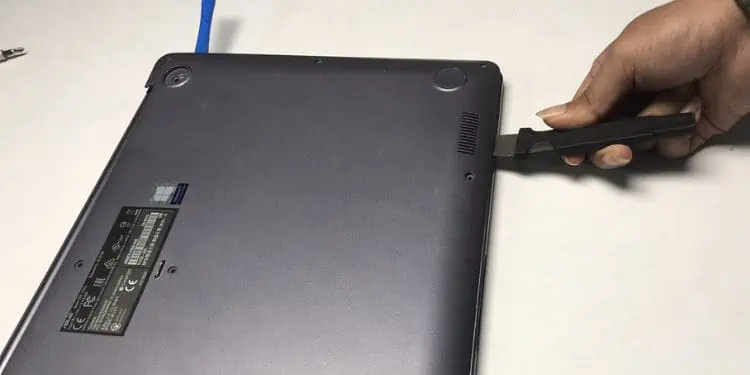
For demonstration, we’ve used the Asus Vivobook, but the process is similar to other laptop models:
Locate and Remove Hard Drive
After the removal of the bottom casing, you’re now able to access the inside of your laptop. The hard drive’s location varies depending on the model. So, we recommend referring to the manual. For example, here’s how you can locate and remove the HDD on Asus Vivobook:
Note:In some laptops, the hard drive can be mounted directly to the side panel. In such a case, you won’t have to remove the bottom casing and instead use the dedicated switch to slide out the disk.
Remove Hard Drive Bracket
Removing the hard drive from its dedicated slot isn’t enough. Every laptop has a bracket that secures the storage drive to its location. So, if you’re planning to replace the storage drive, it’s essential to remove this component:
Additional Tip:After removing the hard disk successfully, we suggest cleaning the slot, bracket, and drive.