If your BIOS got corrupted or you experienced other issues when updating to the latest version, it’s possible to reflash it to ensure the system is stable. In fact, the steps for reflashing areidentical to updatingBIOS.
As you guessed, the process is going to be tedious, and alongside comes therisk of brickingyour motherboard. Thus, if your system is experiencing issues with related settings or boot problems, I suggestresetting the BIOSfirst.
Before You Begin
Flashing a new BIOS version is entirely different thanupdating an operating systemor any other application software. This involves wiping the BIOS chip completely andreprogramming/rewritingthe executable code.
Therefore, if you experience any type of interruption during the update, the code might not be written completely. If that happens, yoursystem won’t POSTand in the worst case, the motherboard needs to be replaced.
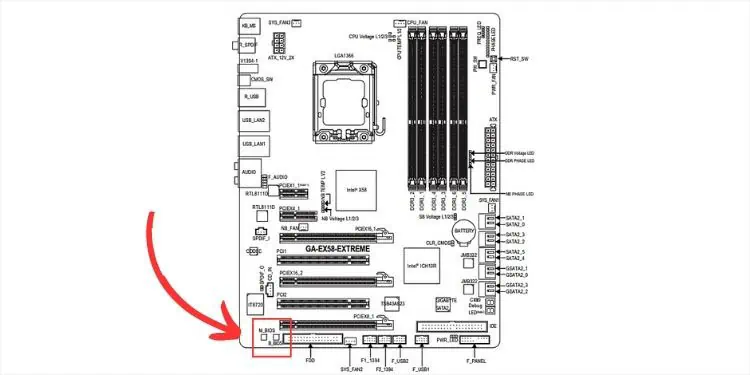
Some motherboards come withdual BIOS chipsor anauto-recovery featurethat lets you recover from failed updates. But not all have such a feature–especially the older ones. That’s the reason professionals never recommend flashing BIOS in the first place.
You’re lucky if your motherboard supports such a feature. Now, if you wish to reflash, you’ll have to do itat your own risk!My suggestion would be to contact the manufacturer first before proceeding with the steps below.
Also, verify youplug in the power adapterfor a laptop so that it is powered throughout the reflashing process. You may opt for anUninterruptible Power Supply (UPS)to prevent a possible power outage.
In some laptops like Dell and HP, the system might not accept the BitLocker key and you won’t be able to boot into Windows after the reflash. For that reason, you need tosuspend the BitLocker Drive Encryptionfirst.

Step 1: Find the Compatible BIOS Version
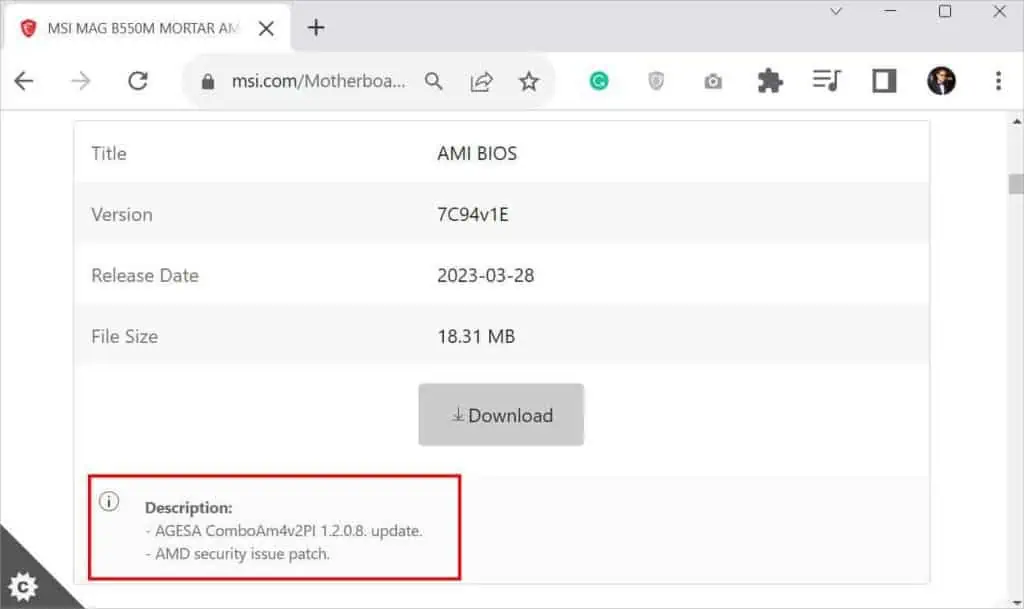
The general idea in most motherboards is to download thelatest BIOSversion. However, if the firmware is already updated to its latest version and you’re still experiencing an issue, it might be due to incompatibility or you had flashed abeta version.
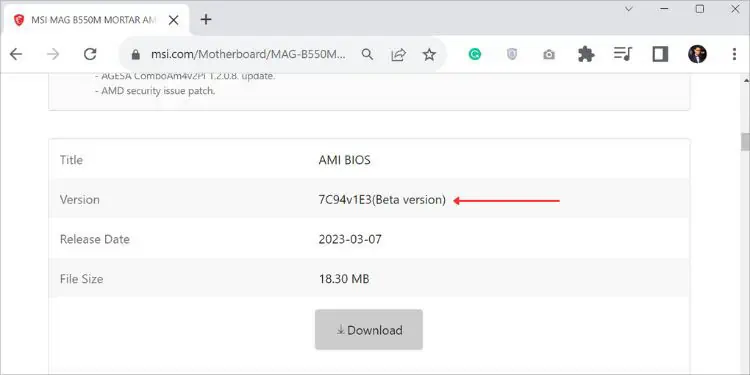
Well, Beta BIOS is only experimental and is not generally recommended unless you’re asked to do so by the manufacturer. Instead, you mayreflash an older stable versionwhich should usually solve all of your issues. But do note that some can’t be downgraded.
I’ve also come across users who download firmware from third-party sites. All manufacturers offer necessary utilities on their official websites. So, I do not recommend opting for the former one.
You might have heard aboutincremental BIOS updates. Well, this entirely depends upon the manufacturer. Most motherboard manufacturers recommend installing the latest version directly. However, some laptop brands suggest doing this incrementally.
For that reason, I advise checking your user manual. Ifnothing is specified, directlyflashing the latest firmwareshould be the best option.
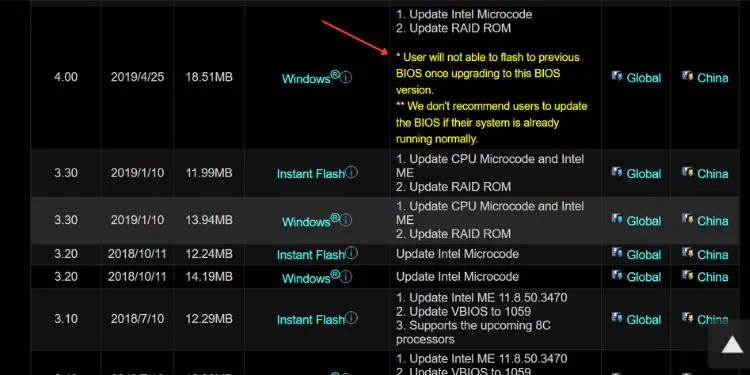
In some cases, the firmware description might ask you to install a prior version or might state that once the version is installed, it can’t be downgraded. You need to follow the incremental approach in such scenarios.

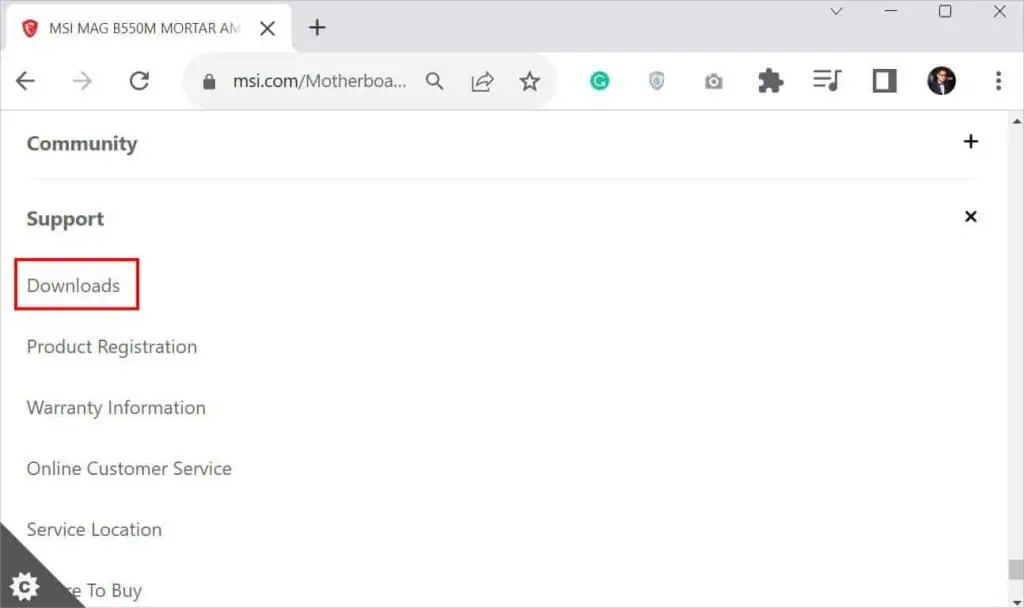
As you’re trying to reflash BIOS, I believe you’ve already flashed one before and understand this well. In case you hadn’t done this right or lack technical expertise, the first step is to download the compatible firmware:
Step 2: Prepare a Bootable Flash Drive
Once you’ve downloaded the appropriate BIOS file, it’s time to load it onto aUSB flash driveor DVD. For this, you need a flash drive with at least 1 GB free space and formatted in FAT32.
The steps below are applicable if you’re trying to use the built-in BIOS flashing utility or USB Flashback button:

If you have an older motherboard that doesn’t come with a built-in BIOS flash utility or aUSB Flashbackbutton, the process of flashing/reflashing is a bit different. But before that, it’s essential that you prepare a BIOS booting flash drive. For this, I suggest using a dedicated utility like Rufus:
Step 3: Reflash BIOS
As mentioned earlier, the steps for flashing and reflashing are identical. Whether you’re experiencing an issue from the previous update or simply trying to flash again, here are the three different ways to do it.
Through BIOS Flash Utility
Every latest desktop and laptop motherboard has a dedicated flashing utility. In your BIOS, you can check for BIOS Flash Update,M-Flash (in MSI),Q-Flash (in Gigabyte),EZ-Flash (in Asus), or similar indications. The process to flash/reflash in all of them have a similar concept.
Using USB Flashback
USB Flashback is an excellent feature on some motherboards that lets you flash/reflash BIOS without needing to open BIOS. This can especially come in handy when you’re trying toupdate the firmware without a CPUor DRAM (usually in new PC builds). Follow the basic steps below to do this correctly:
Update in DOS Mode
For older motherboards with no flashing utility or the Flashback button, the only way to reflash BIOS is using the DOS mode. This might sound a bit technical but it is actually quite easy. Follow the below instructions:
If you’re able to boot into Windows, you may even opt formanufacturer-recommended softwareto reflash BIOS. For example, MSI offersMSI Dragon Centerwhich makes the process effortless.

Additionally, modern motherboards supportdirectly running the executable file. All you have to do is download the appropriate version and run it.
Step 4: Verify the Update
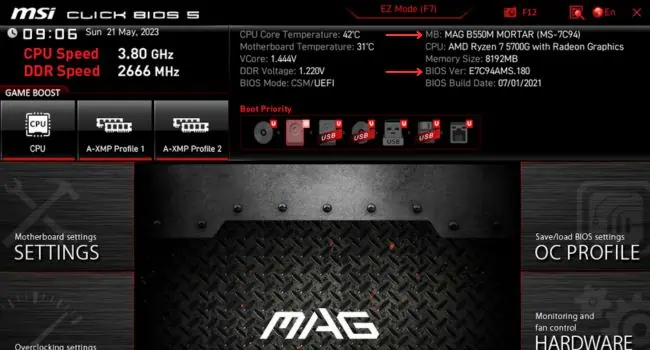
Once the BIOS is successfully reflashed, your PC should restart. Now, I suggestgetting into the BIOSand verifying whether the new BIOS version is detectedfrom the BIOS Ver field.
Now, you may remove the USB flash drive and recover the BIOS settings (only possible if you hadbacked up your BIOSearlier). Finally, you can boot into Windows and check whether the related bugs and compatibility problems are fixed.