Stickers are not only a fun way of conveying messages and decorating items but also a cost-effective way of promoting a business.
So, whether you are looking to advertise your business or simply want to spread some laughter and joy, you may do it immediately with that printer in your room.
In this article, I will show a step-by-step process to print stickers at home using as few resources as possible.
Step 1: Gather Materials to Print Stickers
To begin with, let’s see the materials required to print the stickers. Since we are printing stickers at home and not on a commercial scale, I have tried to cover up the entire process at a minimal cost by using limited resources.
Sticker Papers
I am quite sure you are not planning to print stickers on plain paper and stick them to your coffee cup using glue. So, you should first get propersticker papersthat are compatible with your printer.
The sticker papers come in two layers—an adhesive layer on the back and a printing layer on the front. you’re able to simply peel off the front layer and paste it wherever you want. Sticker papers are available for both inkjet and laser printers.

If you want your stickers to be waterproof, you may useVinyl sticker paperwhich is far more durable and reliable than normal sticker paper. However, Vinyl sticker papers are more expensive than normal ones, and they also make theprinting process much slower.
Lamination Sheets
Unlike Vinyl sticker papers that are waterproof, normal sticker papers degrade their quality when it comes in contact with water and moisture.
To avoid this from happening, you may purchase alaminating sheetand use it to laminate the sticker paper. Or you can also use transparent tape.
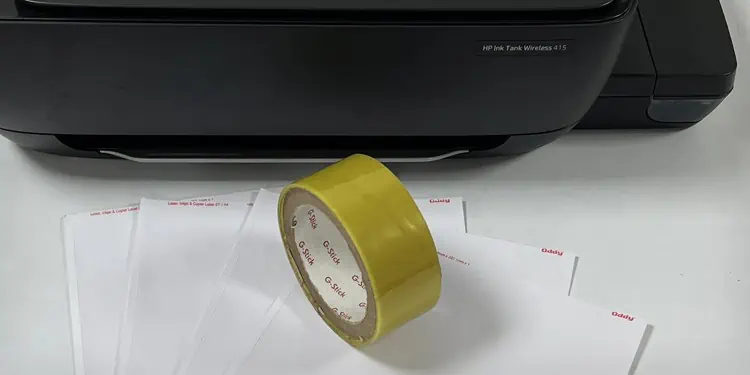
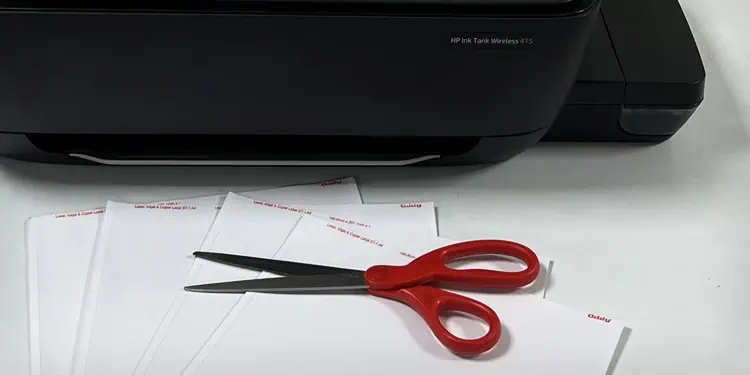
Scissors
Large scale sticker manufacturers generally use a Cricut machine to cut the sticker in its actual layout. It makes it easier to peel off the sticker from the sticker paper once it is ready.
If you have this machine, you may go for it. Otherwise, scissors will always work. The only thing is you must be good with scissors to get the sticker perfectly out of the sticker paper.
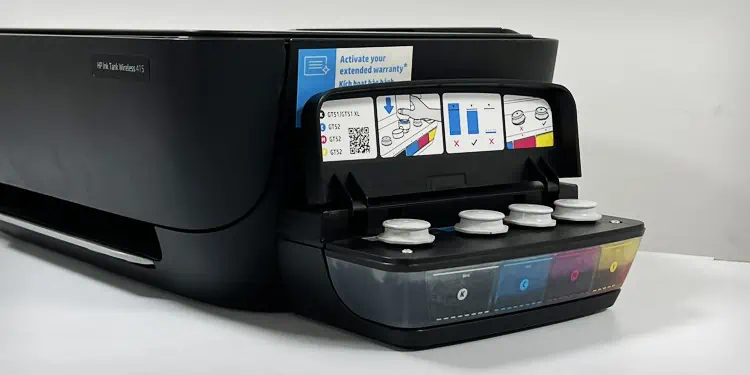
Sufficient Ink/Toner
Last but not least, always make sure theink/toner levels on your printerare sufficient enough to print the stickers. Running low on ink can not print the colors with precision.
However, bear in mind that you will always see a slight color difference between the computer image and the printout due to the difference in color profiles used by the computer and printer.
Step 2: Get Your Design Ready
The next step is to design your sticker and save it in a printable format. You may use applications as simple as MS Word and Paint to advanced image editing tools like Adobe Photoshop to create your sticker design. You may even use online design platforms like Canva to prepare your design for printing.
Not only can you create the design on your computer, but you’re able to also use pre-made sticker images and print them or hand-draw the sticker,scan it with your printer, and then print it as a sticker.
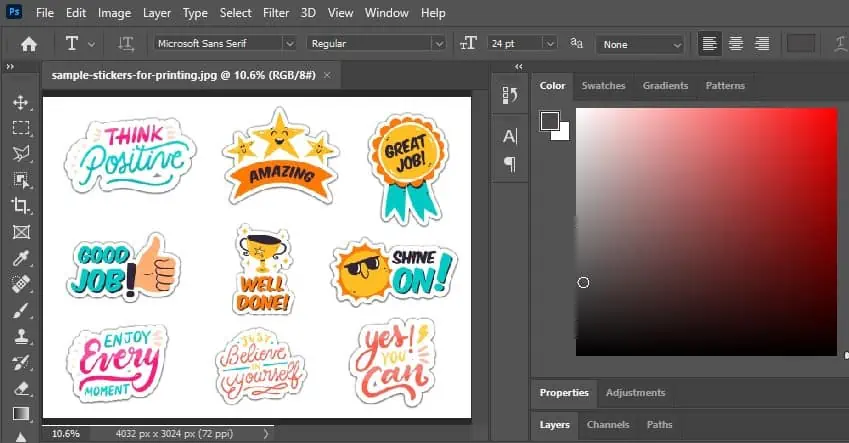
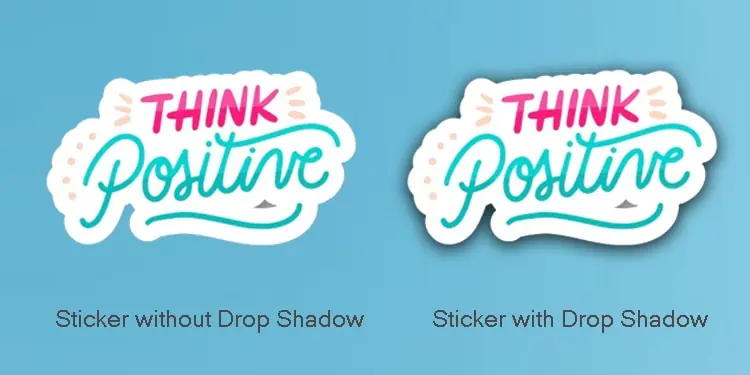
While designing the sticker template, leave enough space between each sticker and put a drop shadow in the stickers so that you won’t have problems later while cutting them with scissors.
Once you complete the design, I recommend you save it in PNG or PDF format for high-quality printing.
I have designed this sample sticker page using Photoshop for demonstration purposes which I will be printing later.
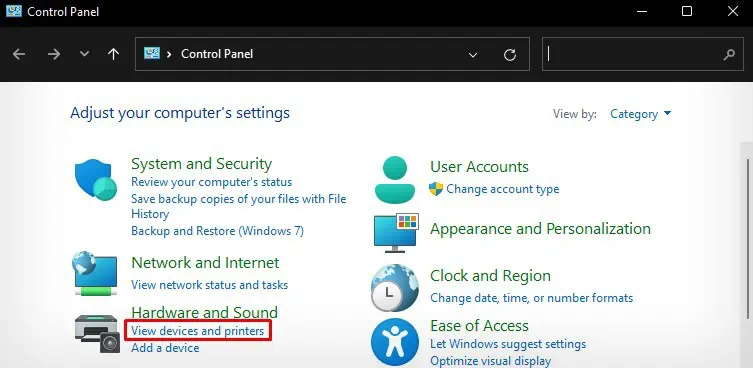
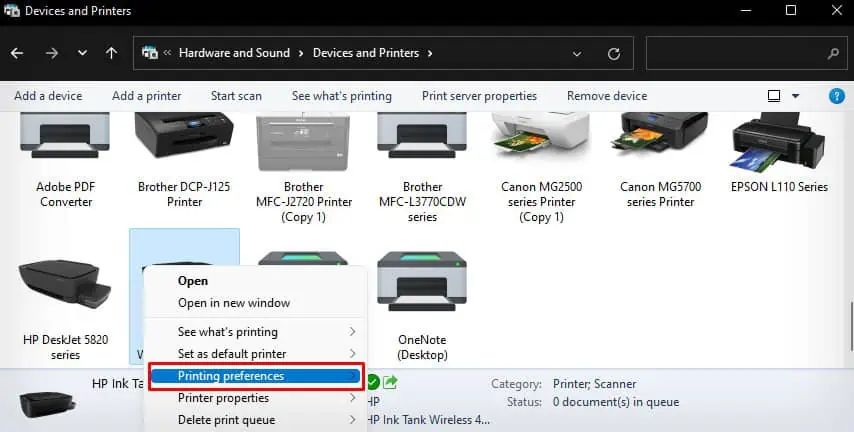
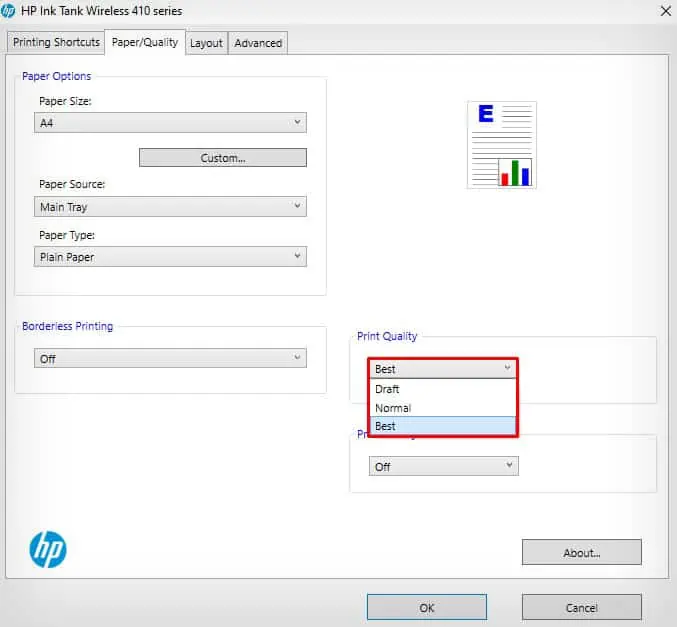
Step 3: Change the Printing Preferences
Once the sticker design is ready, you can now insert the sticker paper into the printer to start printing.
Since sticker papers are a bit thicker than normal plain papers, I recommend inserting only one or two at once. Otherwise, you might encounterpaper jams on the printer.

Once you insert the papers, you should change the paper type and print quality from the printing preference of your printer.
Here, I will be using the HP Ink Tank Wireless 410 series printer to demonstrate the steps. you may go through similar steps on other printer models too.
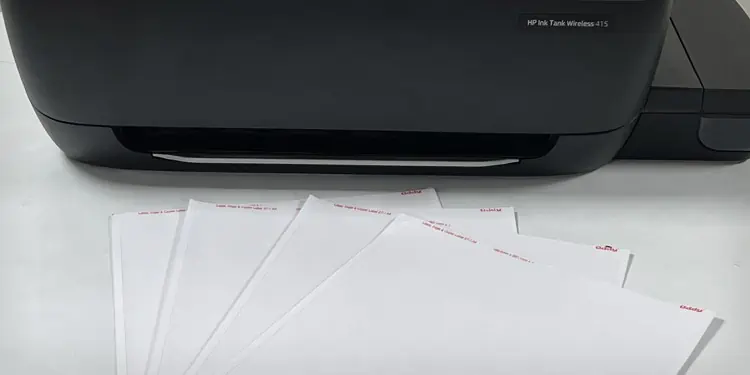
Step 4: Start Printing Your Stickers
Now that everything is set up, you can start printing your stickers. I recommend you first print a single copy of the sticker just to confirm that everything is fine.