In a modern Linux operating system we usually take it for granted that when we insert a USB flash drive,best hard drive, or even a DVD disk, they just appear ready for use. But under the hood there is a process where the device is mounted (made ready for use) and assigned a mountpoint. When using a server or a remote connection, it is not certain that a device will automatically be made available, so how can we mount our own devices?
In this how-to we’ll look at various ways of mounting and unmounting disks and disk images. We will use a variety of approaches and tools including both terminal commands and GUI tools.

All the commands in this how-to will work on most Linux machines. We’ve used an Ubuntu install but you could also run this how-to on aRaspberry Pi. All of the how-to is performed via the Terminal. You can open a terminal window on most Linux machines by pressingctrl, altandt,or by searching for the terminal app in your applications menu.
Unmounting and Mounting Drives using GUI tools
Most of the time when you attach a drive, for example a pen drive, the system will recognize it and automatically mount the drive. Occasionally this may not happen and knowing how to manually mount and unmount a drive can be a useful skill.
1.Plug in a USB Flash drive and allow it to automatically mount.You should see an icon appear as a shortcut to the drive, or opening a file explorer you will find the pen drive mounted.
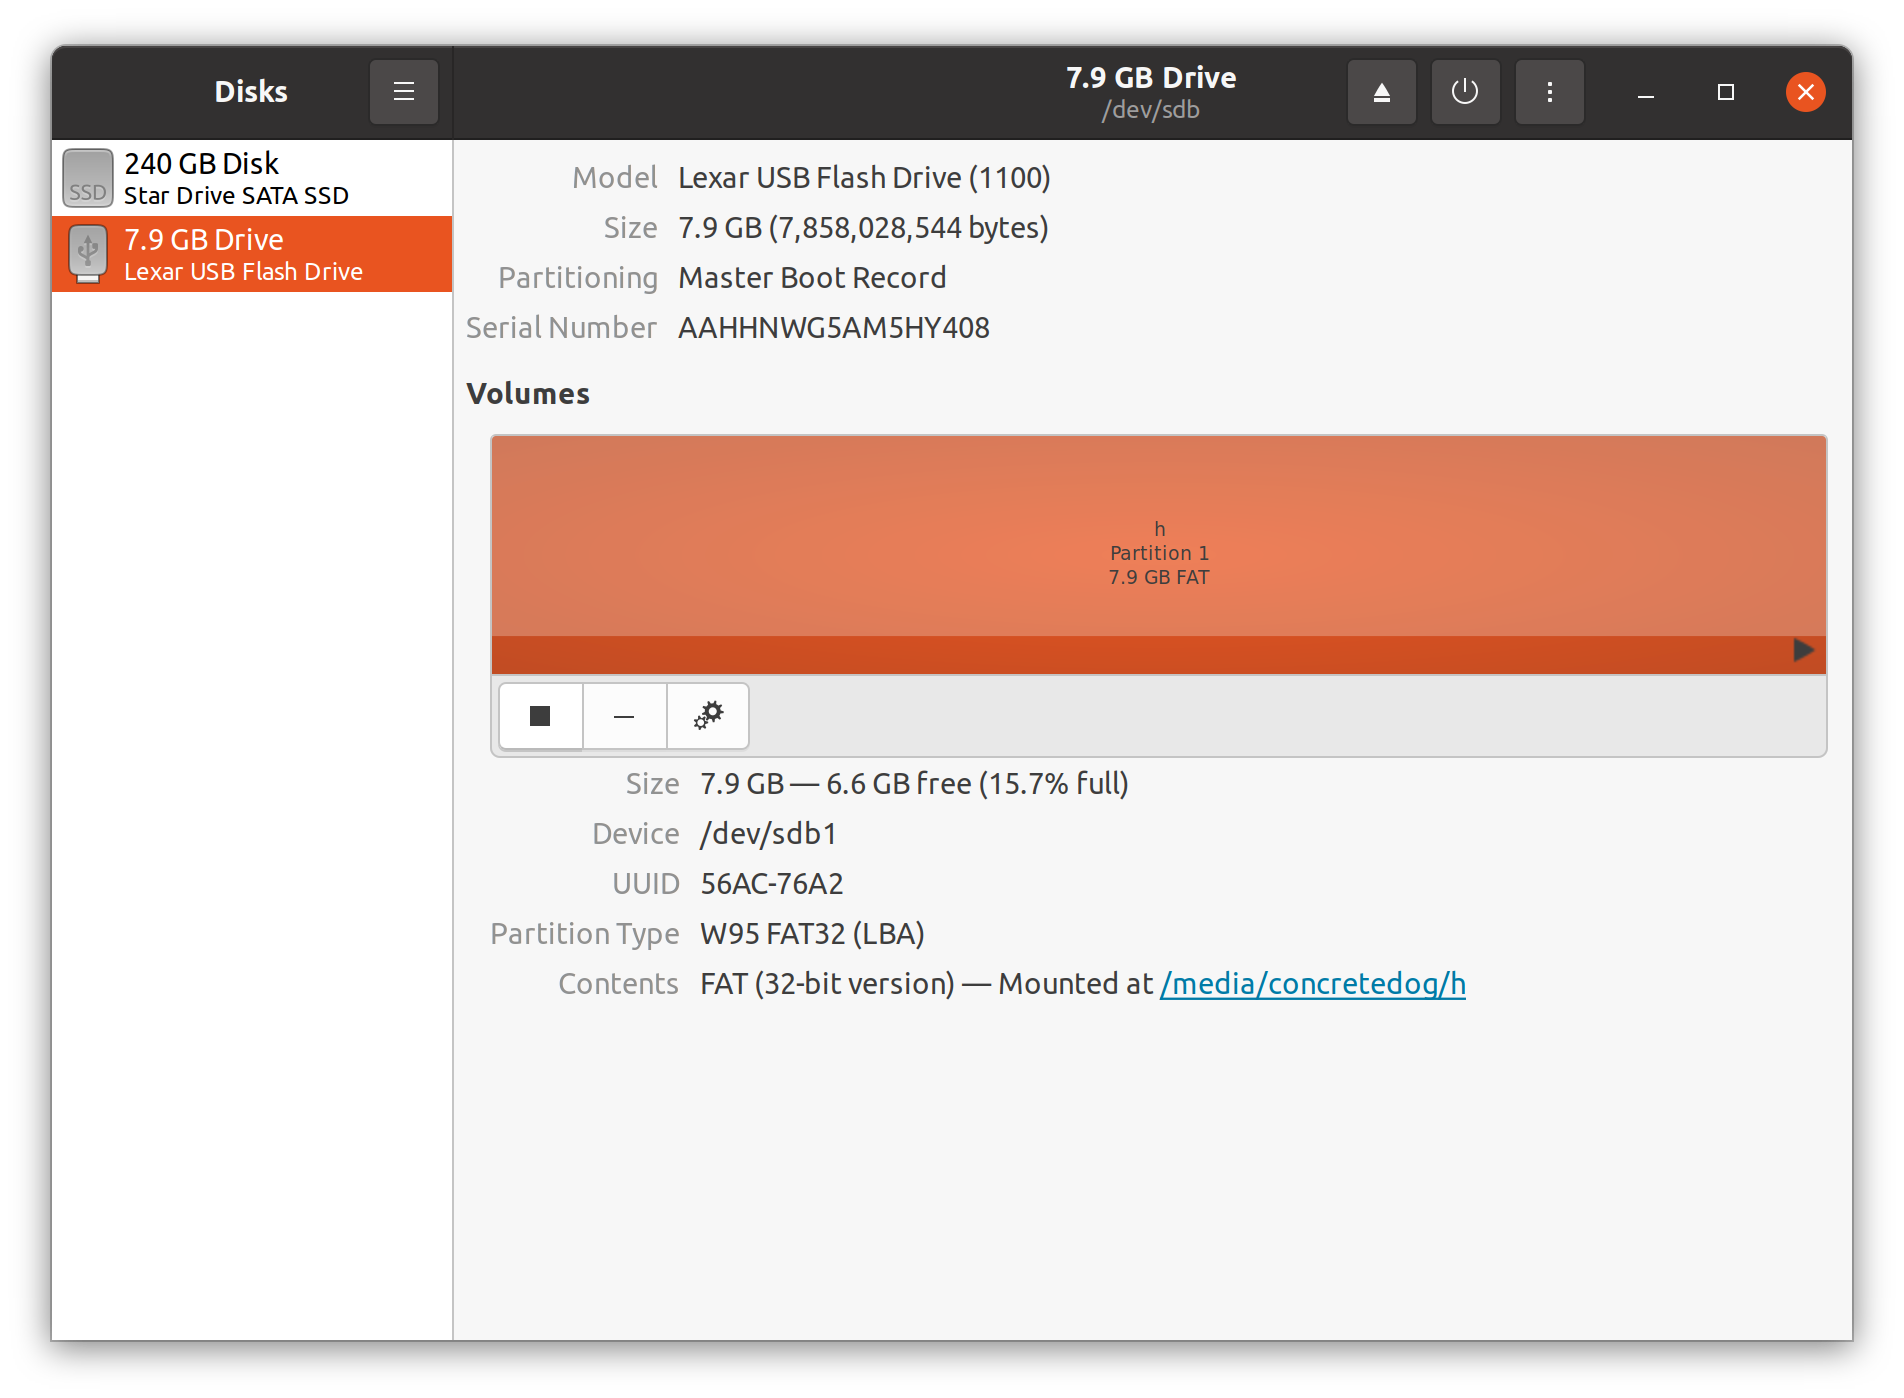
2.Press the Windows / Super keyandsearch for “disk.” Select the Disks utility.
3.Selecting the correct USB Flash drive. Click the square stop button icon to unmount the disk.You will see your main system disk drive(s) and also the pen drive you just inserted, so double check before taking the action.
Get Tom’s Hardware’s best news and in-depth reviews, straight to your inbox.
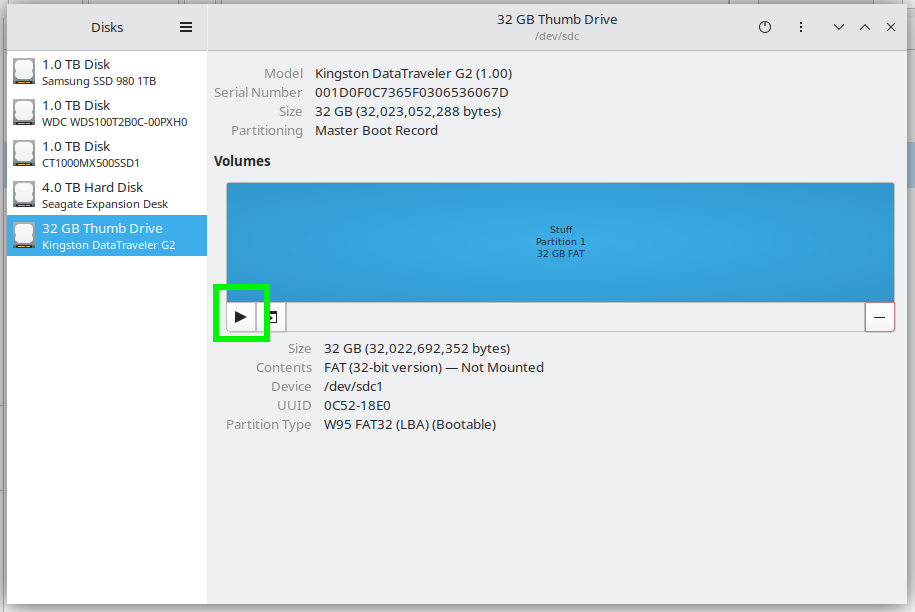
4.Click the mount buttonto re-mount the drive. With the pen drive unmounted the mount button icon changes to a triangular “play” icon. Clicking this will remount the pen drive.

5.Unmount the driveto get ready for the next part of the tutorial. It’s useful to have the pen drive attached but not mounted for the next part of the tutorial so unmount it by once again clicking the unmount button in the disk utility.
Identifying and Mounting a Drive using the Linux Terminal
Using the terminal enables us to have greater control over when drives are mounted and their position in the filesystem that they are mounted to.
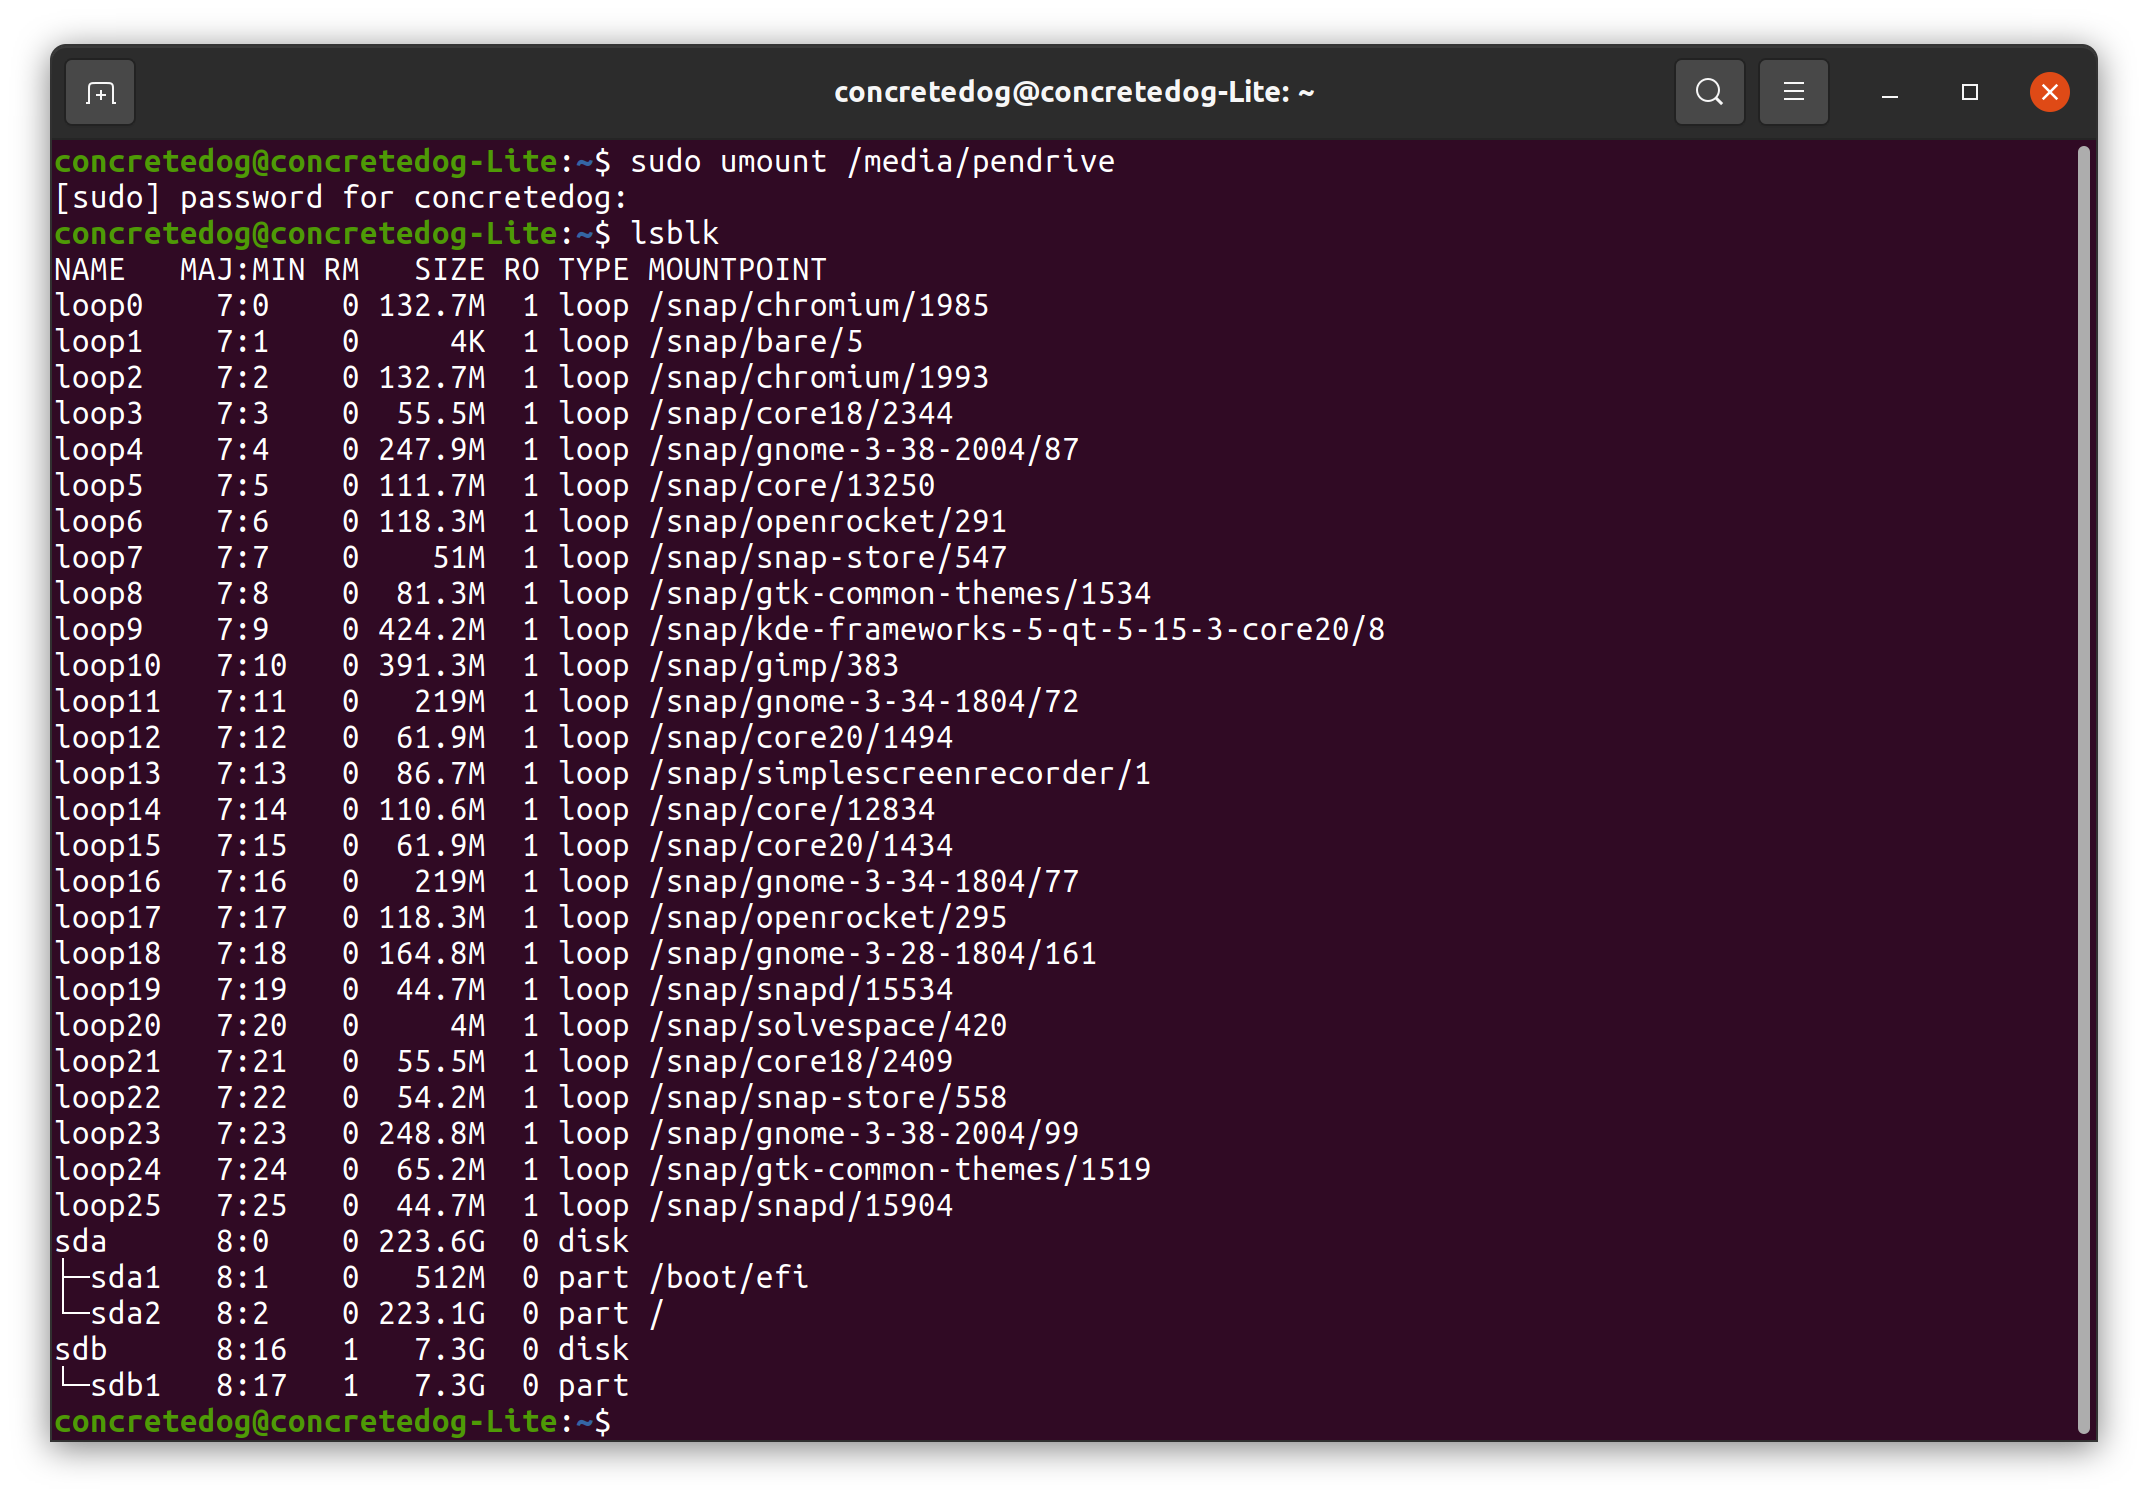
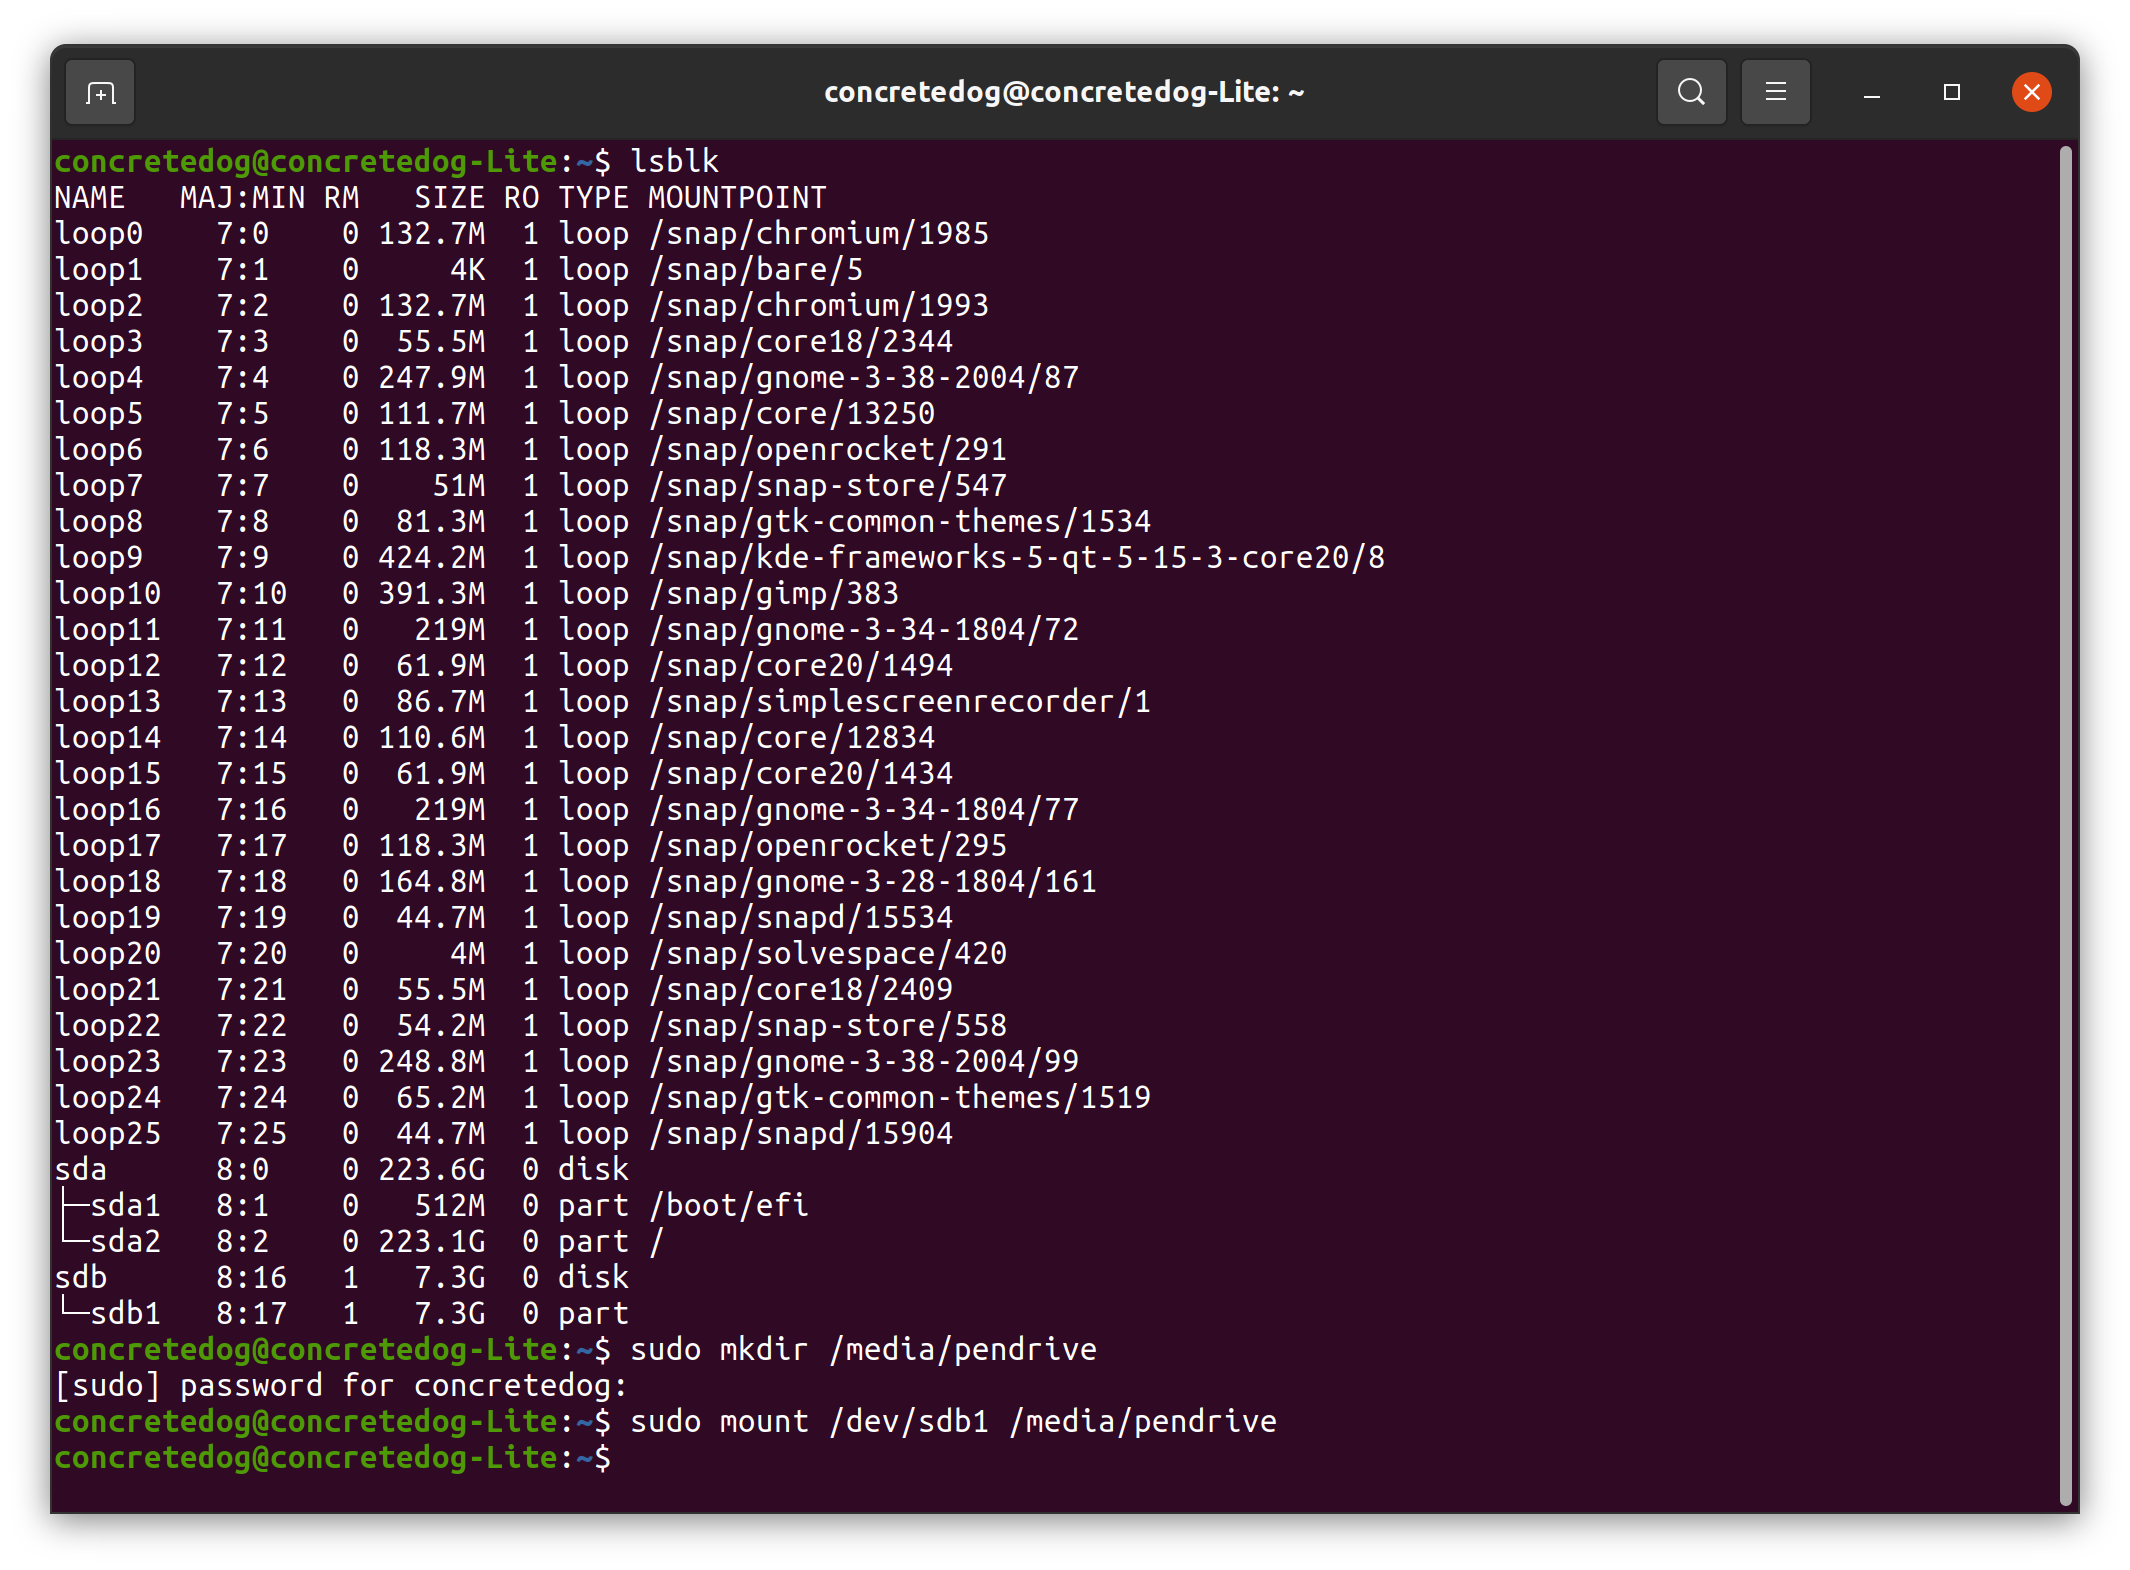
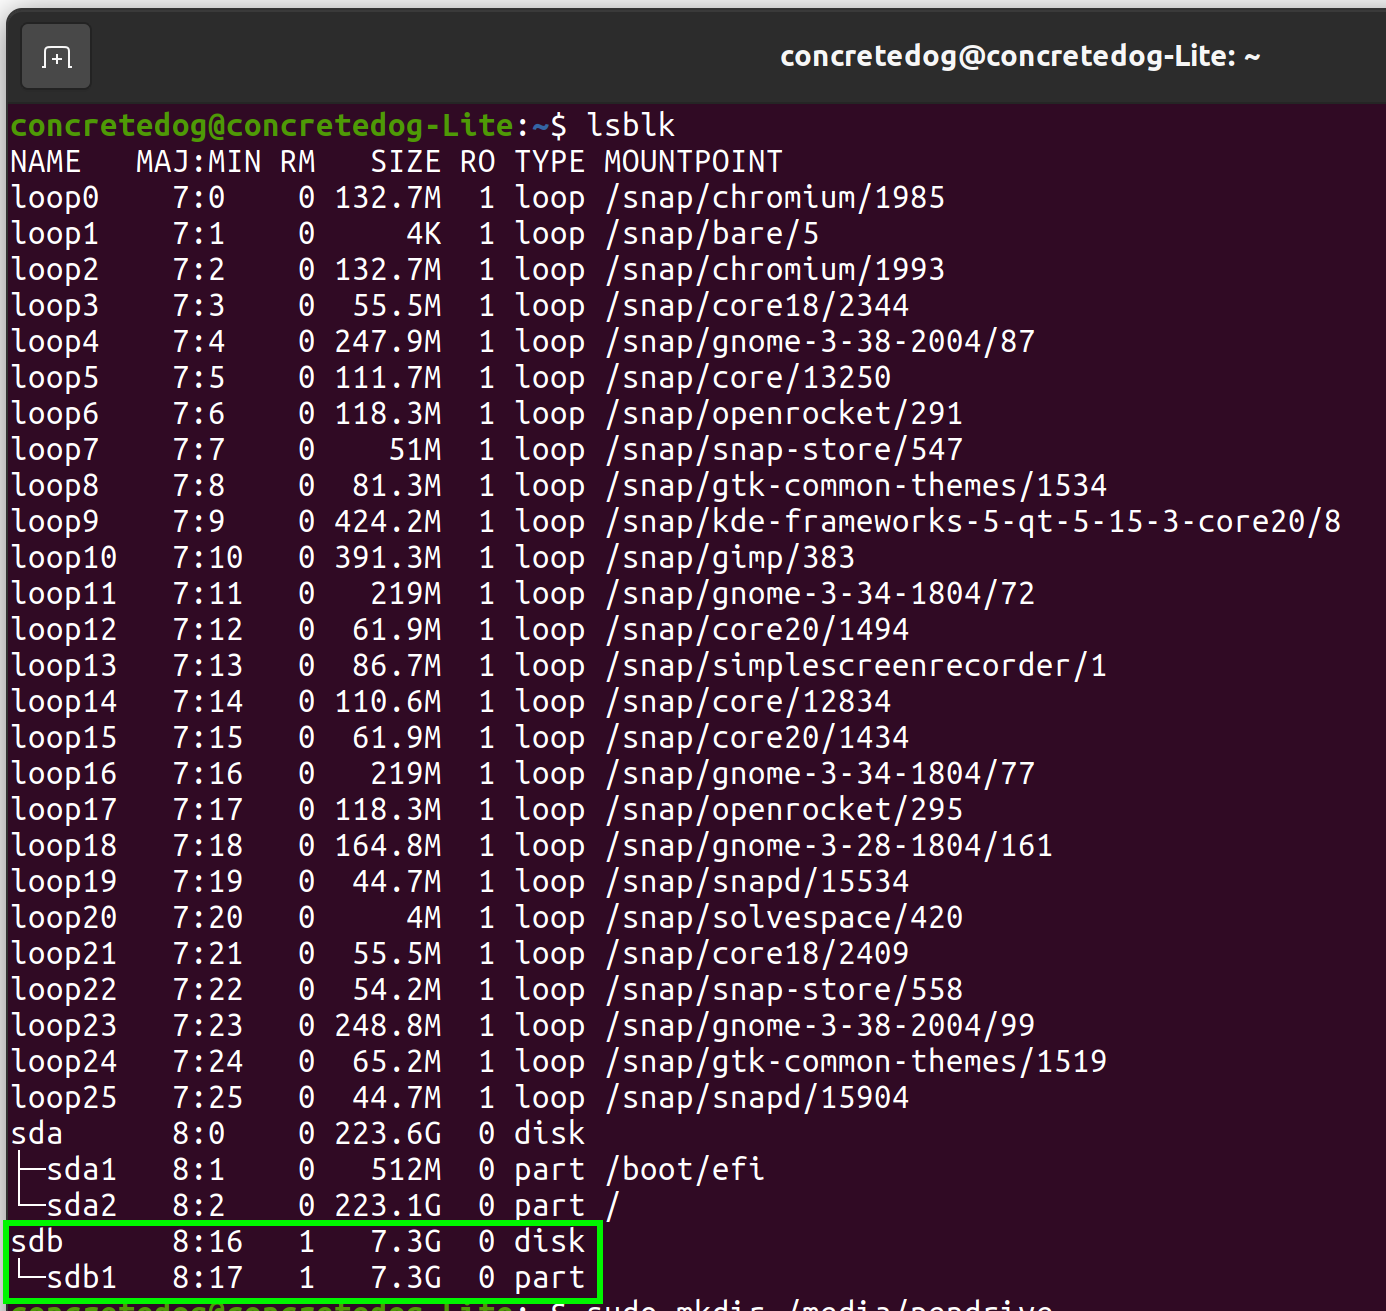
1.Identify the USB drive using the lsblk command.In the results you may well see lots of entries labeled “loop.” However you are looking for results that are listed assda, sdbor start withnvmeto identify physical disks attached to your system via SATA or PCIe. Comparing the listed capacity of the attached drives can often help you discover the name of your target drive. In our case we can identify our USB drive as sdb1.

2.Create a directory to mount the USB drive into.When an external drive is automatically mounted it is often mounted inside themediadirectory. However using the CLI we can create and specify a directory into which we will mount our pendrive. Note that we need to invoke root privileges usingsudoto create a directory inside themediadirectory.
3.Mount the USB drive to the/media/pendrivedirectory using themountcommand.Themountcommand has the following syntax; sudo mount /path/to/drive /path/to/mountpoint.
4.Check the drive has been mounted by re-runninglsblk.Notice that the final column in thelsblkoutput lists the mount point of the listed device, if there is a mount point listed then the device is confirmed as mounted.
Unmounting a drive in Linux using the umount command
Unmounting a drive is handled via theumountcommand and when invoked it safely removes the drive from the system, enabling us to pull the drive and use it in another machine.
1.Unmount the drive usingumountcommand.Note the spelling ofumount.It is a common error to type “unmount”. Using theumountcommand we only need to specify the mount point location and name of the drive we wish to unmount.
2.Check the drive is unmounted usinglsblk.Notice that in thelsblkoutput the final column lists the mount point of detected devices, if there is no mount point listed then the device is unmounted.
Mounting a Disk Image to view contents in Linux
It is possible to mount a CD / DVD or other disk image to appear as a read only drive. This is a useful technique if you want to copy some content out of a disk image or if you simply want to inspect a disk image’s contents. In the following example, we have used a downloaded disk image of thePuppy Linux distributionbut this technique would work with any disk image including images made of disks for backup purposes.
1.Create a directory calledisoin themediadirectory to mount the disk image into.Again this could be anywhere in the file system but we have created a directory calledisowithin themediadirectory.
2.Mount an ISO disk image using themountcommand and the loop argument.We need to run this command with root privileges so therefore we usesudo.The usage of themountcommand is similar to previous uses and includes the path to the image and the path to the mount point we created in the previous step. We also add the-o loopargument to create the loop device which tricks the operating system into believing this is a real disk and not an image.
3.Unmount the ISO usingumount.Once again when using theumountcommand we need only specify the mount point of the drive or disk image we wish to unmount.

With these techniques you now have greater control over mounting and unmounting disks in Linux and now have skills that may help next time a connected drive doesn’t automatically mount correctly. Being able to mount a disk image using a loop device is very useful when exploring old backup images of previously used systems or when you want to have a look around a Linux distributions image contents for exploration or learning.
Related Tutorials
Jo Hinchliffe is a UK-based freelance writer for Tom’s Hardware US. His writing is focused on tutorials for the Linux command line.