Microsoftmakes it easy to create a bootable USB Flash drive for Windows 10 or 11. For each OS, a nifty little all-purpose tool works to install whichever Windows version it knows about. Because it’s bootable, it also serves quite nicely as a bootable recovery drive, should you be unable to start up from the usual boot/system drive.
That means you can instruct your PC to boot to the USB drive by interrupting the normal boot sequence. Then, by targeting this drive as your boot source, you can run the Windows Recovery Environment (WinRE) it contains to conduct repairs on any Windows PC or do a fresh install (seehow to get Windows 11 for free or cheap). This is extremely handy when a PC experiences aBSODor won’t boot and you need to fix the problem or access files on the boot drive even when Windows won’t run.
Meet the Microsoft Media Creation Tool (aka MCT)
There’s a separate download page for each Windows version – that is, one forWindows 10, and another forWindows 11. Even so each of the relevant links on those pages reads “Create Windows X installation media,” where X can be 10 or 11 as the target dictates. For both OSes the idea is to download the Media Creation Tool of choice, namely:
For either OS, you need only navigate to the appropriate link (specified above), insert a target Flash or other USB-attached drive into your PC, then download and run the tool. Depending on version, the corresponding MCT filename should show up in your Downloads folder. you’re able to run the tool against your target drive (feel free to bail out fo File Explorer to make sure you pick the right target). Here’s what that looks like forWindows 11(it’s nearly identical, but slightly different for Windows 10). For brevity, I skipped the “Getting a few things ready” screen and went straight to notices and licenses stuff.
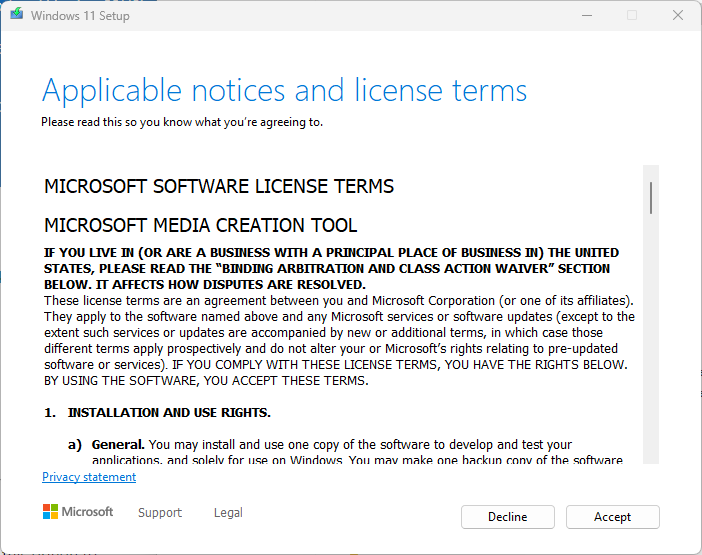
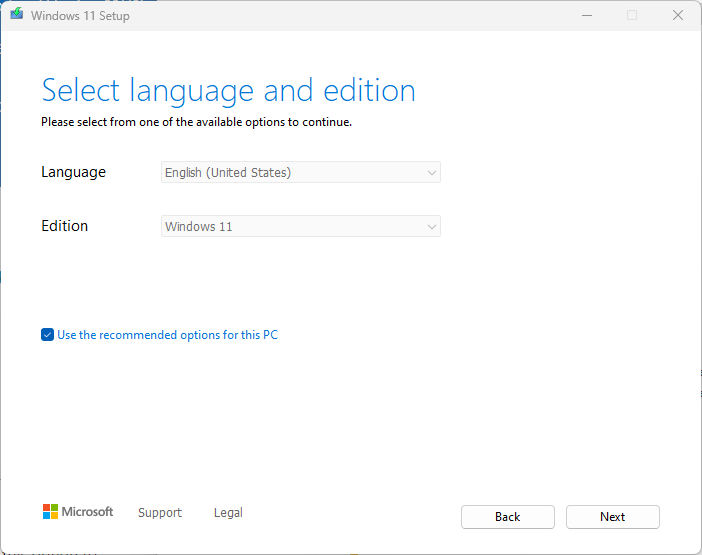
Click Acceptwhen prompted. The MCT will continue on “Getting a few things” ready. (Which I also skip.) Then, you’re asked to select language and edition as shown next:
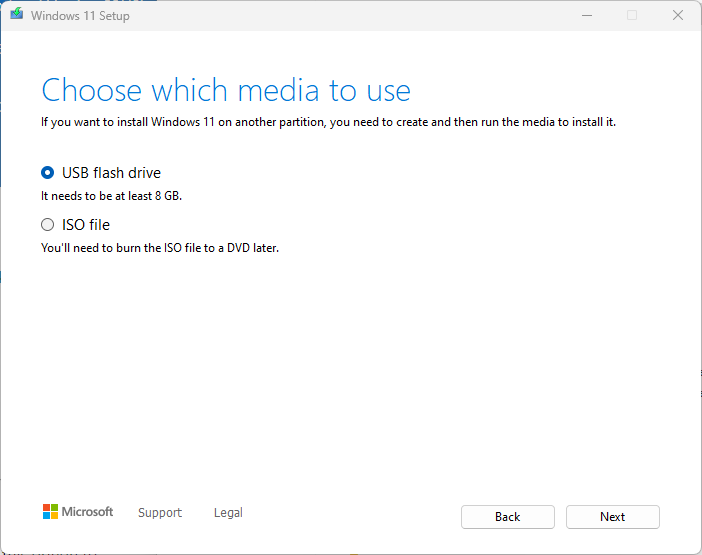
Select “UFD (USB Flash Drive)”and clickNext.
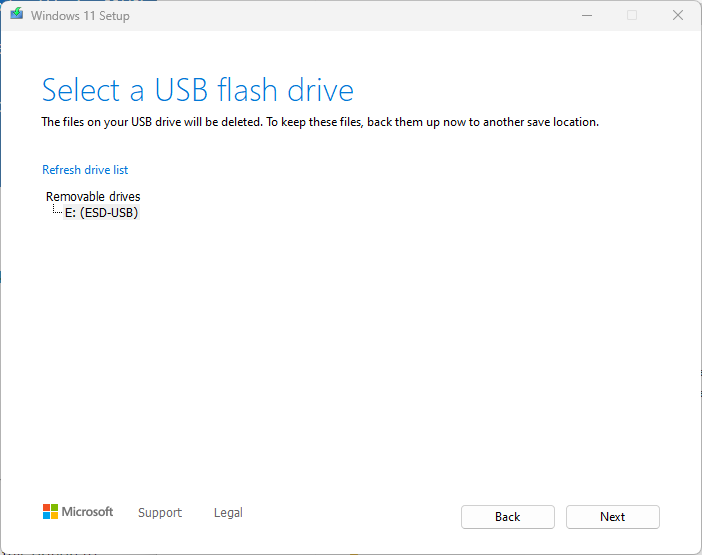
Select your target UFD for MCT.On the test PC from which the next screencap comes, it’s the only valid choice so it’s also the only option showing: Drive E.
Get Tom’s Hardware’s best news and in-depth reviews, straight to your inbox.
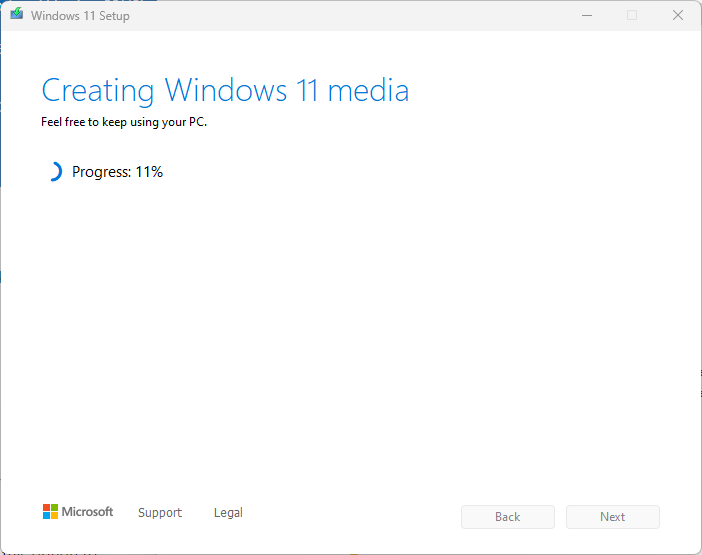
At this point, the MCT again says it’s “Getting things ready” then “Downloading Windows X” (10 or 11) with a progress bar to tell you how far it’s along. When it gets to 100%, the MCT then verifies what it’s downloaded with another progress bar. On my test PC, verifying took longer than downloading – that’s not unusual. Then comes what we’re waiting for, Creating Windows X media (also with progress counter), as shown for 11 next:
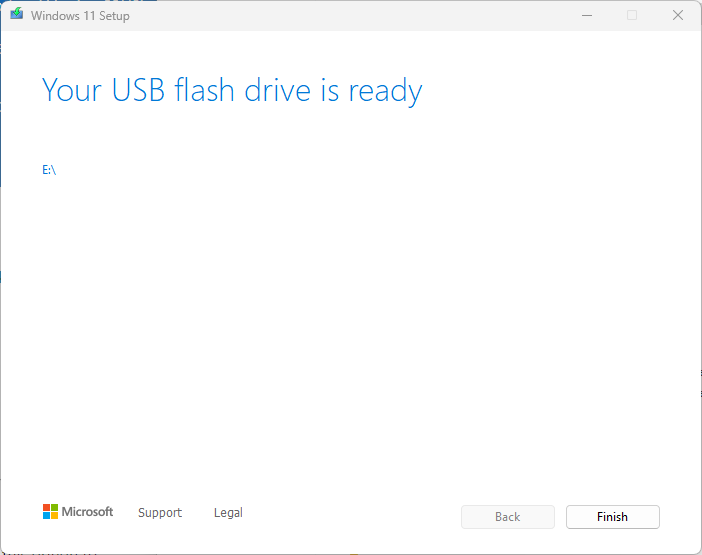
This can take a while, depending on the targeted device. I used a 2014 vintage Mushkin Atom USB 3.0 UFD, and it took about 10 minutes to get through the process. When the media is done and dusted, you’ll get a “ready” notification like this one:
When MCT finishes creating the media, it provides a “ready” notification. Click Finish to complete the job.
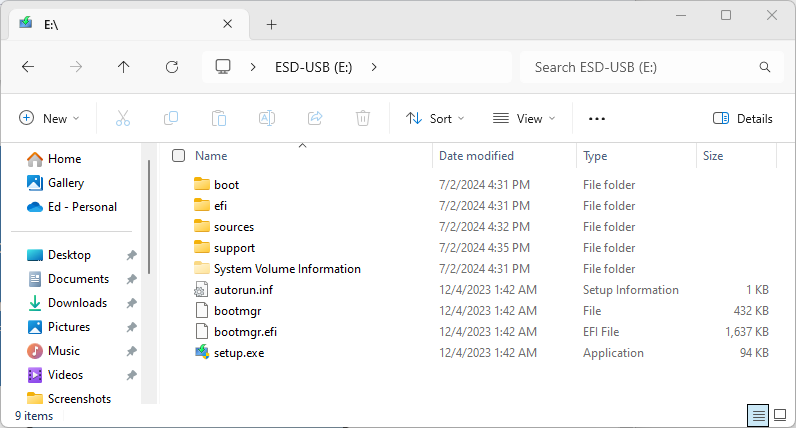
When you click the “Finish” button, MCT performs some miscellaneous cleanup tasks, then closes its window. You may now use the media you’ve just created. Here’s what it looks like in File Explorer:
Booting Your Windows Install UFD
As a Windows PC is booting, you may be able to interrupt the boot sequence before the Windows loader gets going by striking a function or special key on that machine. On my newer Lenovo PCs, the BIOS tells me that striking the proverbial “any” key will interrupt initial boot-up. If I take that route, I must then strike the F12 function key to get to an alternate boot menu. On newer PCs (less than 5 years old) it will probably be necessary to turn off Secure boot in the UEFI before you can actually target the UFD during the startup process.
If you can boot into Windows, you can force your PC to boot off the USB drive on restart. If search Settings for “Advanced startup” you can get to that setting which also features a “Restart now” button. Click that button, and your PC will restart immediately and offer the Recovery environment as an option upon start-up. Either way, as long as you’ve got the USB drive plugged into a USB port as the system restarts, you will then be able to boot from that device into WinRE. If you boot to this drive, you can also use it to perform a clean install of Windows on your PC by running setup.exe from the drive’s root folder. It will take over from there.
On the other hand, if you want to, you can upgrade and repair your PC using whichever version of Windows is present on your USB flash drive. Simply runsetup.exefrom the root folder to launch the upgrade process, and the software will take it from there.
Ed Tittel is a long-time IT writer, researcher and consultant, and occasional contributor to Tom’s Hardware. A Windows Insider MVP since 2018, he likes to cover OS-related driver, troubleshooting, and security topics.