The freshly released Raspberry Pi Pico 2 comes with two different CPUs onboard. A dual core Arm cortex M33 or a Dual Core RISC-V Hazard3, yes the first RISC-V product from Raspberry Pi! The latter CPU has a performance that falls somewhere between the older Raspberry Pi Pico’s dual core Arm Cortex M0+ and the new Arm Cortex M33. The RISC-V CPU was developed by Raspberry Pi employee Luke Wren as an interesting side project.
Right now there are two ways to use this new CPU, via the C++ workflow, and using a preview of the latest MicroPython firmware. We’re going to use the latest MicroPython firmware for RISC-V to show that it is as easy as the version of MicroPython used for the Arm CPU.
The goal of the project is to create a WS2812B “NeoPixel” light sequence, demonstrating that the RISC-V CPU is capable of handling the timing critical WS2812B protocol and producing a rather splendid “disco light” effect for the office.
For this how to you will need
Installing MicroPython for RISC-V on the Raspberry Pi Pico 2
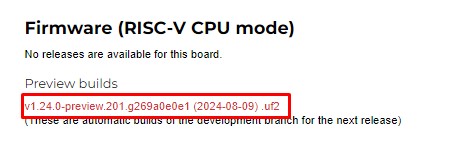
1.Download the RISC-V MicroPython UF2 filefrom theMicroPython resource.Ensure that you download the RISC-V preview. Note that as this is a preview, things are liable to break, so do not build any mission critical projects with this firmware.
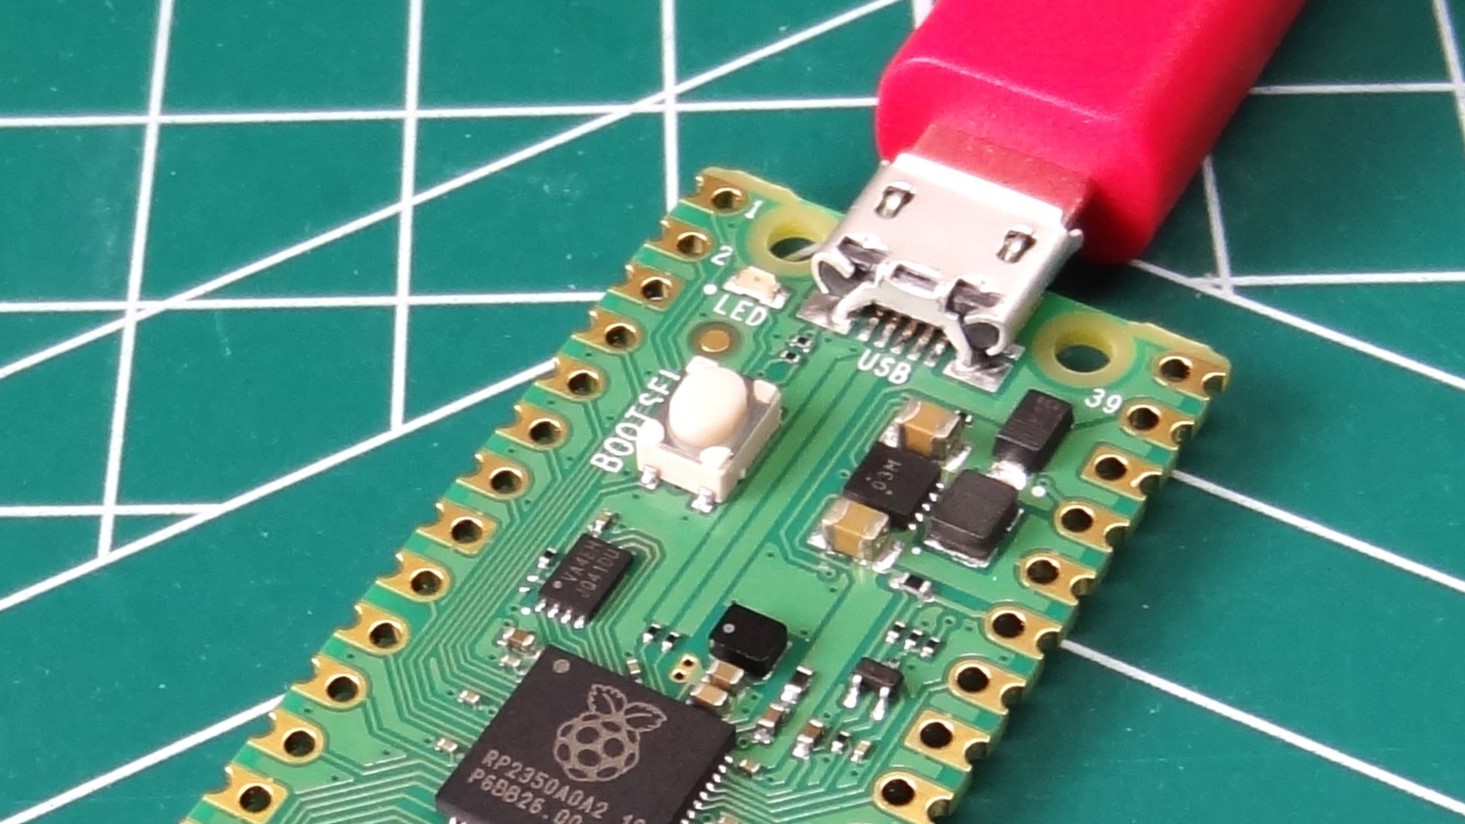
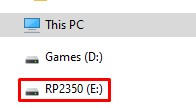
2.Push and hold the BOOTSEL buttonon the Pico 2, then connect to your computer using a micro USB cable. Release BOOTSEL once the drive RP2350 appears on your computer.
3.Drag and drop the UF2 fileonto the RP2350 drive. The Raspberry Pi Pico 2 will reboot and will now run MicroPython.
If you have never used MicroPython, it is a version of Python 3 developed for microcontrollers. If you may write Python, then you can write MicroPython. To write MicroPython code, we need to use a dedicated editor and the default, basic editor is Thonny which is what we shall use for this tutorial.
Get Tom’s Hardware’s best news and in-depth reviews, straight to your inbox.
4.Download and installThonnyfor your OS.
5.Open Thonny.
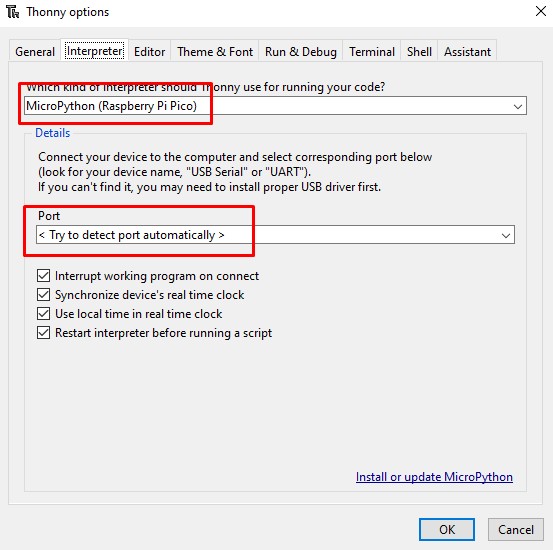
6.Connect the Raspberry Pi Pico2 to your computer and inThonny go to Tools > Optionsandclick on the Interpreter tab. From the interpreter, dropdown list select MicroPython (Raspberry Pi Pico). The port dropdown menu can be left to automatically detect the Pico.Click Okto close.
7.Check the Python Shell (REPL) for “Raspberry Pi Pico2 with RP2350-RISCV”to confirm that it has been installed correctly.
Building the Circuit
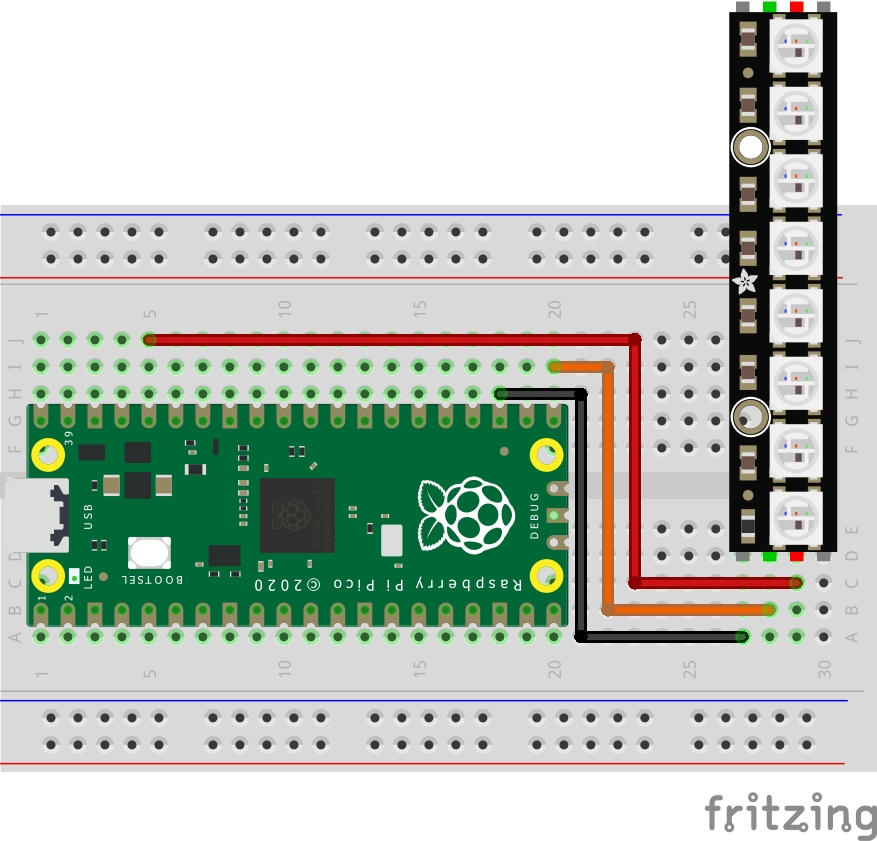
The circuit is a simple connection between the Pico 2 and the WS2812B “NeoPixels” that uses only three wires. We need connections for power and data.
You may need to solder header pins to your Neopixels, for that you will need the bestsoldering iron or soldering station, and a quick refresher onhow to solder.
Writing the code
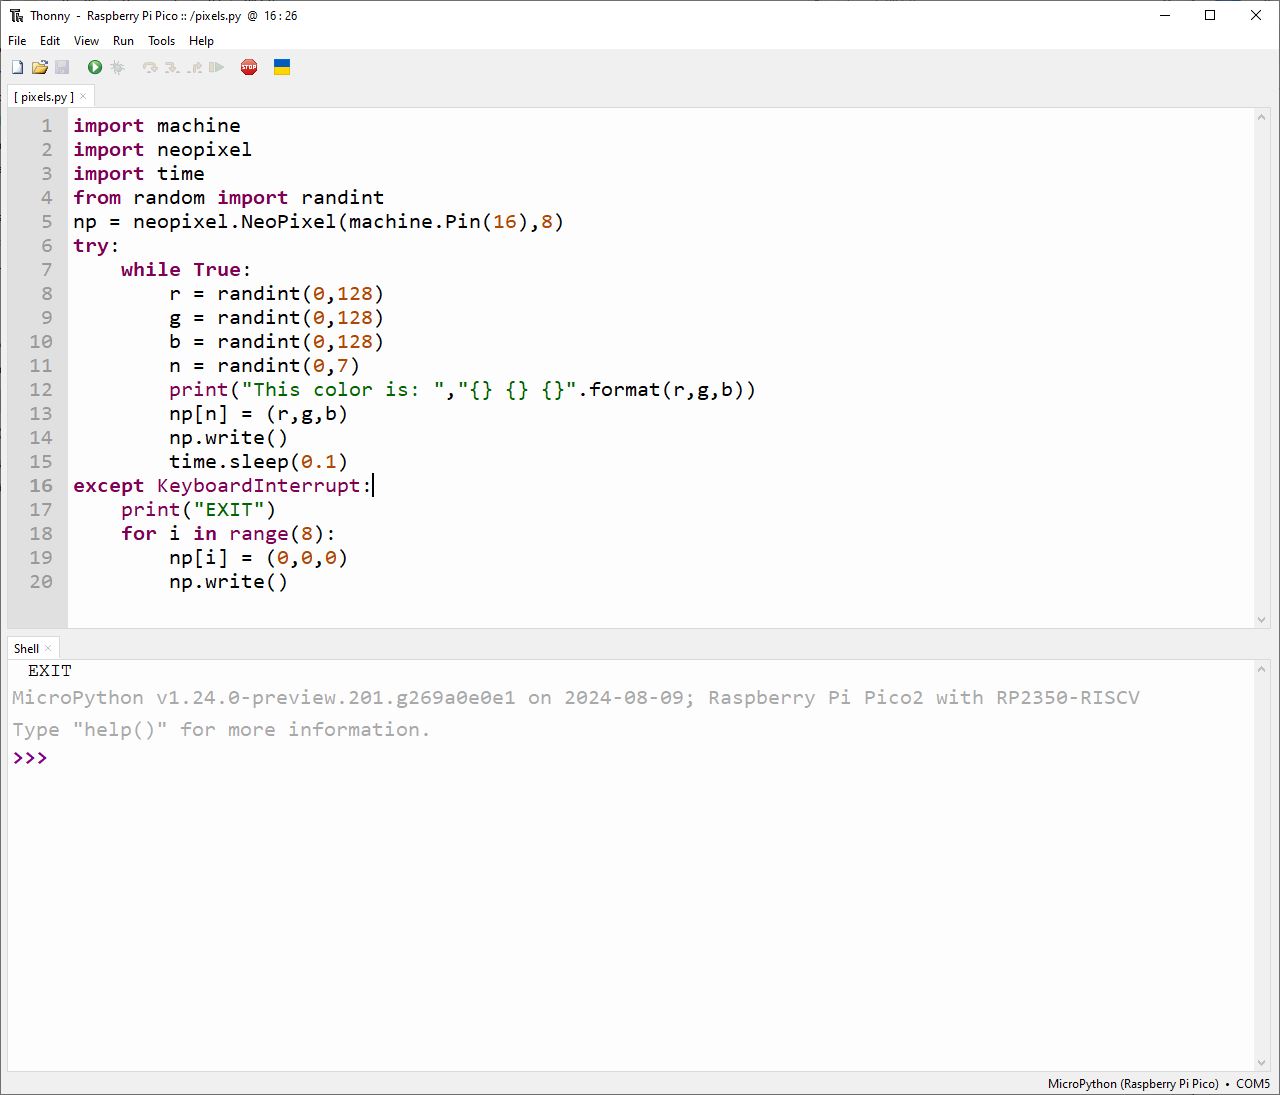
The goal of the code is to create a pseudo random light sequence along the full length of NeoPixels.
1.Create a new blank file in Thonny (File » New).
2.Import a series of modules (pre-written code.)The first is machine, this enables the code to talk to the Pico 2’s GPIO. Next is NeoPixel, an abstraction that makes working with the WS2812B RGB LEDs much easier. Then we import time, used to add delays to the code. Finally we import the random integer generator from the random module. This is used to generate random numbers in our code.
3.Create an object, np, and use it to tell the code that we have NeoPixels connected to pin 16, and that we have 8 “pixels” (individual LEDs) in the chain.Change this value to match how many you have.

4.Create a try, exception handling sequence.Essentially this tells the Pico 2 to try and run the code that is indented inside of it. If it fails, an exception is raised, and we will catch that later.
5.Indented to show that this is the code to “try” and run, add a while True loopto run the code forever. Thonny will auto-indent the code as we type.
6.Create four objects, r,g,b and n to store randomly generated numbers between a range of 0 and 128 (r,g,b) and 0 to 7(n, the number of NeoPixels in our chain, we have eight, but Python starts counting from zero.) The value 128 is half brightness for the NeoPixels. Youcanset this to be 255 for full brightness, but it does consume more power, and could affect those with photosensitivity.
7.Print the current color mix values to the Python Shell.This is the mix of R,G and B that makes up the randomly chosen color.
8.Set the value of the randomly chosen pixel (n) to the color mix stored as r,g,b using the np object that we created earlier.
9.Write the changes to the NeoPixels, and then wait for 0.1 seconds.This adds a short delay before the code goes back to the start of the while True loop and repeats the process.
10.Create the exception handler part of the code to detect when the user clicks Stop, or press CTRL + C.
11.Print a message “EXIT” to the Python Shell.This tells the user that the exception has been successfully raised and the handler process is now in control.
12.Using a for loop, iterating through all of the NeoPixels (8 for us). Set all of them to off, and write the changes to take effect.
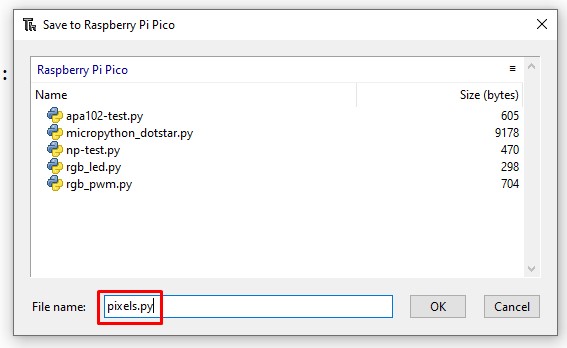
13.Save the code to the Raspberry Pi Pico 2 as pixels.py.
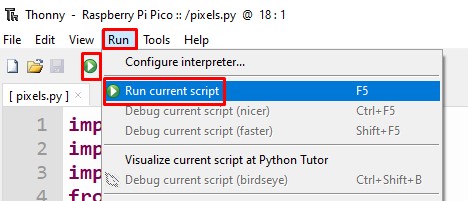
14.Click on Run > Run Current Script, or click on the green run button to start the code.
All of the NeoPixels in the chain should soon be a random color, changing every 0.1 seconds. The Python Shell will show the current color as an RGB value.
When you want to stop, click on the stop button, or press CTRL + C on the keyboard.
Complete Code Listing
Les Pounder is an associate editor at Tom’s Hardware. He is a creative technologist and for seven years has created projects to educate and inspire minds both young and old. He has worked with the Raspberry Pi Foundation to write and deliver their teacher training program “Picademy”.
