As the name implies, a cabinet (CAB or.cab) file is like a container for storing other files (usually.inf, .dll, etc). Developers prefer this format of file packaging because of its excellent compression ratio.
On the user’s end, a CAB File is typically used to manually update a driver or install a system update when the usual methods such as Windows Update don’t work. As for how to do this, it’s very simple.
you’re able to extract the CAB package and install it via Device Manager. Or, if you prefer the command line, you can use the DISM tool in CMD/Powershell. We’ve listed the necessary steps for all these and more in the guide below.
How to Install CAB File Using DISM
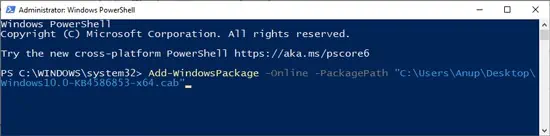
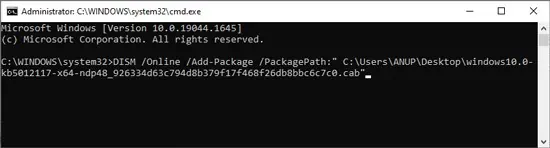
The DISM tool can be used to install a specified.cabor.msupackage to a Windows image. You can do this via Powershell or Command Prompt as you prefer.
Here’s how to install CAB files via powershell:
How to Extract CAB Package and Install Manually
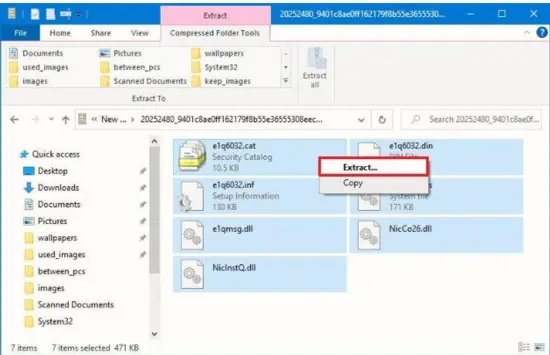
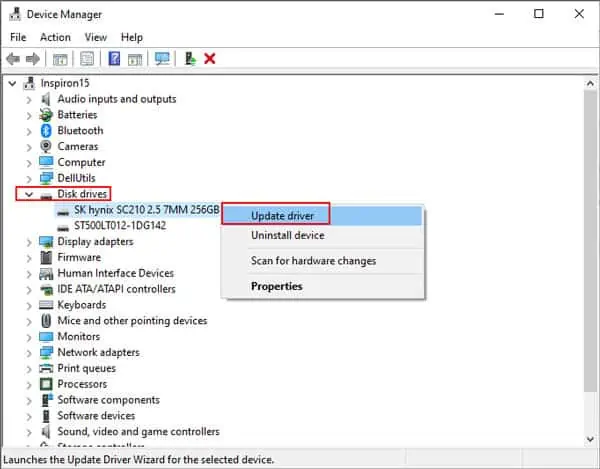
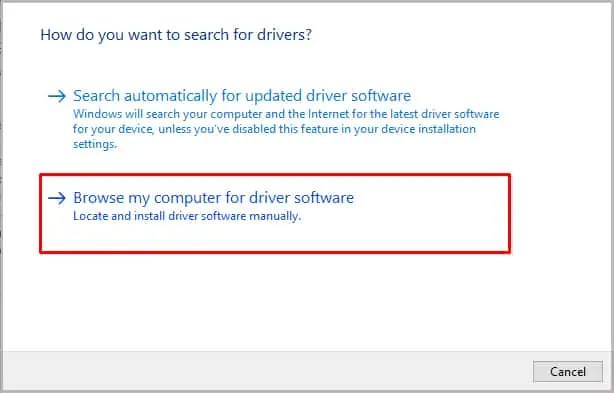
If the command-line method doesn’t work, you can extract the CAB package’s contents and try to install the file manually. Right-click the extracted.inffile and selectInstall. If no such option is available, follow the steps listed below to update via Device Manager:
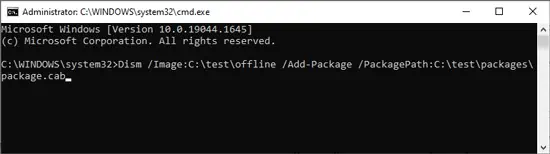
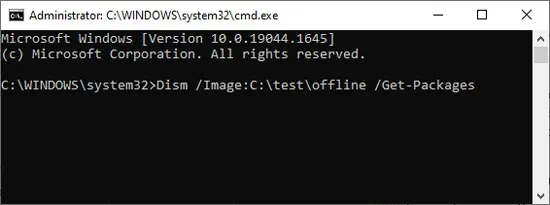
How to Install CAB File to an Offline Image?
Sometimes you’ll need to install a CAB file to an offline image, and an MSU package is only supported on offline images, to begin with. For such cases, here’s how to install CAB files to an offline image:
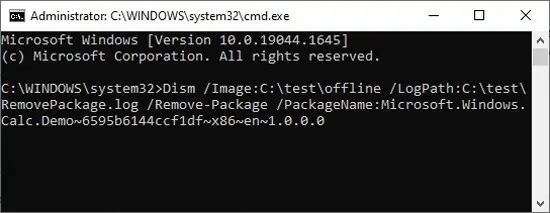
How to Remove CAB Package from a Windows Image?
You can use either thePackageNameorPackagePathswitches in conjunction with theRemove-Packagecommand to remove the specified .cab package from an image. Make note that this commanddoesn’twork for.msupackages. With that said, here are the necessary steps: