SSDs have certainly taken over traditional mechanical hard drives. But if you’re looking for a cheaper option that offers the same storage (or even better), installing an HDD wouldn’t be a bad idea at all.
You may opt for either aninternal or externalhard drive to expand your storage. However, the former would be the ideal choice if you seek better performance and longevity.

But when it comes to installing internal HDDs, normal users might find this a little tricky. Whether you want to replace your hard drive or simply wish to expand the storage, here’s a step-by-step guide on how to install one.
Step 1: Check Compatibility
The first question is—have you got the right hard drive? Just because you have an HDD doesn’t mean it’s compatible with your current setup.
As per my experience, the most common hard drive interface isSATA, and if I’m not wrong, you probably have the same. However, if you’re going to install a very old drive, yours could be aPATA/IDE(with 40-pin configuration) or evenSCSI(with 80-pin or 68-pin configuration).
You can even findSASandFEinterfaces which are both better than SATA but are rarely used. We shall discuss them in detail some other day. For now, I will be guiding you on how to install a SATA hard drive as it is the most commonly used.
Along with the interface, it’s also important to note the HDD’s form factor (in inches). In the past, 8, 5.25, 1.8, 1.3, 1, and even 0.85 inches HDDs were available, which have all now gone obsolete. Today, you’re only going to find two form factors—2.5 inchesmeant for notebook computers and3.5 inchesfor desktops.
However, it doesn’t necessarily mean you’re able to’t use either of them on your respective device. You may utilize the 3.5″ hard drive on your laptop as external storage if you have the appropriate connector but it might require an additional power supply (to support the 3.5″ HDDpower requirement).
To use a 2.5″ HDD on desktops, all you need is an appropriatemounting bracket,but note that this might not satisfy your needs.
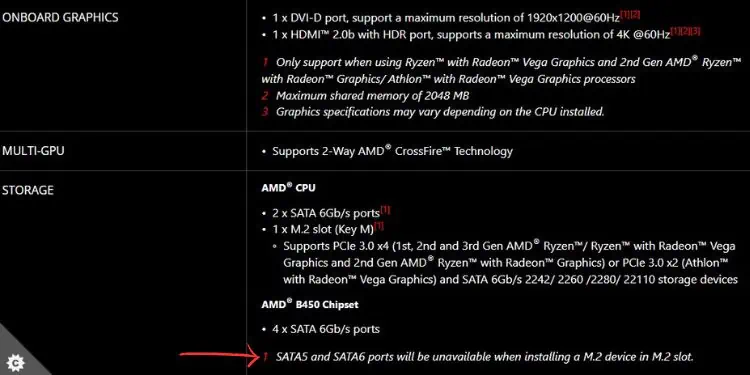
Moreover, some systems aren’t compatible with certain hard drives, or they provide additional notes regarding which slot should be avoided. For that reason, it’s always best tocheck your motherboard specificationsto know what’s right for you.
Looking at the specifications of MSI B450 TOMAHAWK above, there are six SATA III ports available. However, the last two becomes unavailable if you utilize the M.2 slot. This means if you connect the SATA hard drives on these slots with an SSD installed, they won’t be detected.
Lastly, I recommend adopting atrusted manufacturer’s HDDonly. These include Western Digital, Seagate, Toshiba, SanDisk, Kingston, etc.
Additional Tip:you’re able to utilize a PC-building utility (for example, PCPartPicker) to know which hard drive would best suit your setup.
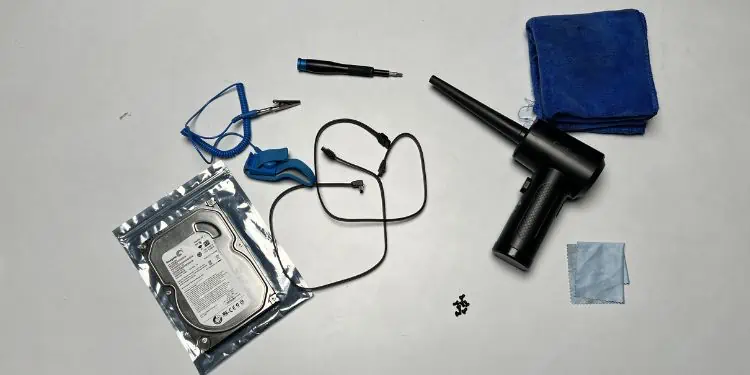
Step 2: Gather Tools
Once you have the appropriate hard drive based on your needs and specs, it’s time to gather the necessary tools:
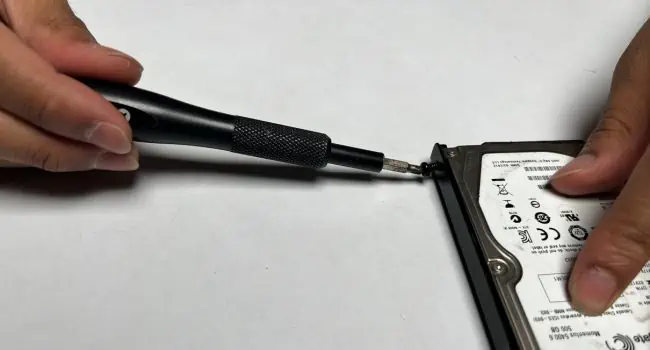
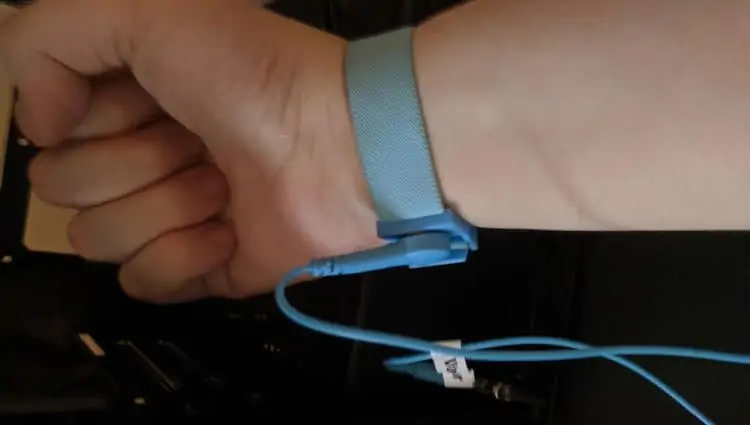
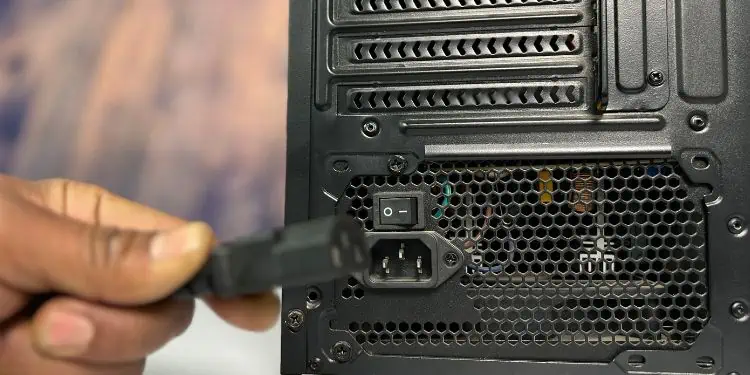
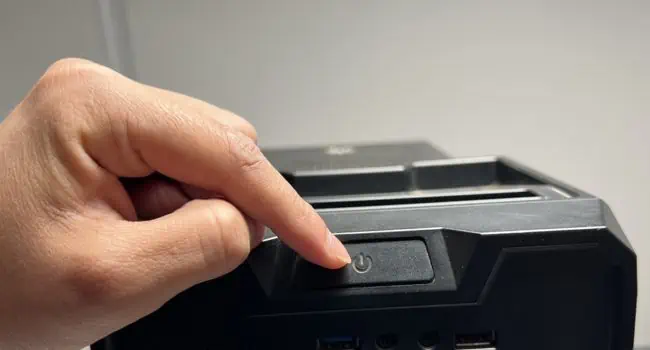
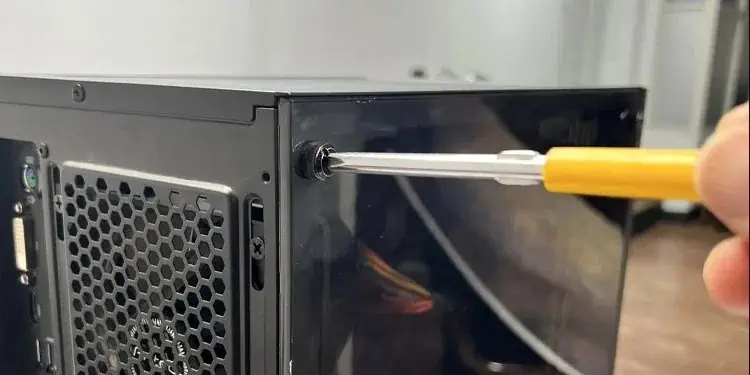
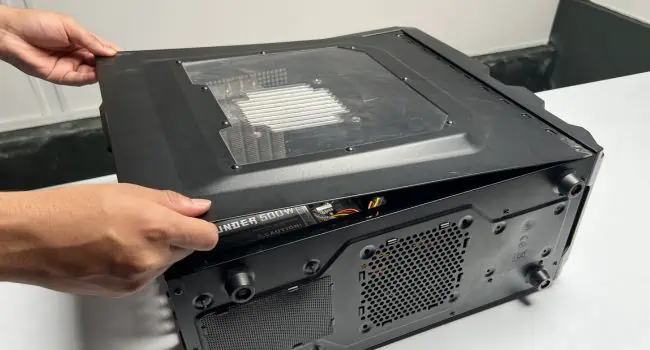
Step 3: Disassemble Parts
Let’s start by turning off the machine andopening the PC case. This should take no time if you tinker with your PC regularly. But if you’re a beginner, do not skip any instructions mentioned below:
Step 4: Remove Old Hard Drive [Optional]
This step is intended for those users who are planning to replace their hard drives. If you’re planning to simply add asecondary drivefor storage expansion, you may skip this and move on to Step 5.
Before you begin, ensure backing up your old hard drive or simplyclone itto the new one. If you opt for the latter option, your operating system files are also copied and you do not have to worry about its installation.
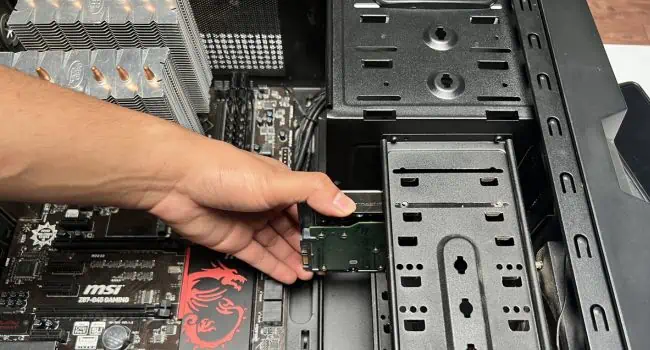
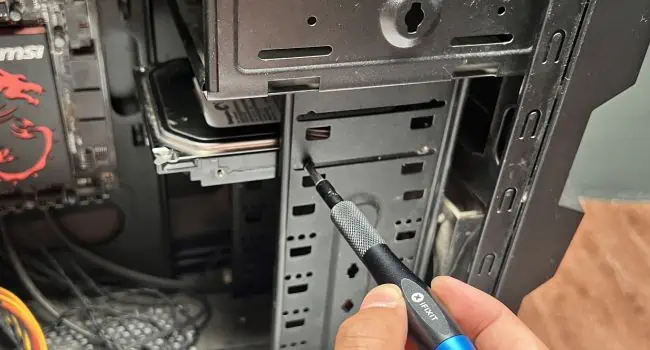
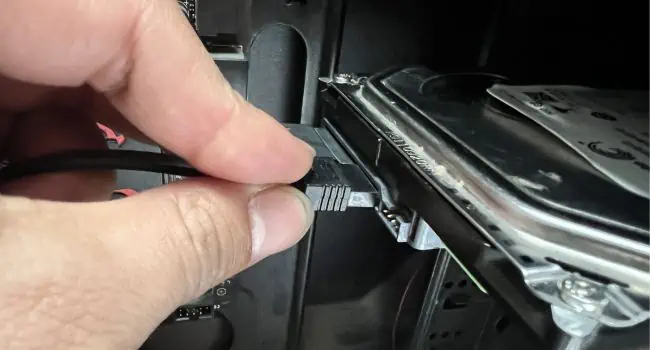
Step 5: Mount the New HDD
Here comes the vital step—mounting/installing the hard drive and connecting the cables. As mentioned earlier, I will demonstrate this for SATA hard drive. Don’t worry if you are using a different interface. The general idea for mounting is the same, with slight variation in cable connection.
Before anything else, identify the dedicated section for hard drive installation. In some PC cases, you need to mount it in thedrive bay,while in others it’s a different location (usually near the case fan and away from the motherboard). You may check the computer case manual for better inspection.
Step 6: Finalize Installation
The internal hard drives should be detected as soon as you connect them just like any other storage media. However, you can guarantee thisfrom BIOS(before even getting into Windows), and here’s how:
If you had cloned the hard drive (in step 4), you may now start using it without making any changes. However, for users who skipped that step, it’s time to finalize the installation by initializing the disk:
How to Install a Hard Drive on a Laptop?
Hard drive installation on a laptop is a much more easy process. In most modern notebook computers, you just need to slide the drive into the respective slot.
One drawback is that most laptops only come with one slot. Therefore, if you wish to expand just the storage, you need to either use a caddy or connect an external hard drive.
However, if you’re looking to replace the laptop’s HDD,here’s a step-by-step guidethat should help you out.