One of the major reasons for your laptop’s performance drop is low-capacity RAM. The more memory you have, the better you can multitask and large applications can also run smoother.
You might have already tried to free up RAM space, reduce its usage, or even increase the Virtual memory. However, all these approaches are not going to physically increase your memory. The only possible way is to get a new RAM stick.
Step 1: Check Laptop Compatibility
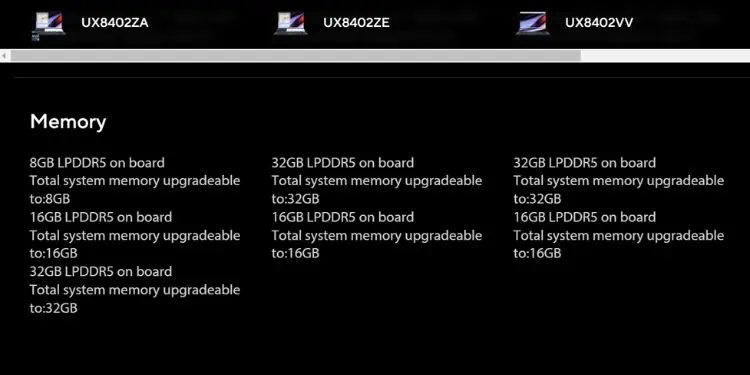
First things first, not all laptops support RAM upgrades. If your device has onboard memory (soldered into the motherboard) and there are no additional slots, it’s very likely that you may’t increase your RAM. However, some models with onboard RAM provide extra slots for upgrades.
It’s also essential to consider theappropriateDDR generation, maximum capacity, and frequencythat your laptop supports. All of these specs are clearly mentioned in the user manual or you can view them from the manufacturer’s online specifications page.
Moreover, yourOS also plays a vital roleduring RAM upgrades or replacements. If you’re running a 32-bit system, you should consider getting a single 4 GB module or two 2 GB sticks. But if it’s a 64-bit system like Windows 11, you can upgrade it to the maximum specifications of your laptop.
Contrary to what many people think,you’re able to use two or more memory modulesfrom different brands. As long as you use the correct form factor (usually SO-DIMM, but might be different on some laptops), generation (DDR3, DDR4, or DDR5) and speed, it is regarded as safe.

Since every module is built differently, manufacturers might be using different components (memory controller, materials, PCBs, etc.). Also, voltage, frequency, and latency mismatches could cause conflicts if you try customizing them. In fact, many users have complained about facing booting issues and crashes. That’s the reason most professionalsrecommend using sticks from the same brand.
Step 2: Get a New RAM Stick or Kit
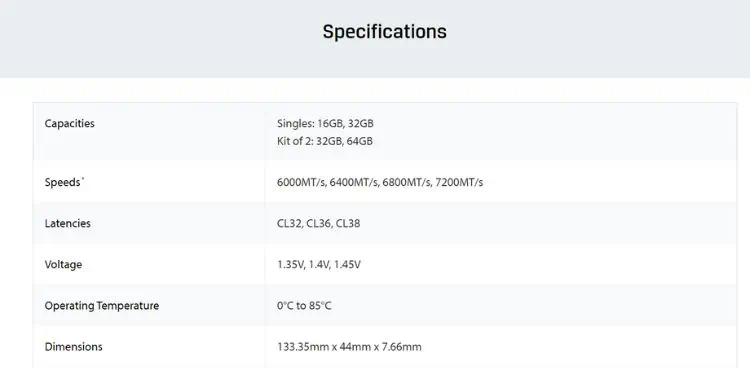
Considering the above specifications, you may proceed to get a new memory module. If your laptop supports single-channel RAM, the only option is to upgrade it with one with a higher capacity. Also, if you already have two sticks installed, you maypurchase a RAM kit(two modules with the same memory batch, which is indeed the best match!).
However, if you only have one RAM and wish to add an extra module in the second channel, you’ll need to ensure they arecompatible with each other. For this purpose, you can simply look up your primary stick’s specifications online and get a similar module.
When getting a new RAM stick or a kit, verify you purchasetrusted brands, like Kingson, Corsair, and Samsung.
Note:Some RAM manufacturers, like Kingston, allow you to search for compatible memory for your laptop and even offer a dedicated page to know where to get them based on your location.

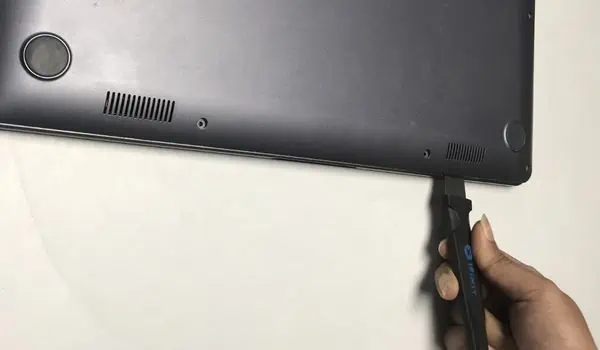
Step 3: Shut Down & Open Bottom Panel
After getting the compatible RAM modules, you can finally start the upgrade. But even before that, you need toshut down your laptop properlyand navigate to the RAM slot, which is usually underneath the bottom casing.
Note:Some older laptops have a dedicated section for your hard drive and RAM. If that’s the case, you do not require prying out the bottom panel. Instead, just open up the dedicated section to get to the RAM slot.

Step 4: Locate Slot and Remove Old RAM Modules
Once you’ve opened the bottom panel, you can now remove the presently installed module from its dedicated slot. But there are certain things to consider before doing that, and here’s a detailed guide on it.
Important:Before touching any internal component inside the laptop, verify youground yourselfto prevent ESD to cause damage. you’re able to do this by wearing an anti-static wrist wrap or touching a grounded metal object when operating the laptop.
Step 5: New RAM Installation
Now that the old RAM sticks are removed, you can now proceed to install the new modules. But you need to know that your laptop’s inner section builds up dust and debris if you haven’t cleaned it before. Therefore, before the installation, we recommendcleaning the slotswell.
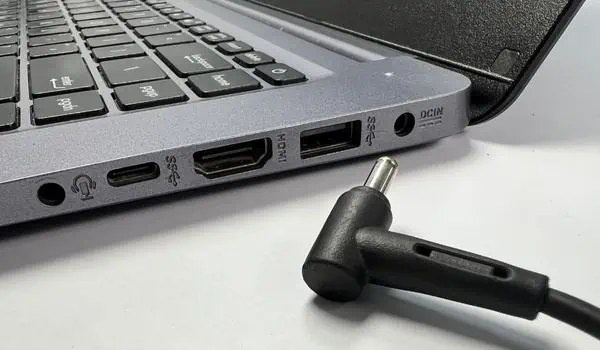
Step 6: Close Bottom Panel & Start Laptop
The next step is to reassemble your laptop parts. You need to reattach the internal battery cables, close the casing, reinsert the external battery (if available), and finally start your device:
Step 7: Test Your RAM & System Performance
You’re just not done yet! After the installation, it’s essential to know whether the upgraded RAM is nowdetected by your system. In case you’re having issues, your system may encounter booting issues.
Also, consider checking theRAM speed, capacity, and latencyto ensure you’re achieving what you have paid for. Navigate to Windows Task Manager and check all these parameters. You’ll also notice there’s quite an improvement as the active processes will only take a small percentage of the physical memory.

You might notice that your memory frequency is lower than advertised. If your laptop supports overclocking, you might want toturn on the XMP profileto achieve the best out of the RAM. But do thisat your own riskas it will void your warranty and may cause overheating and stability problems.
Additionally, we recommendperforming a stress testto ensure your memory is stable even after a heavy workload. To learn more, here’s a detailed guide onwhat you should do after installing or upgrading your memory module.