It is very common for printers to generate misaligned or skewed texts over time. It generally happens due to the mispositioning of the printhead. Sometimes, you might even encounter printouts with overlapping texts or cut-off margins.
When you face such issues on your printer, you can fix the problem by simply using the printhead alignment tool integrated into the printer driver or navigating through the maintenance options on the printer’s LCD control.

Before you begin, load some unused papers in the input tray and make sure there is enough ink on the printer.
Fix Printer Alignment On HP Printer
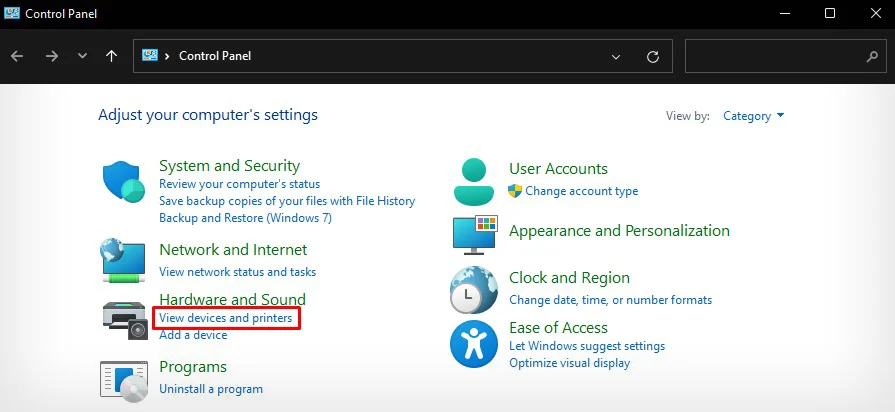
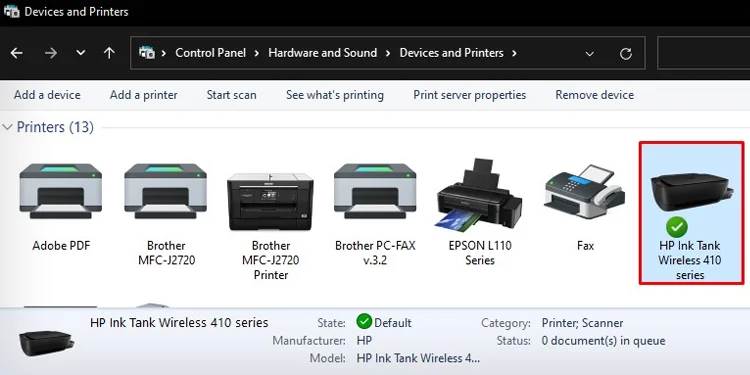
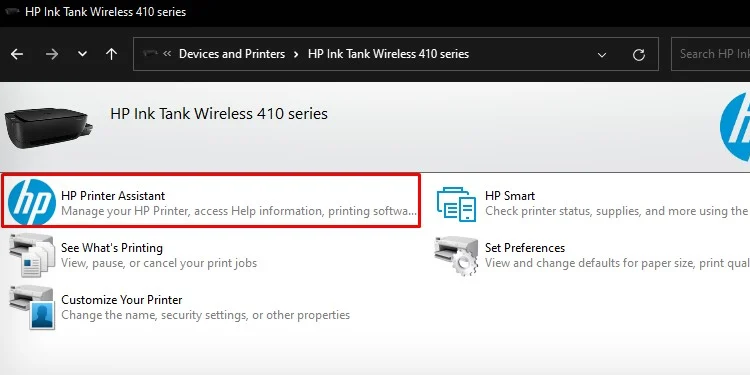
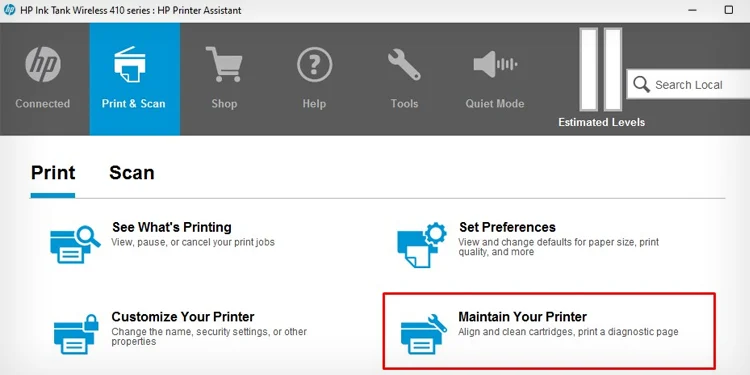
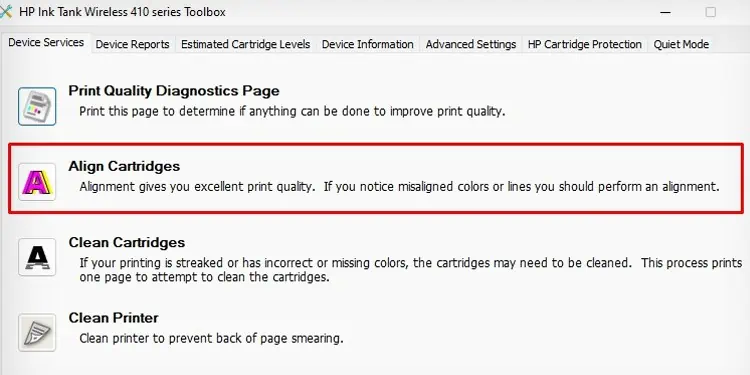
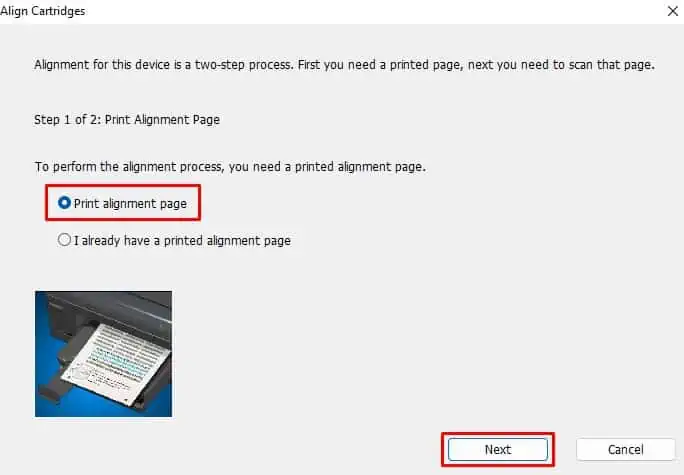
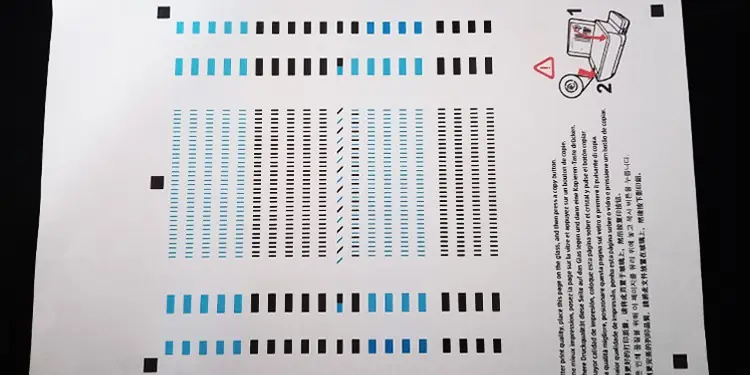
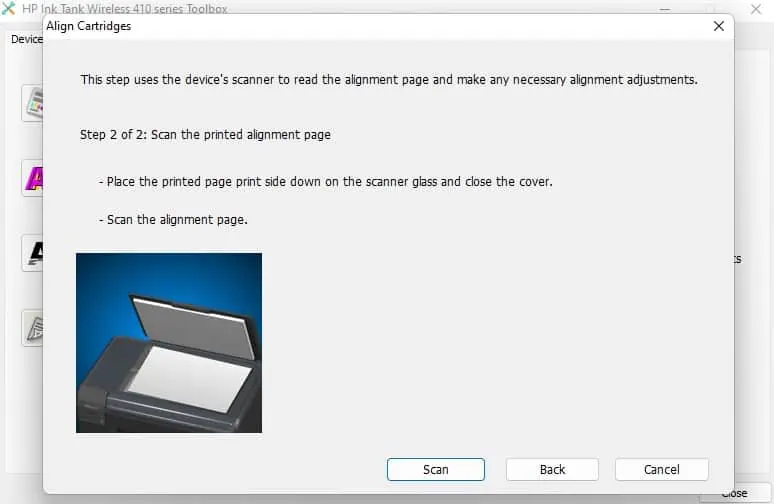
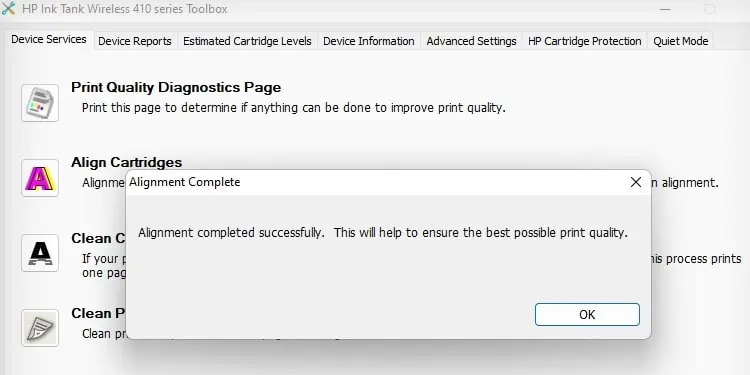
If you own an HP printer, you’re able to basically use two methods to fix printer alignment—the HP assistant tool and the printer’s LCD screen. Let’s check them out one by one.
Using Printer’s Screen
Fix Printer Alignment On Canon Printer
Depending upon the model of your Canon printer, there are multiple ways to fix the printer alignment. In some models, you may simply use a combination of a few buttons to perform the alignment. At the same time, others may require you to use the printer driver or the LCD control panel.
Using Printer’s Button
Fix Printer Alignment On Epson Printer
Most of the Epson printers come without a screen. So, using the printer driver would be a good option to fix the alignment. However, you can also use the screen if your printer has one.
Fix Printer Alignment On Brother Printer
Since most of the Brother printers come with a screen, you’re able to easily navigate through it to align the printheads. If not, you can use a combination of a few buttons to accomplish the job.

![]()
