Sometimes, the internal microphone on a Dell laptop or even an external one can fail to record any audio. This issue usually happens because of improper audio configuration or driver issues. But it can also occur if the microphone hardware itself is damaged.
You can easily fix the software issues through the Windows settings and some other applications. But for hardware issues, you will likely need to replace the device.
Power Cycle Laptop
First, try power cycling your laptop by shutting it down, removing the batteries, and holding the power button for 20 seconds. Doing so will remove any stuck charges from your hardware components and properly refresh them.
If any temporary or power issues were preventing the microphone from working, this process would fix it.
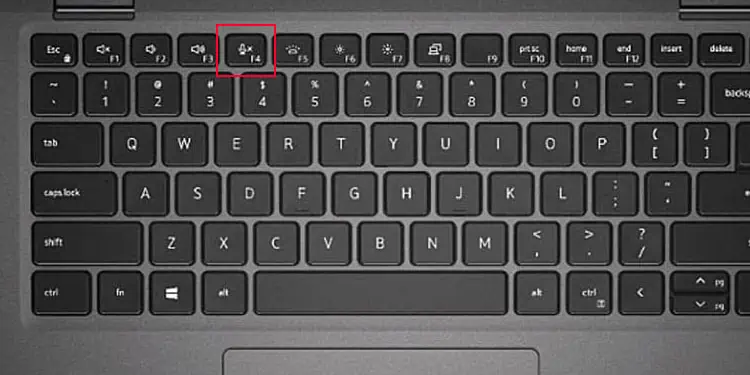
Make Sure the Microphone is On
Some Dell laptops contain a keyboard shortcut to mute and unmute the Microphone, usually the F4 key. It might also contain an indicator that lights up when the device is off or muted. So, press the key or Fn + the key if the indicator is on.
If you are using an external headset or microphone, you need to similarly check the device for any On/Off switch and use it. Then, change the ports or connect the mic/headphone to another device. Some microphone connectors require the standard microphone ports (pink) or a mixed port (black).
Also, you need to pair and connect to a Bluetooth device before you can use it.
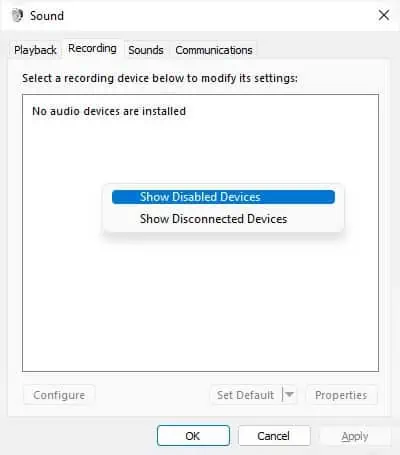
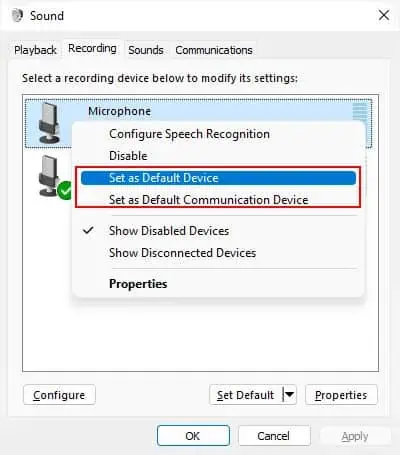
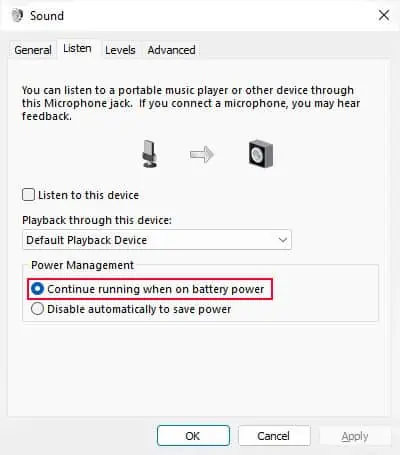
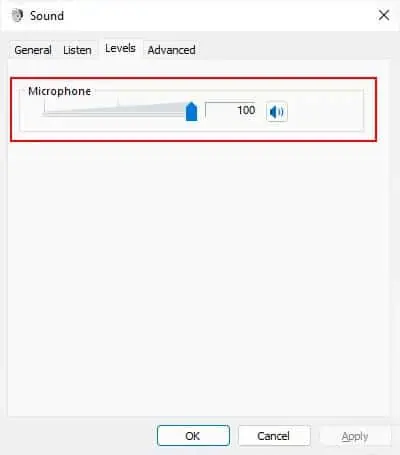
Go Through Microphone Settings
Now, you need to look through the microphone settings and see if your system is actually using it as the default recording device. You should also check the volume and other settings at the same time.
Some applications can override your system Microphone settings. So, you should also check their in-app microphone settings and make sure everything is alright.
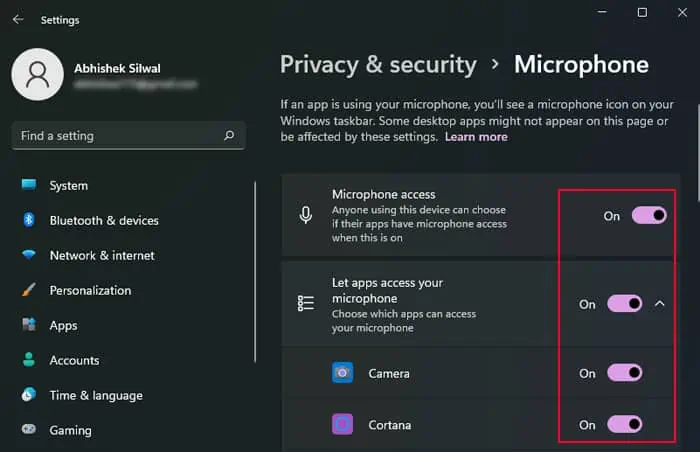
Give Access to the Microphone
It is also possible that your system is restricting access to the microphone for security reasons. You need to check and change such settings in this situation.
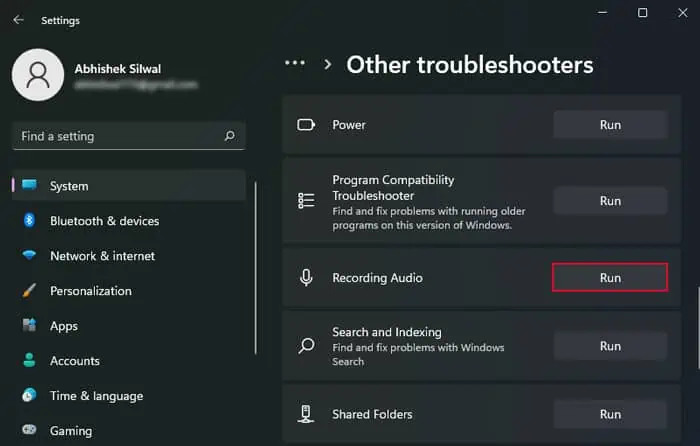
Run Microphone Troubleshooter
You can also try running the Recording Audio troubleshooter on Windows. It detects most of the common issues with the microphone and attempts fixing them. Even if it can’t fix them, it will tell you the nature of any problem that it successfully detects.
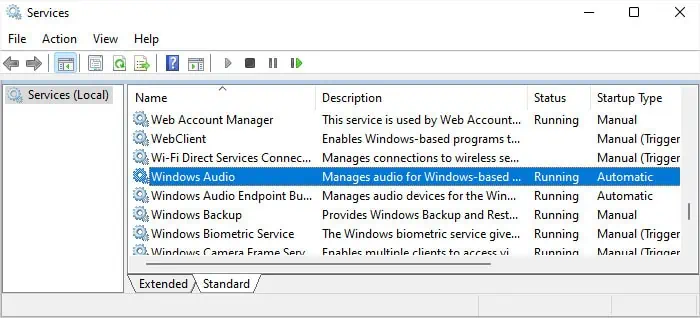
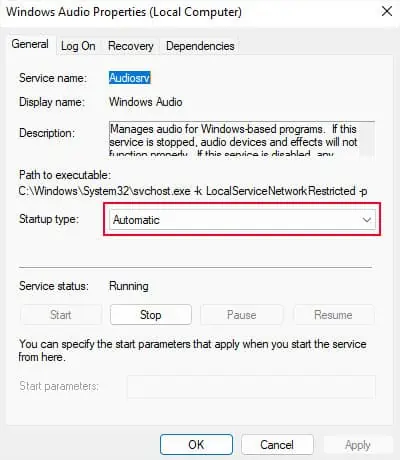
Restart Audio Service
Both playing and recording audio requires the use of Windows Audio service. So, you should check if this service is running or not. Even if it is currently running, you should restart it to refresh the service and resolve any temporary issues with it.
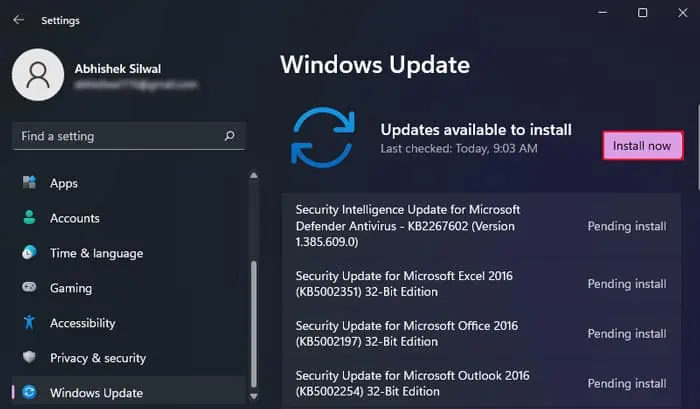
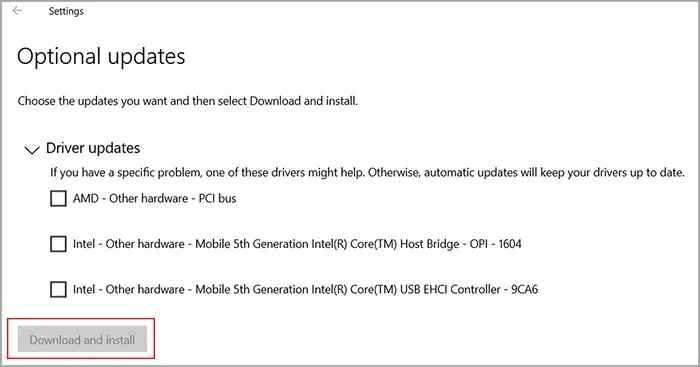
Update Windows OS and Drivers
Outdated or buggy system files and audio drivers can also prevent the microphone from working properly. So, it’s best to keep Windows and your driversfully updatedin order to prevent such issues.
First, disable some third-party antivirus in case they block the installation of the update. Then,
You can also look for any audio or microphone driver updates from Dell or the manufacturer’s website and install them manually.
Set Audio Device as Headset
If you have Realtek audio drivers on your system and areexperiencing this issue on a headset, your system may be treating the headset as just a headphone. You need to check this configuration on your Realtek Audio Console.
If you have the Realtek HD Audio Manager and not the console, you need to double-click the circle under Audio to change this setting.
Run Dell SupportAssist Diagnostic
Dell’s support app, the Dell SupportAssist, also includes the option to check and fix any hardware or software inconsistencies in your system. So, you can run this application to troubleshoot your microphone.
If this program fails to resolve the issue, you will likely need to replace the internal microphone device. We recommend seeking help from Dell support or service centers to check and replace the component.