If your MSI system has a processor with integrated graphics, you can select the graphic adapter to use, set the amount of shared memory, manage multi-monitor output, and more.
You can configure all such iGPU-related settingsfrom the Integrated Graphics Configuration section of the MSI BIOS. Sometimes, these options may be missing though.

So, I’ll cover the full steps to enable/disable integrated graphics on MSI boards, and what you can do if the integrated graphics options are missing in this article.
Boot to MSI BIOS
Power on or restart your PC and pressDel/F2toenter the MSI BIOS.
Sometimes, the BIOS key may not work due to settings likeFast Boot. In such cases, use the restart button to reboot your PC 3 times in a row.
Your system will boot to therecovery environment. There, selectSee advanced repairoptions>Troubleshoot>Advanced Options>UEFI Firmware Settingsto get to the BIOS.
Configure Integrated Graphics
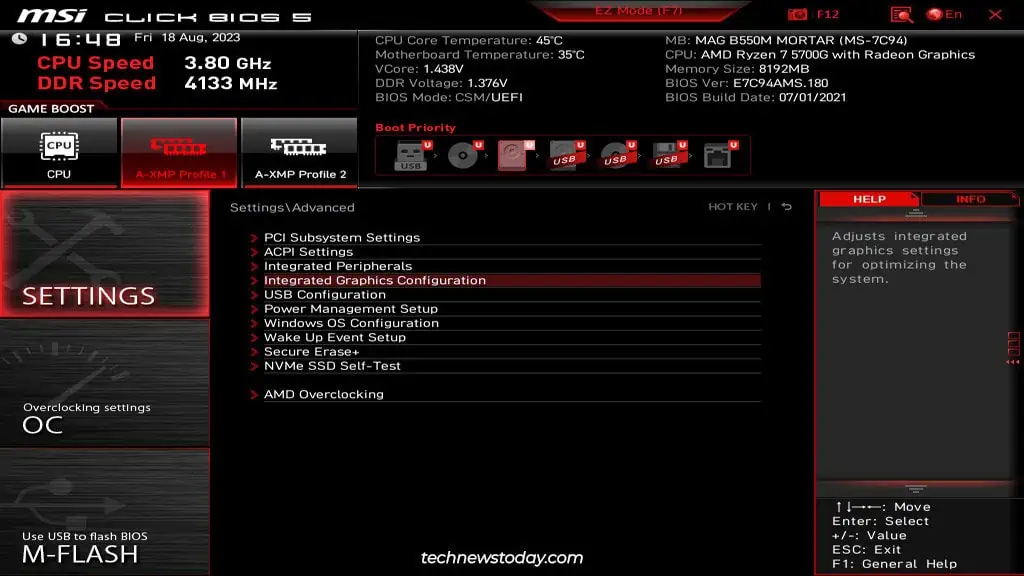
you may start by simply enabling or disabling Integrated Graphics as you see fit. PressF7(if required) to switch toAdvanced Mode. Then, go toSettings>Advanced>Integrated Graphics Configuration.
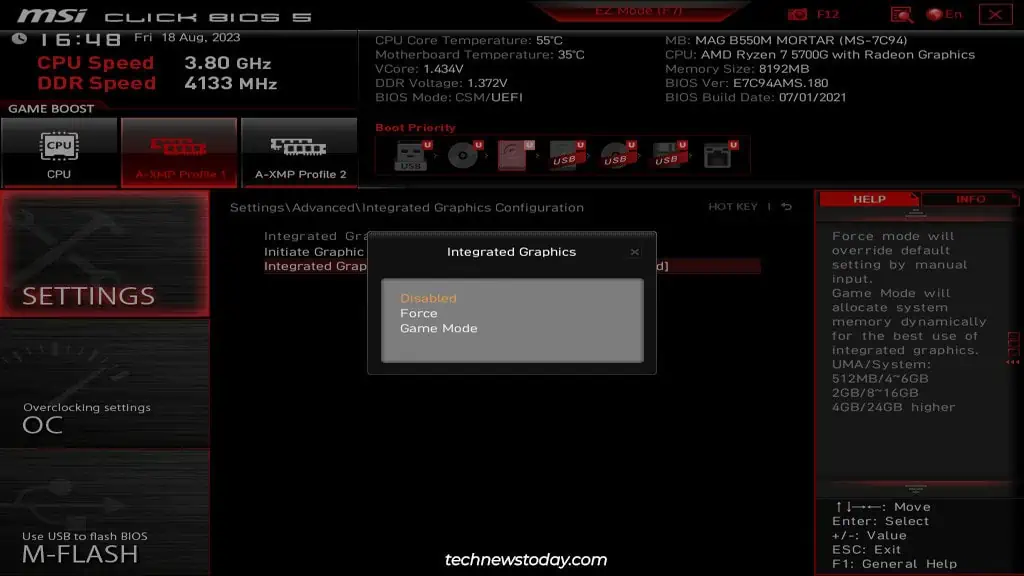
Disable Integrated Graphics
If you don’t have an external GPU, the BIOS typically won’t let youdisable Integrated Graphicsregardless of the settings you change. But assuming you do have a dedicated GPU, you can use one of the following methods to turn it off:
Afterward, pressF10to save the changes and exit the BIOS.

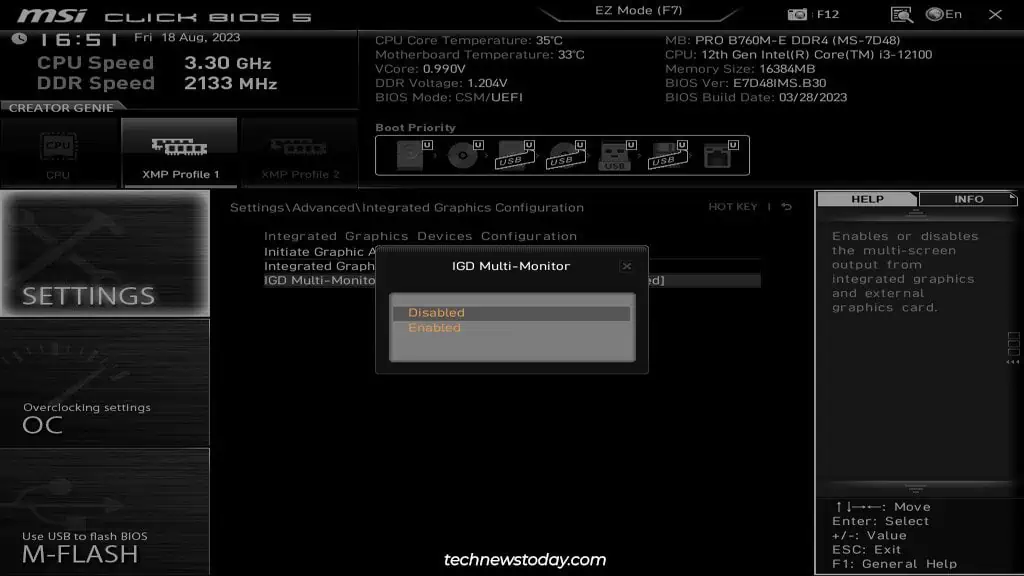
Enable Integrated Graphics
First of all, use the following settings to enable Integrated Graphics:
Then, pressF10to save the changes and exit the BIOS.
If you set Integrated Graphics to manual configuration, you can additionally set theUMA Frame Buffer Size. Some boards provide theIntegrated Graphics Share Memoryoption instead of this.
This basically determines how much system memory is reserved for the iGPU. You can leave this toAutoor set the value manually.
For the latter, there’s no practical lower limit as even if you allocate a very low amount of RAM, the system will dynamically increase the value as required. But there is an upper limit and it varies on your total system memory.
For instance, if your system has 8 GBs of RAM, you shouldn’t allocate more than 2 GBs for the onboard graphics. Any more is likely tonegatively impact overall system performance.

What If Integrated Graphics Configuration Is Missing
The Integrated Graphics option missing from the MSI BIOS is a very common problem. The iGPU can be configured in multiple ways, as I’ve shown in the earlier sections, so make sure you’ve tried all those first.
Besides that, there are two main reasons why the integrated graphics option may be missing from your BIOS.
BIOS Version
Sometimes, boards only fully support a CPU after flashing arecent BIOS version. Even if your PC boots with a processor, you may not be able to configure some features like integrated graphics until you update. So, if you haven’t updated the BIOS in a while, now would be good time to read the changelogs andupdate if required.
CPU Support
The second reason is that your CPU doesn’t support integrated graphics. This is surprisingly common.
AMD processors with integrated graphics are calledAPUs (Accelerated Processing Units). These use the G suffix (e.g., Ryzen 5600G). Aside from the G-series, the PRO series also include Radeon Graphics (e.g., Ryzen 7 PRO 7745).
Intel’s naming scheme is not as straightforward as AMD’s. So, I recommend checking outIntel’s processor listas that’s the easiest way to confirm whether your CPU supports integrated graphics. You can check theProcessor Graphicssection in this list, or you can check your CPU’sProduct Specificationspage.
