The CSM feature on ASUS motherboards and laptops enables legacy BIOS comptability. It allows your ASUS system to boot and install older operating systems that do not natively support UEFI.
However, there’s acertain trade-offas launching it may deactivate certain UEFI-based security features.

While the process seems easy, the setting was unconfigurable on myNX580VDlaptop. If something like that happens to you, I advisedisabling the Secure Bootoption first, which is exactly how I was able to solve my problem. Let me guide you through the step-by-step process.
Access UEFI BIOS Utility
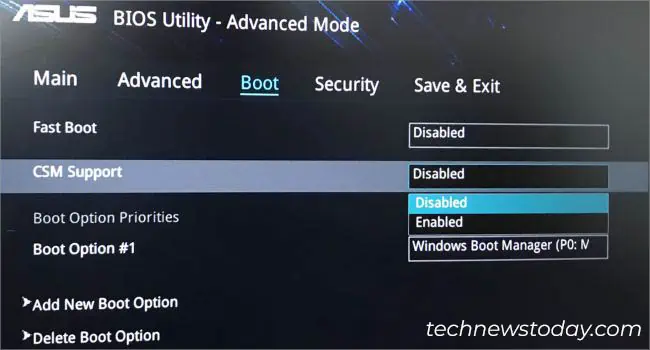
CSM, a feature within the UEFI settings canadd backward compatibilityto certain legacy components.
But don’t get confused–it will not completely change your BIOS to Legacy mode. Instead, it’s just going to create an emulation of the Legacy environment.
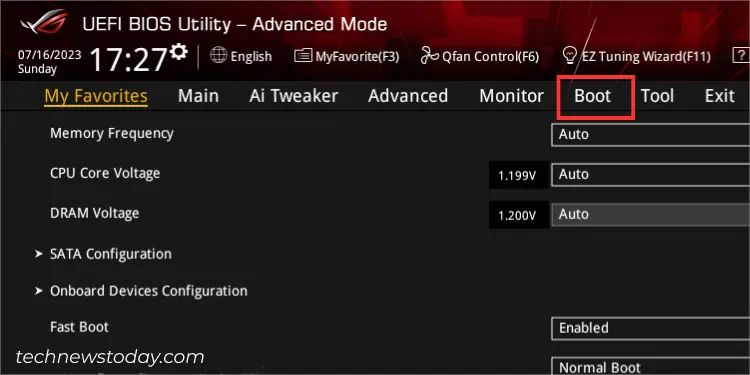
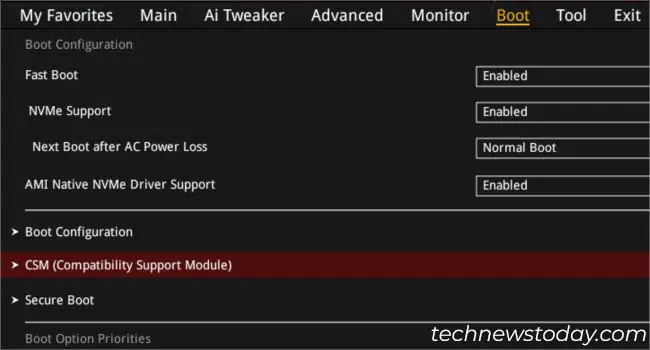
Having said that, the first step towards tweaking CSM settings in ASUS (or any other motherboard) is reaching the UEFI interface:
Tweak CSM Settings
Now that you’re on the UEFI screen, the next step is to find the dedicated CSM settings page and configure your desired changes.
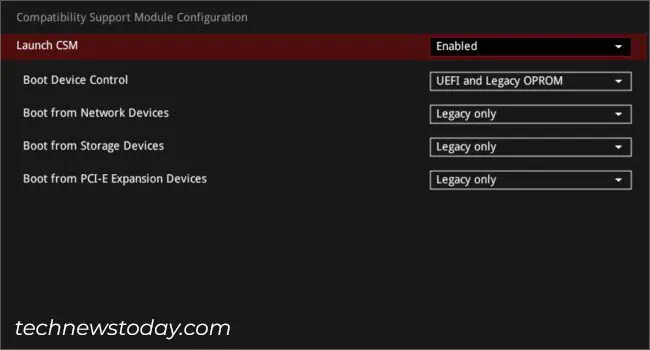
If you enable CSM, most modern ASUS motherboards let you manage additional boot options. These includemanaging storage/network/PCI-E expansion devicesand settingboot priority.
Note that disabling CSM might lead to booting issues if yourPCIe-based storage devicesdo not contain aMicrosoft-signed UEFI driver. You’ll even get a related notice if you’re using a recent AMI BIOS version.
In short, enable CSM if you’re seeking legacy compatibility and leave it disabled for full support of UEFI security features.
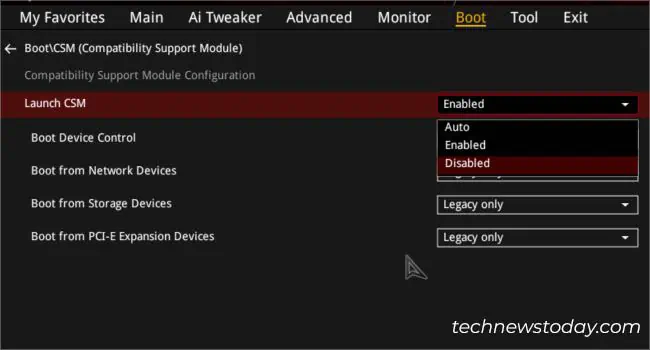
Also, you may opt forAuto, which automatically detects thelegacy/UEFIstate of your devices and sets the CSM support accordingly.
Additional Tip:Turning onReSize Bar Supportutilizes the full capability of your GPU memory. If you want to do this, get to the dedication option in the status menu bar (near the Search button).However, this feature will automatically disable CSM. Also, the option is not available on every ASUS model.
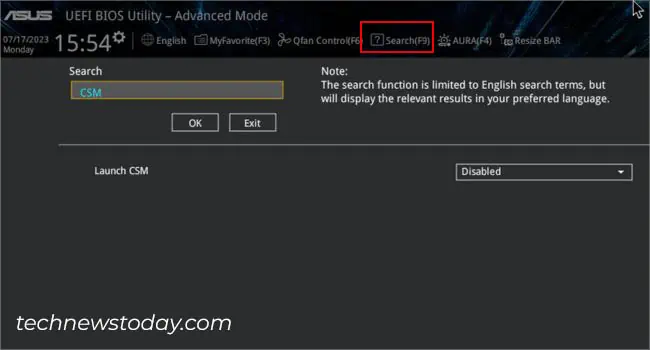
A much quicker way to configure CSM settings is by using the Search functionality. you’re able to execute the following instructions even on the EZ Mode:
Disable Secure Boot [Optional]
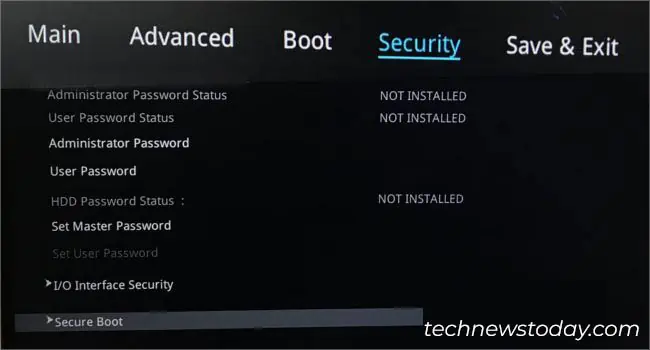
Note:Skip this step if your CSM option is not greyed out.
If the CSM option is non-configurable (greyed-out), it can indicate two things–either yourmotherboard/laptop doesn’t support itor you need to make modifications at thehardware or firmware level.
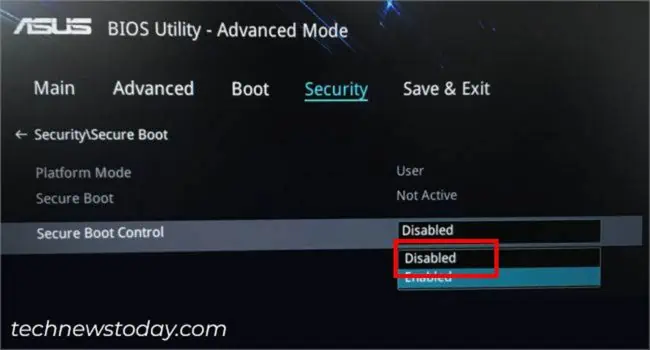
In most ASUS laptops, you can fix this by disabling the Secure Boot option. Since it is one of the advanced security functionalities, yourUEFI firmwareis likely restricting you to configure the CSM option.
Warning:Disabling Secure Boot will prevent your operating system’s digital signature to be checked. So, you might be vulnerable to malware and unauthorized access to the device.
However, this isn’t always the case. I was able toenable the Secure Bootoption even when my BIOS mode was set to CSM. With most modern ASUS motherboards, this might be possible.
In case the above instructions didn’t help, I recommend examining yourmotherboard’s user manual. Identify whether the CSM can be configured with the integrated graphics card. If not, you need to use an add-on graphics cardthat supports UEFI VBIOS.
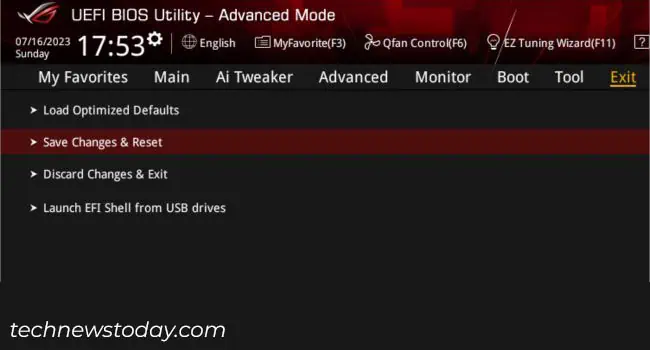
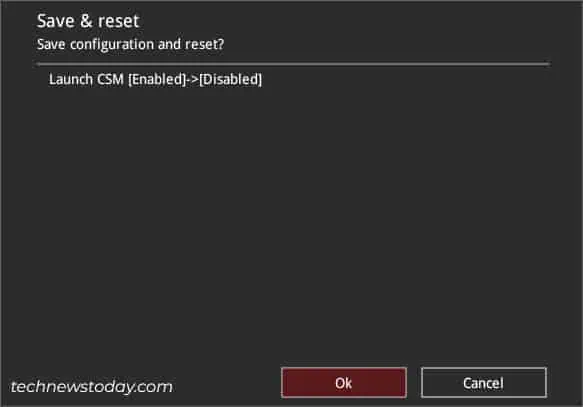
Save Changes and Verify
After configuring CSM mode to Enabled/Disabled/Auto, don’t forget to save the changes before youexit from BIOS. As a final step, make sure you verify the changes as discussed below: