Microsoft Hyper-V is a native hypervisor that can create virtual machines on x86-64 systems running Windows. Starting with Windows 8, Hyper-V has acted as the hardware virtualization component of Windows.
Hyper-V lets you create a virtualized computing environment where you may create and manage virtual machines.
Hyper-V is available as an optional component of Windows. It is also available as Hyper-V Server, a standalone freeware, with limitedWindows Serverfunctionality and Hyper-V component.
Applications of Hyper-V
As discussed above, Hyper-V lets you create and run a software version of a computer, called a virtual machine. You might want to create and run a virtual machine for the following reasons:
Checking Hardware Compatibility to Run Hyper-V
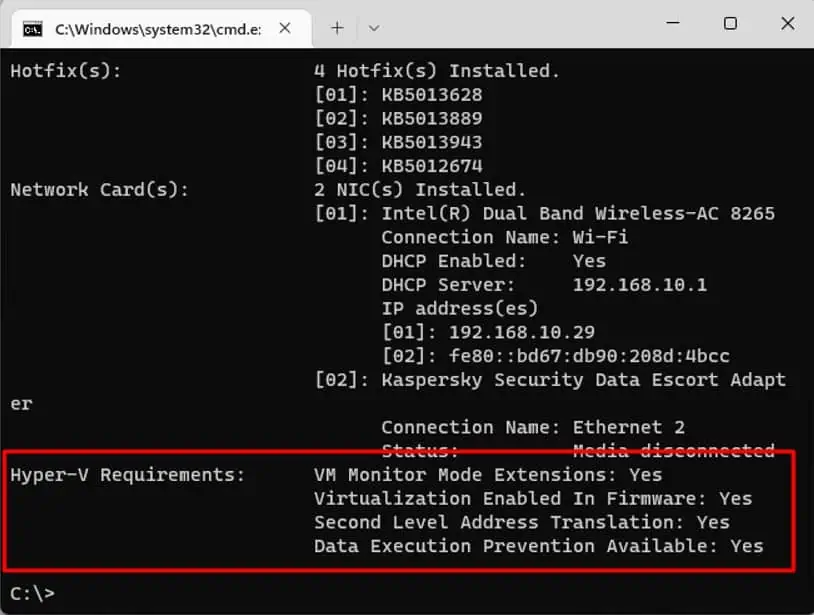
To run Hyper-V, you will need a 64-bit processor with Second Level Address Translation (SLAT). Your CPU must also support VM Monitor Mode Extension (VT-x on Intel CPUs, and AMD-V on AMD CPUs). Make sure your system meets Hyper-V’s system requirements.
You can find out whether your system is compatible with Hyper-V. To do so, please follow the simple steps outlined below:

If all listed Hyper-V requirements have a value ofYesthen you may run Hyper-V. However, if any of the values areNothen you need to rectify the situation before you can run it.
You will also need to enable virtualization in the system BIOS. If you do not knowhow to turn on virtualization in BIOS, worry not because we have just the article for you.
Enabling Hyper-V in Windows 11
Now that you have ascertained you meet the system requirements for enabling Hyper-V and that virtualization is enabled in your system BIOS, we can go about enabling Hyper-V.
Below we have outlined a few different methods to enable Hyper-V in Windows 11. Please go through the methods outlined below and let us know if this worked for you.
Enabling Hyper-V Through Optional Components of Windows
Hyper-V is not installed by default in Windows clients, which is also the case for Windows 11. However, you will find the option to install Hyper-V through Optional Components. To use this feature, please follow the steps below:
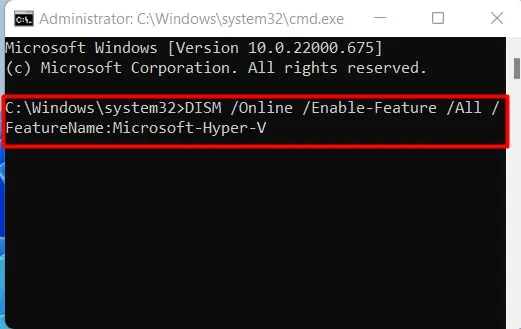
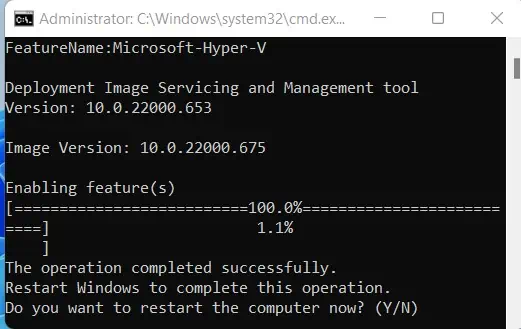
Enabling Hyper-V by Using DISM tool
Deployment Image Servicing and Management (DISM) is a command-line tool that can be used to service and prepare Windows images. You can use the DISM tool to turn on Hyper-V. Please follow these steps to find out how:
Enabling Hyper-V by Using the Terminal
You can also use theTerminal (Windows Powershell)to enable Hyper-V. Please follow the steps below:
Frequently Asked Questions
How to Check Virtualization Enabled in Windows 11
To check whether you have virtualization enabled or not, follow these steps:
How Do I Disable Hyper-v in Windows 11?
To disable Hyper-V in your Windows 11 machine, please follow the steps below:
Why Can’t I Enable Virtualization?
If you are having trouble enabling Hyper-V in windows, then check if one of the following is the problem:
How to Enable Hyper-V in Windows 11 Home?
Officially, Hyper-V is not available in Windows 11 Home edition. However, with a little tweak, you may get around that restriction.
Once your computer has booted back up, you can follow one of the three procedures outlined above to install Hyper-V on your Windows 11 Home machine.
