Tom’s Hardware Verdict
If you need capacity over performance, then the X1011 is a good choice. Building your own Pi-powered NAS just became a little easier.
Compact size
Space for four drives
Easy to assemble
Easy port access
PCIe Gen 2 bandwidth
Supplied spacers are too short
SSD 1 and 2 screw points are under the Pi!
Why you can trust Tom’s HardwareOur expert reviewers spend hours testing and comparing products and services so you can choose the best for you.Find out more about how we test.
We’ve gone from one, to two and now four NVMe drive add-ons for the flagshipRaspberry Pi 5! This new board from Geekworm, the $51X1011provides us with the aforementioned four drive slots.
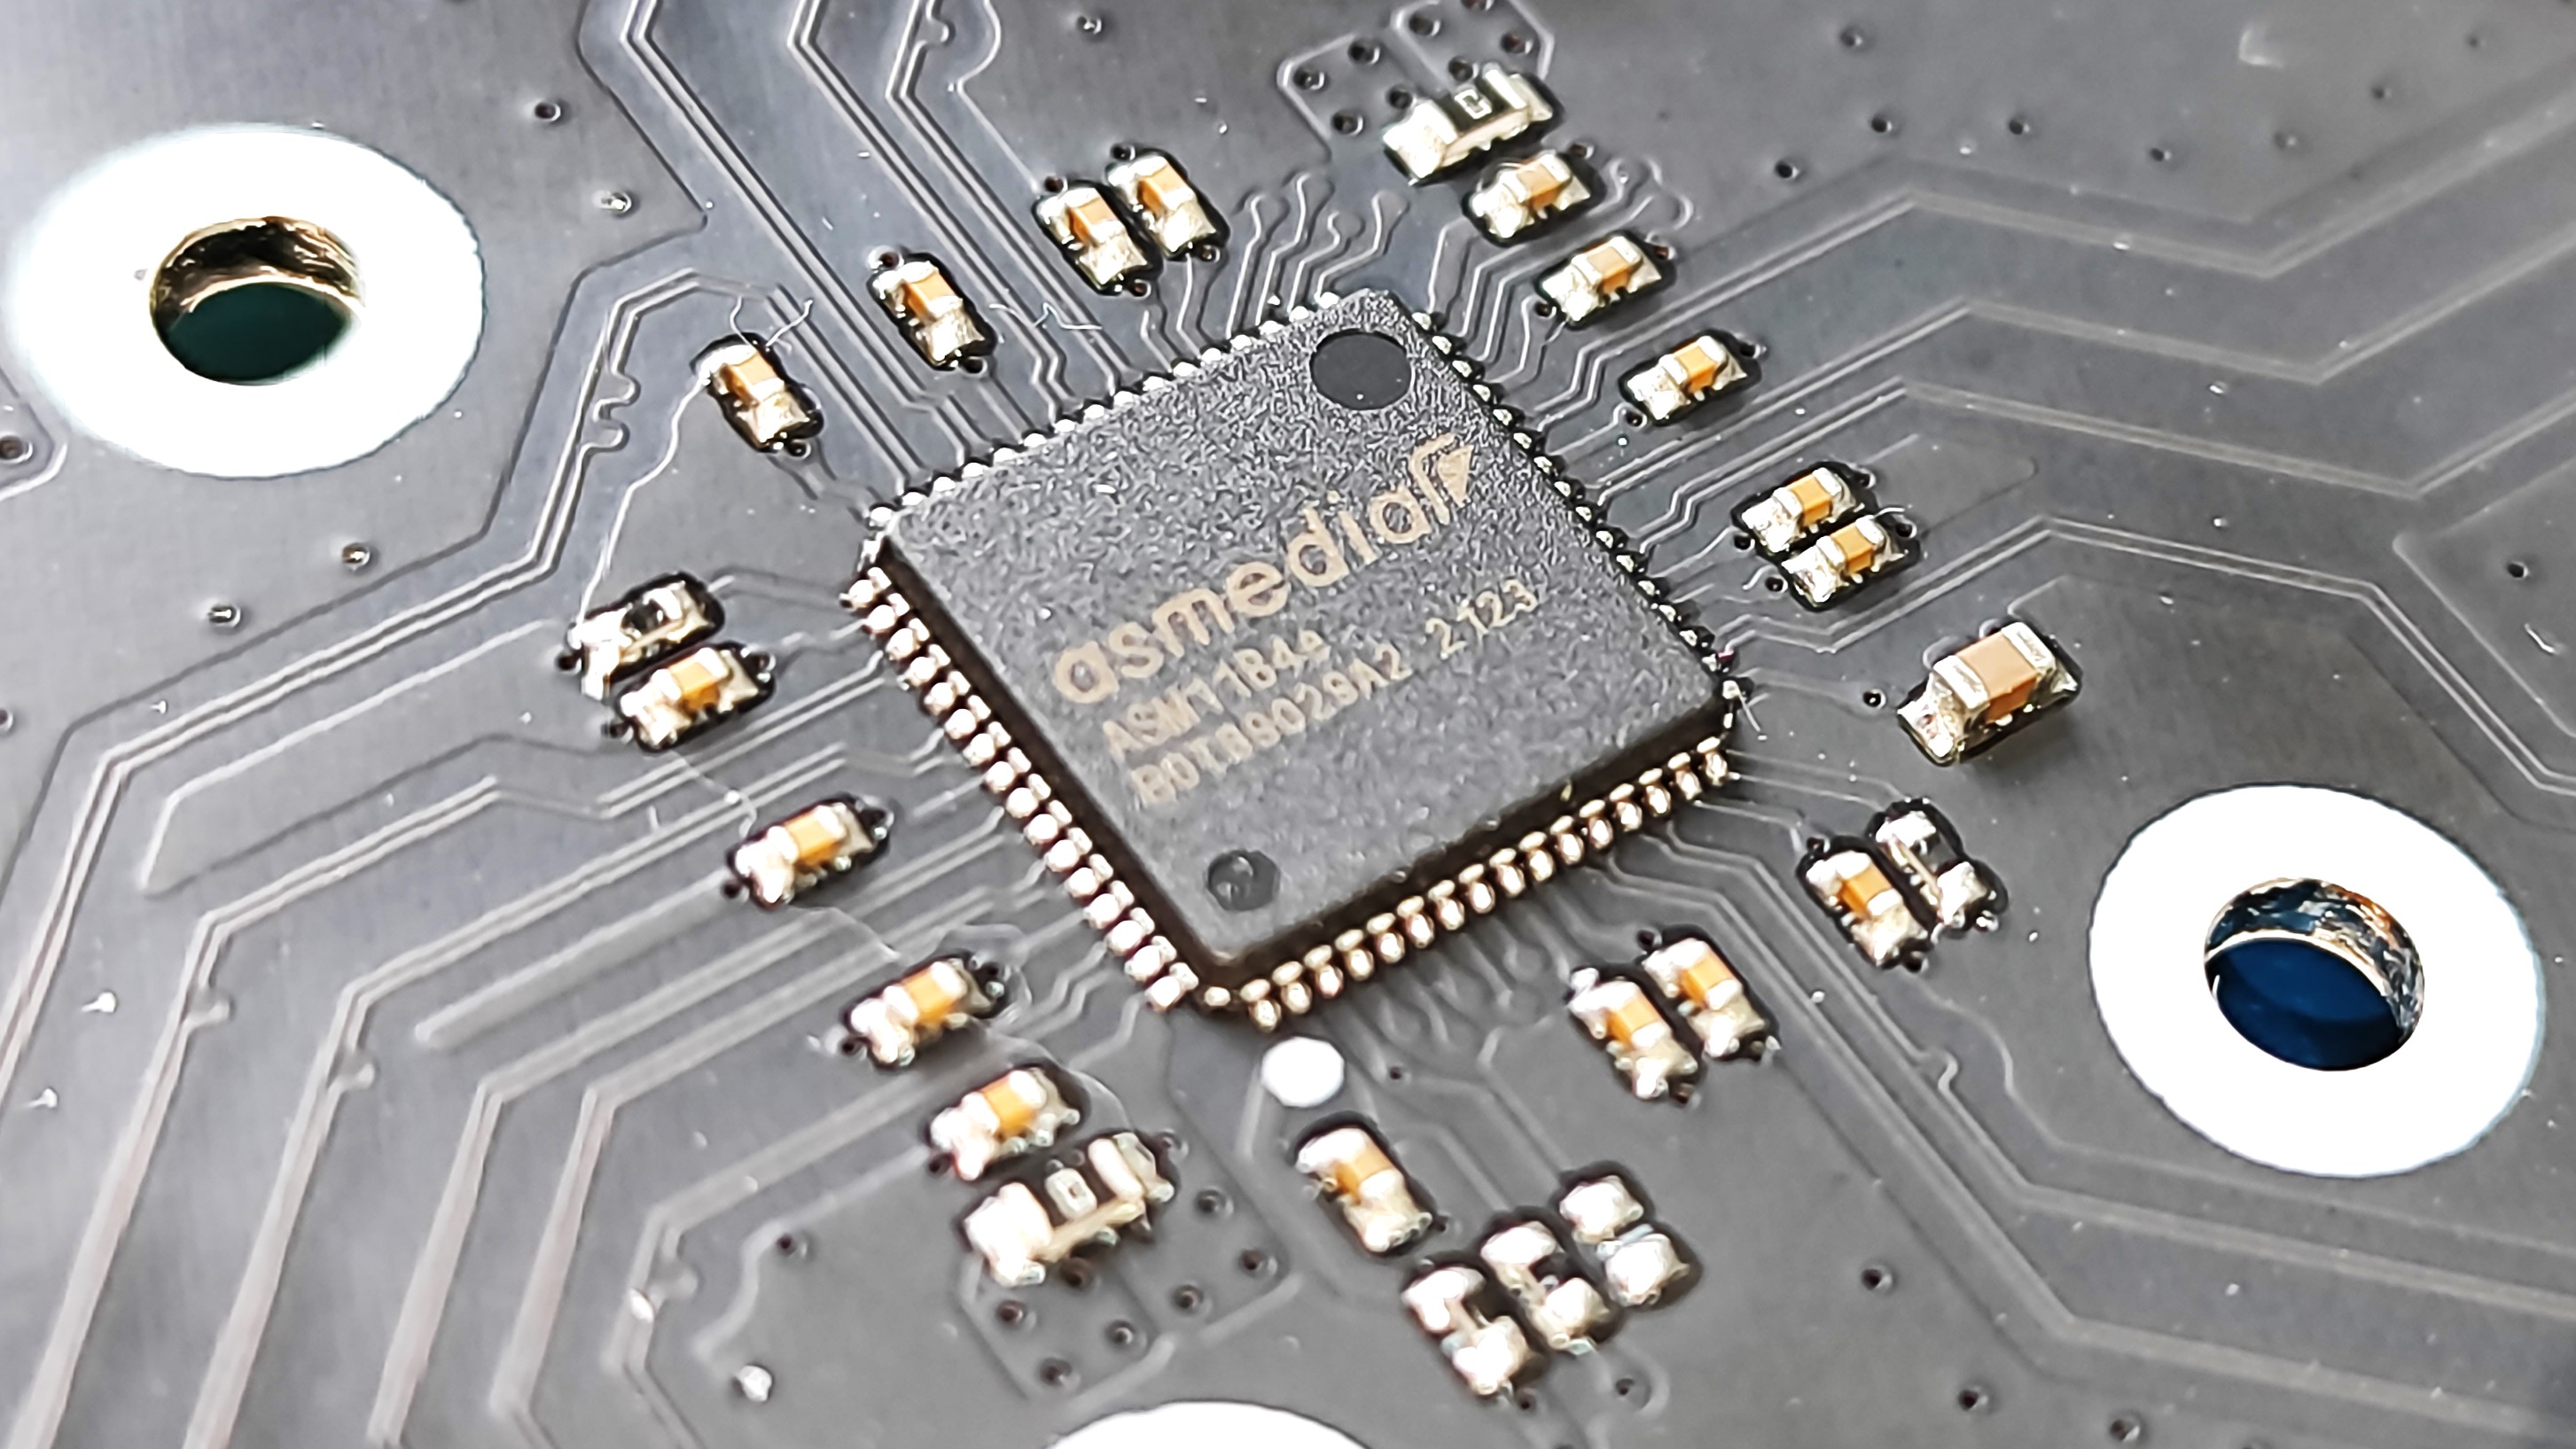
But the issue that we face is that more drives on a single PCIe channel means that bandwidth is restricted. We found that out withPimoroni’s NVMe Basewhich uses anASM1182ePCIe packet switch. Providing two PCIe x 1 Gen2 downstream ports from the single upstream port on the Raspberry Pi 5. Geekworm’s X1011 board has an ASM1184e. Yes, the 1182e and 1184e refer to two or four PCIe x 1 Gen2 downstream ports, and that leaves us still with a single upstream port on the Raspberry Pi 5.
How does the Geekworm X1011 perform and should you stump up the $51? Let’s find out.
Geekworm X1011 Technical Specifications
Geekworm X1011 Design
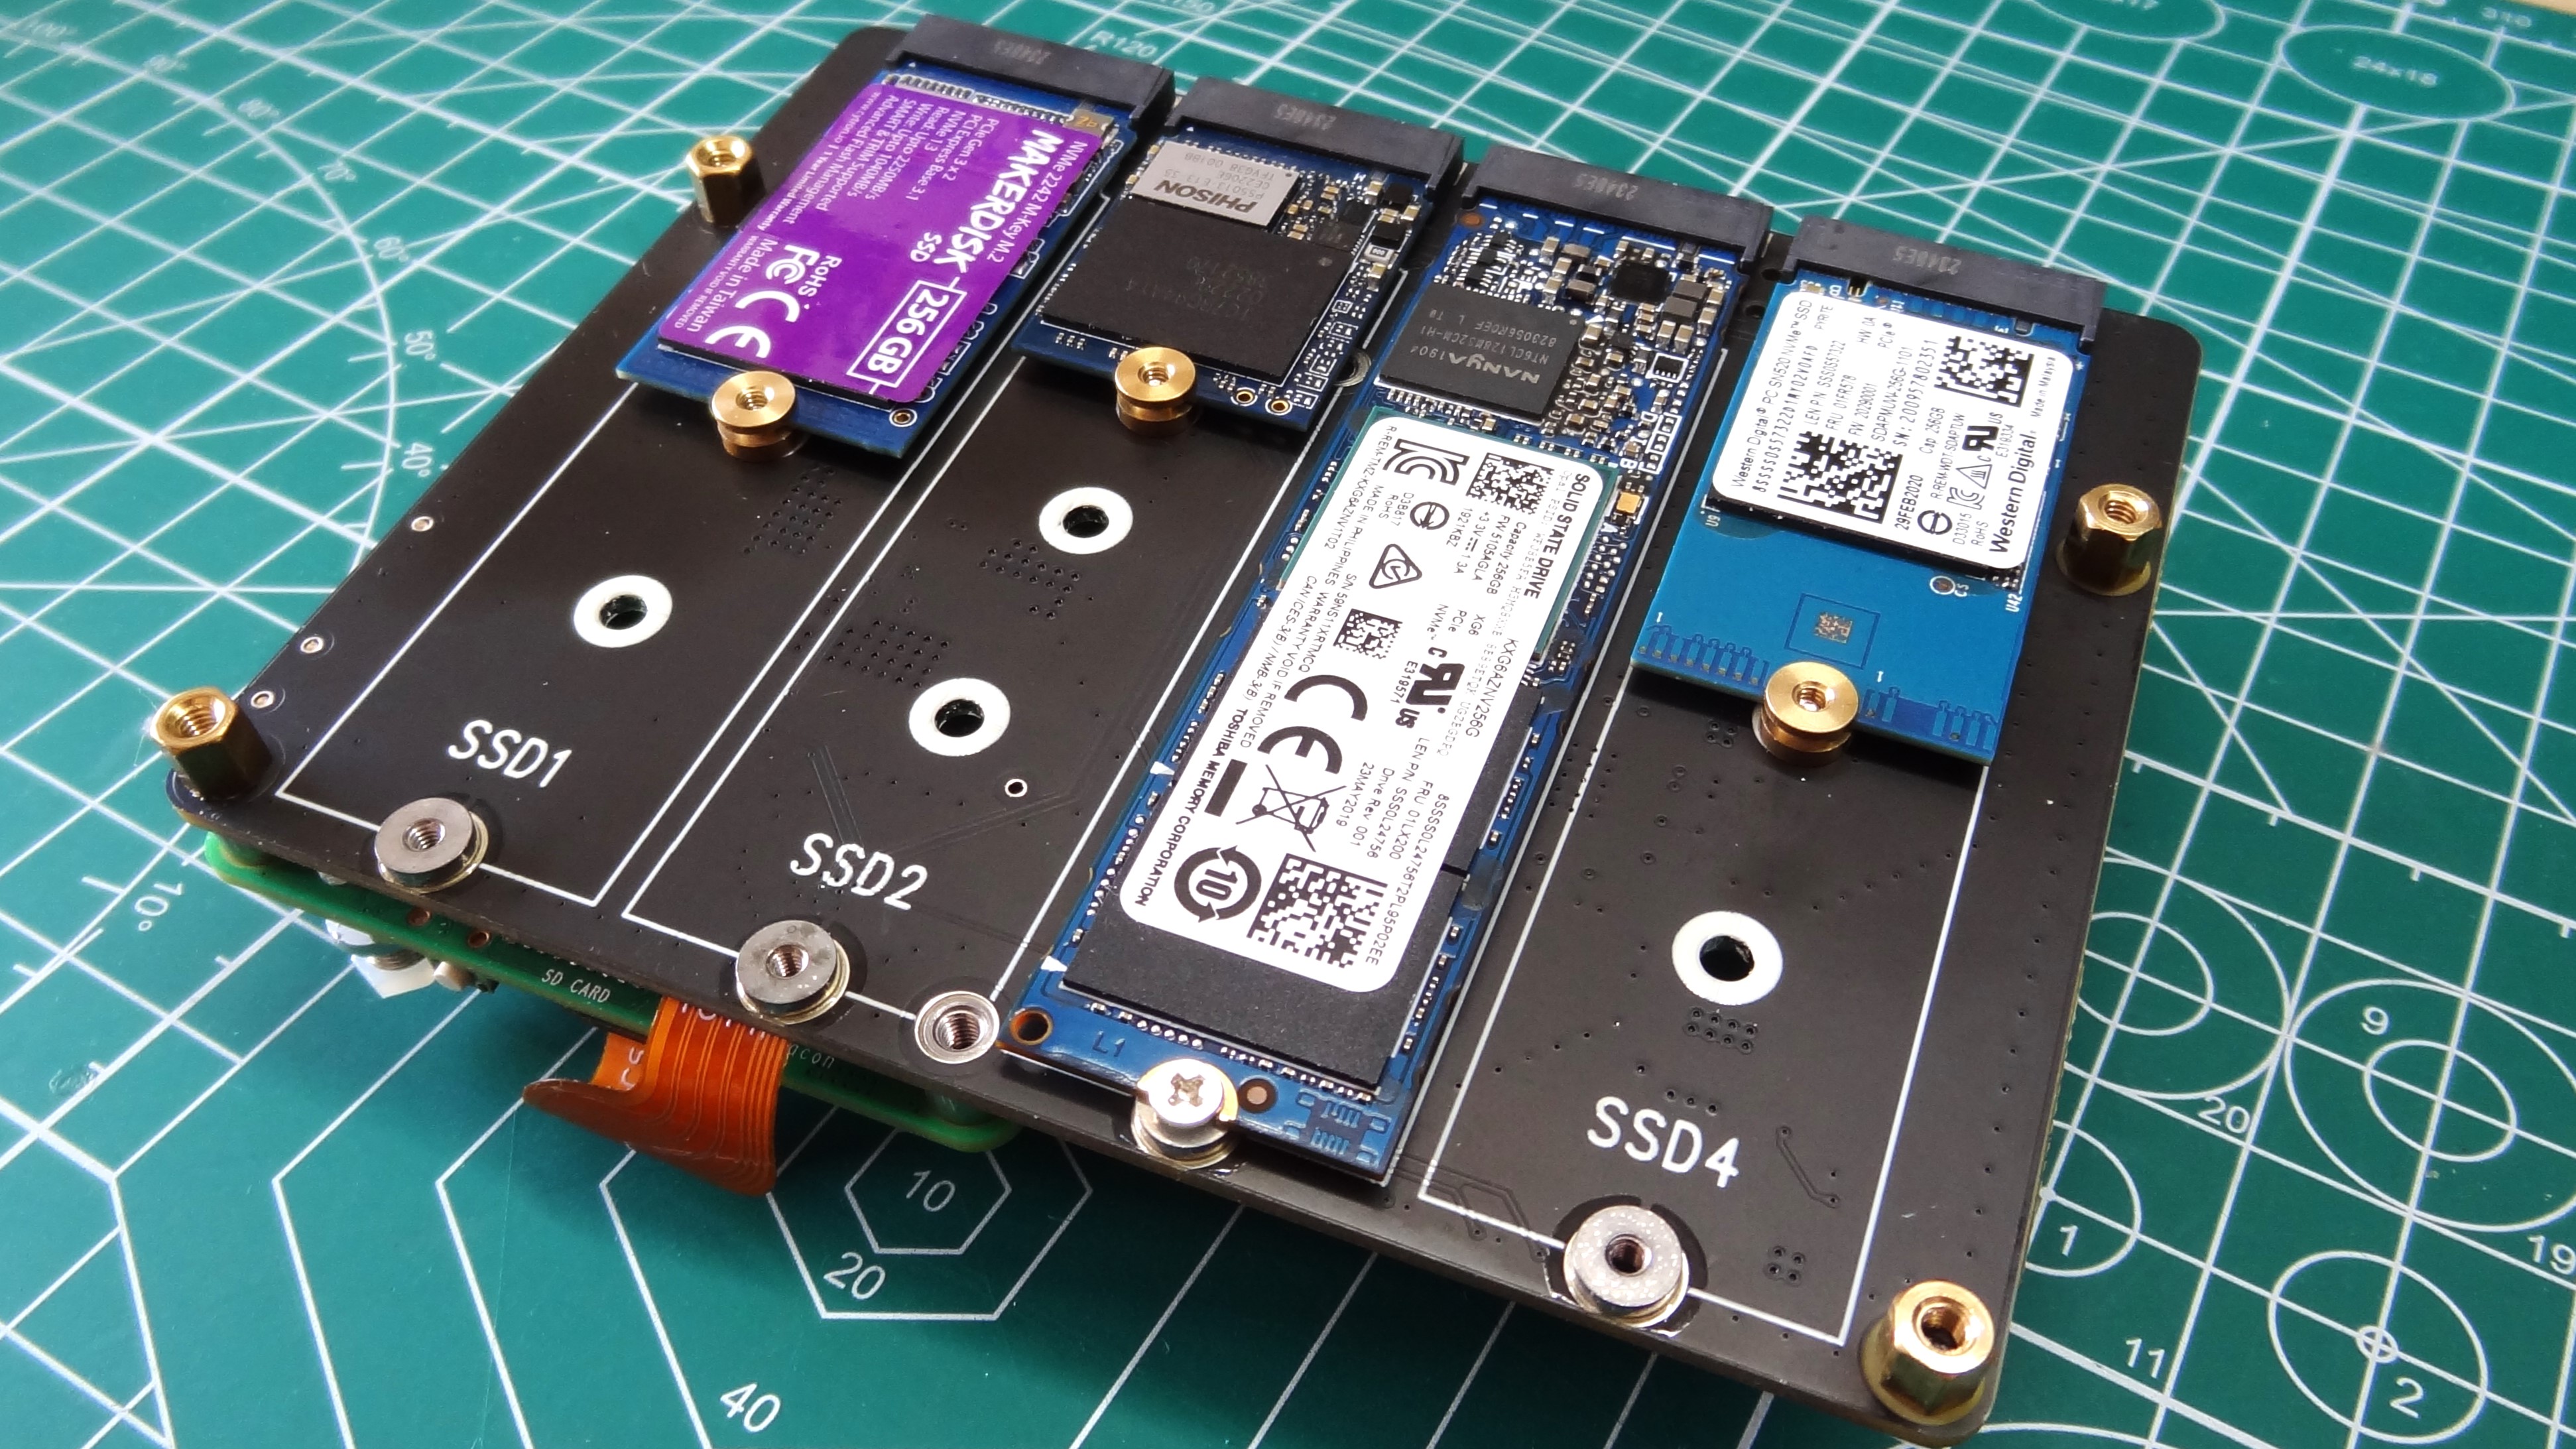
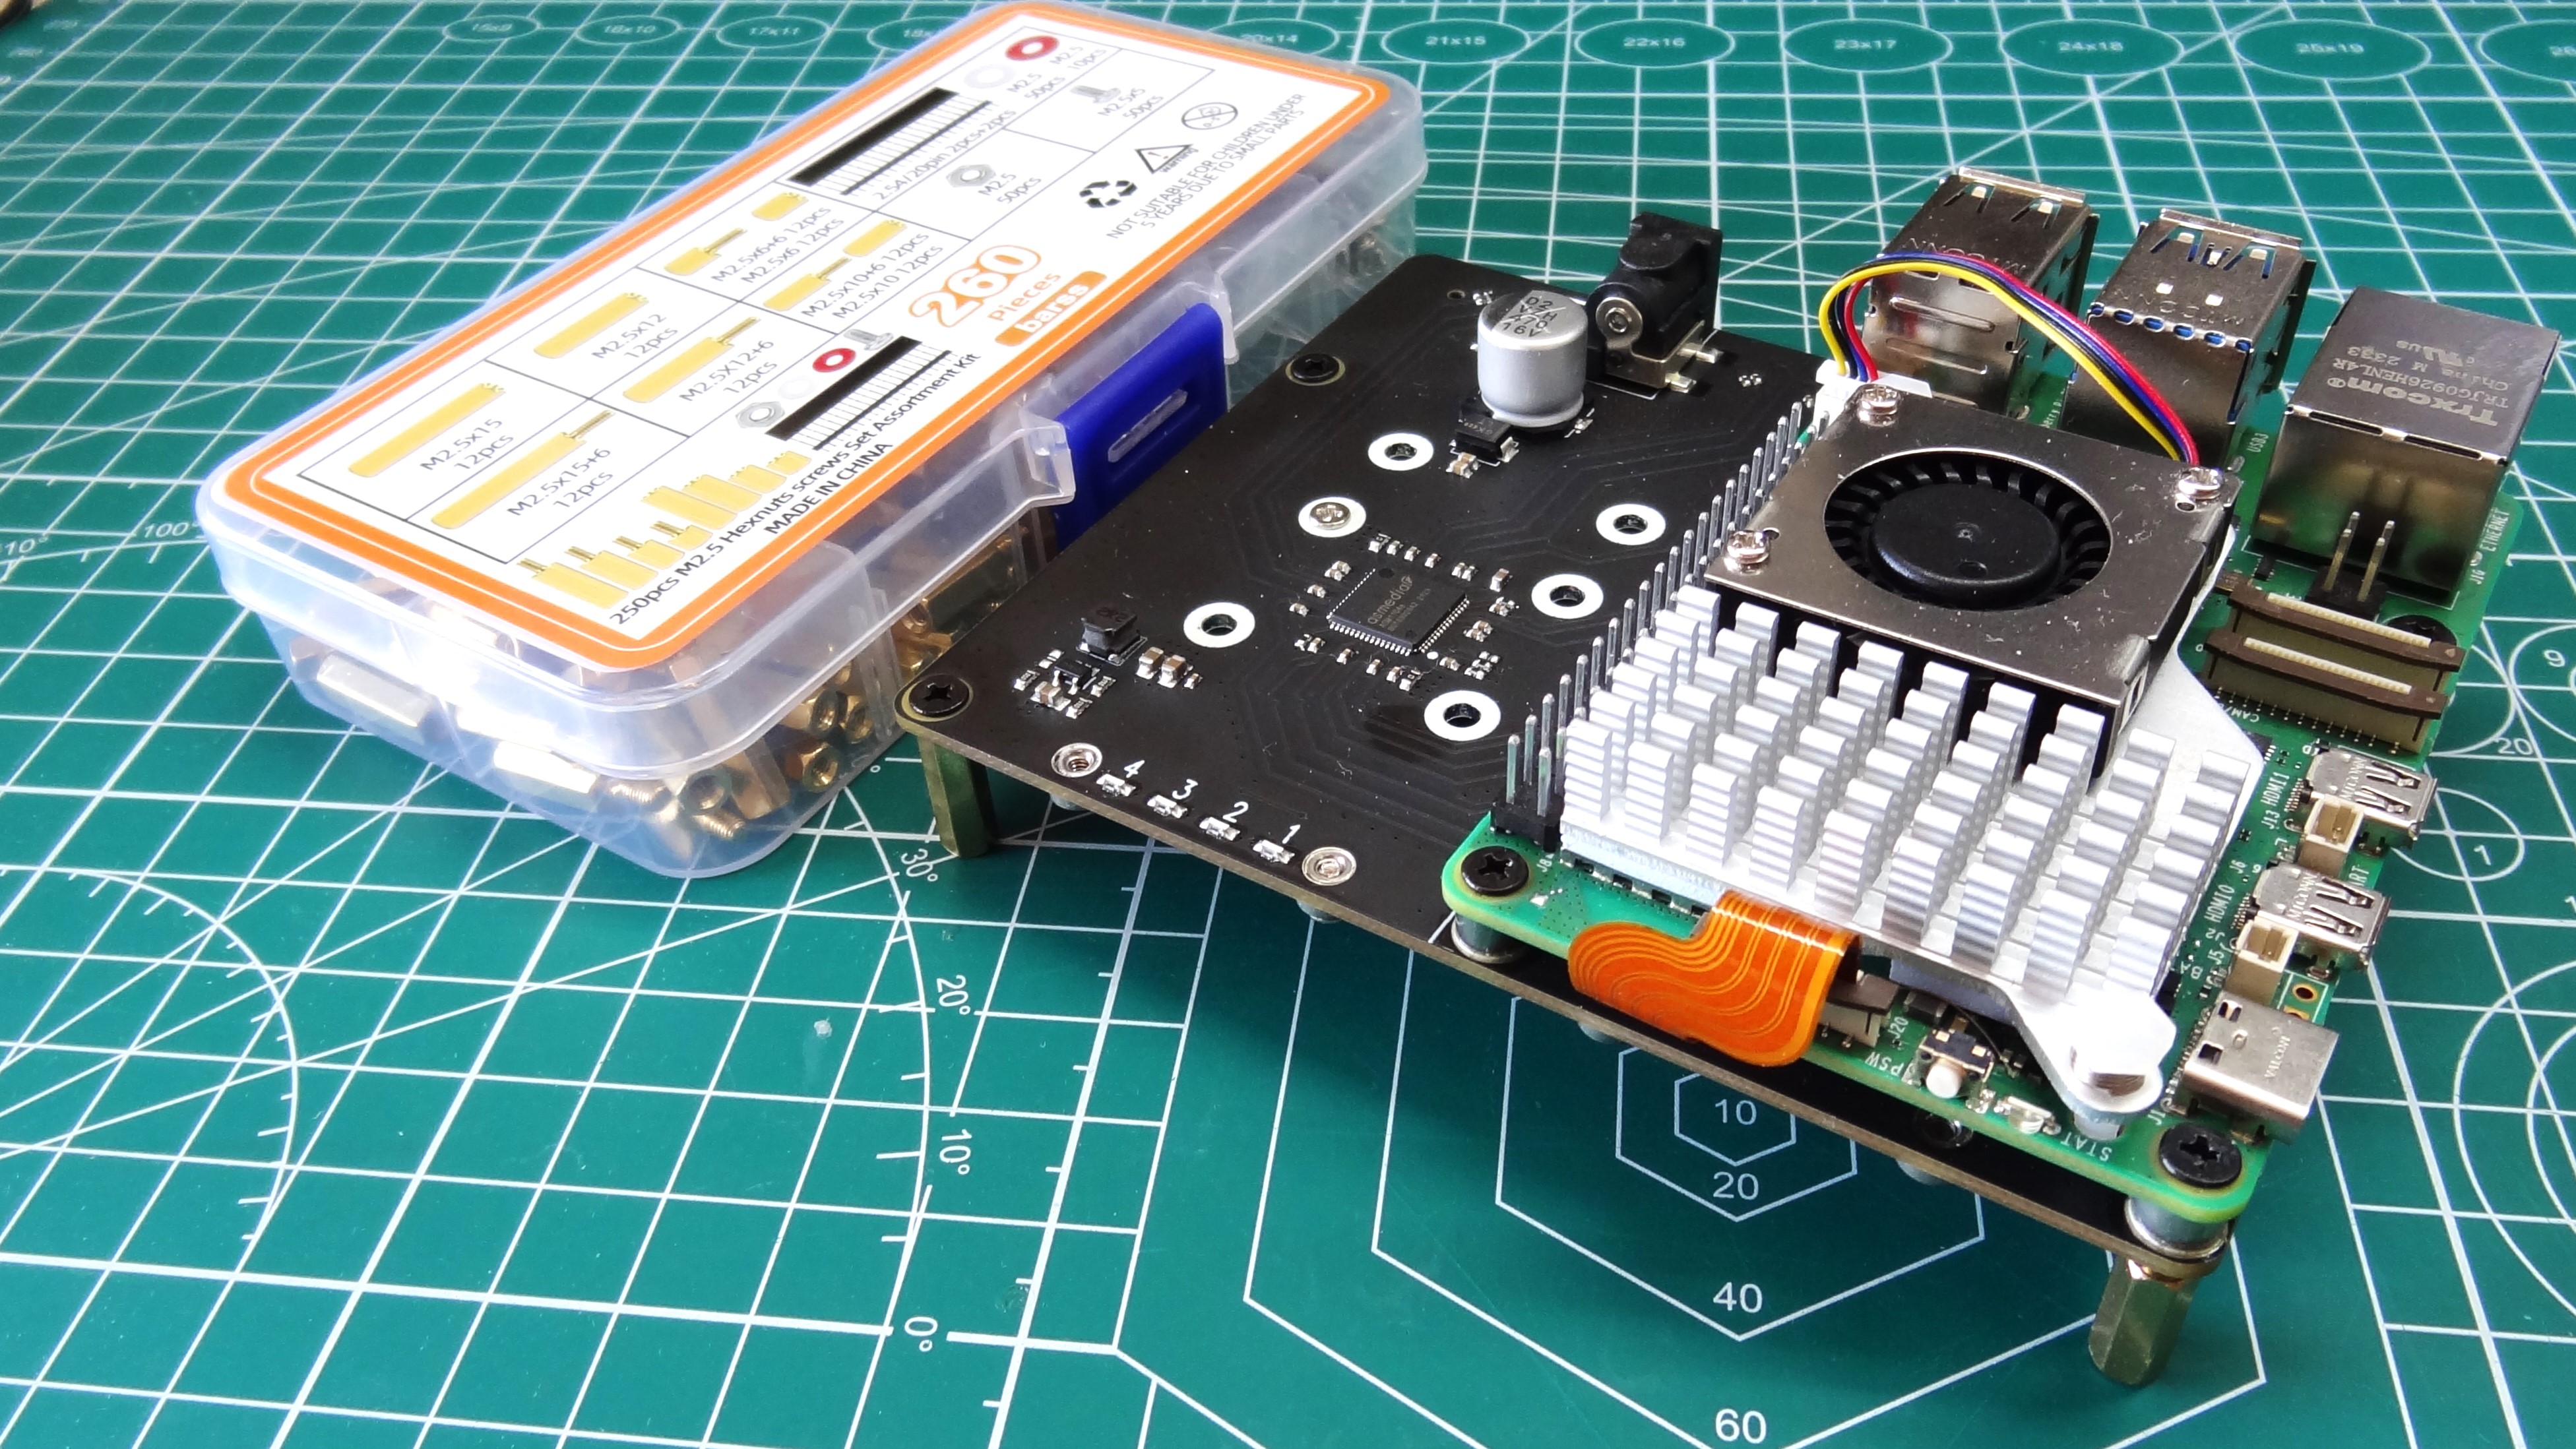
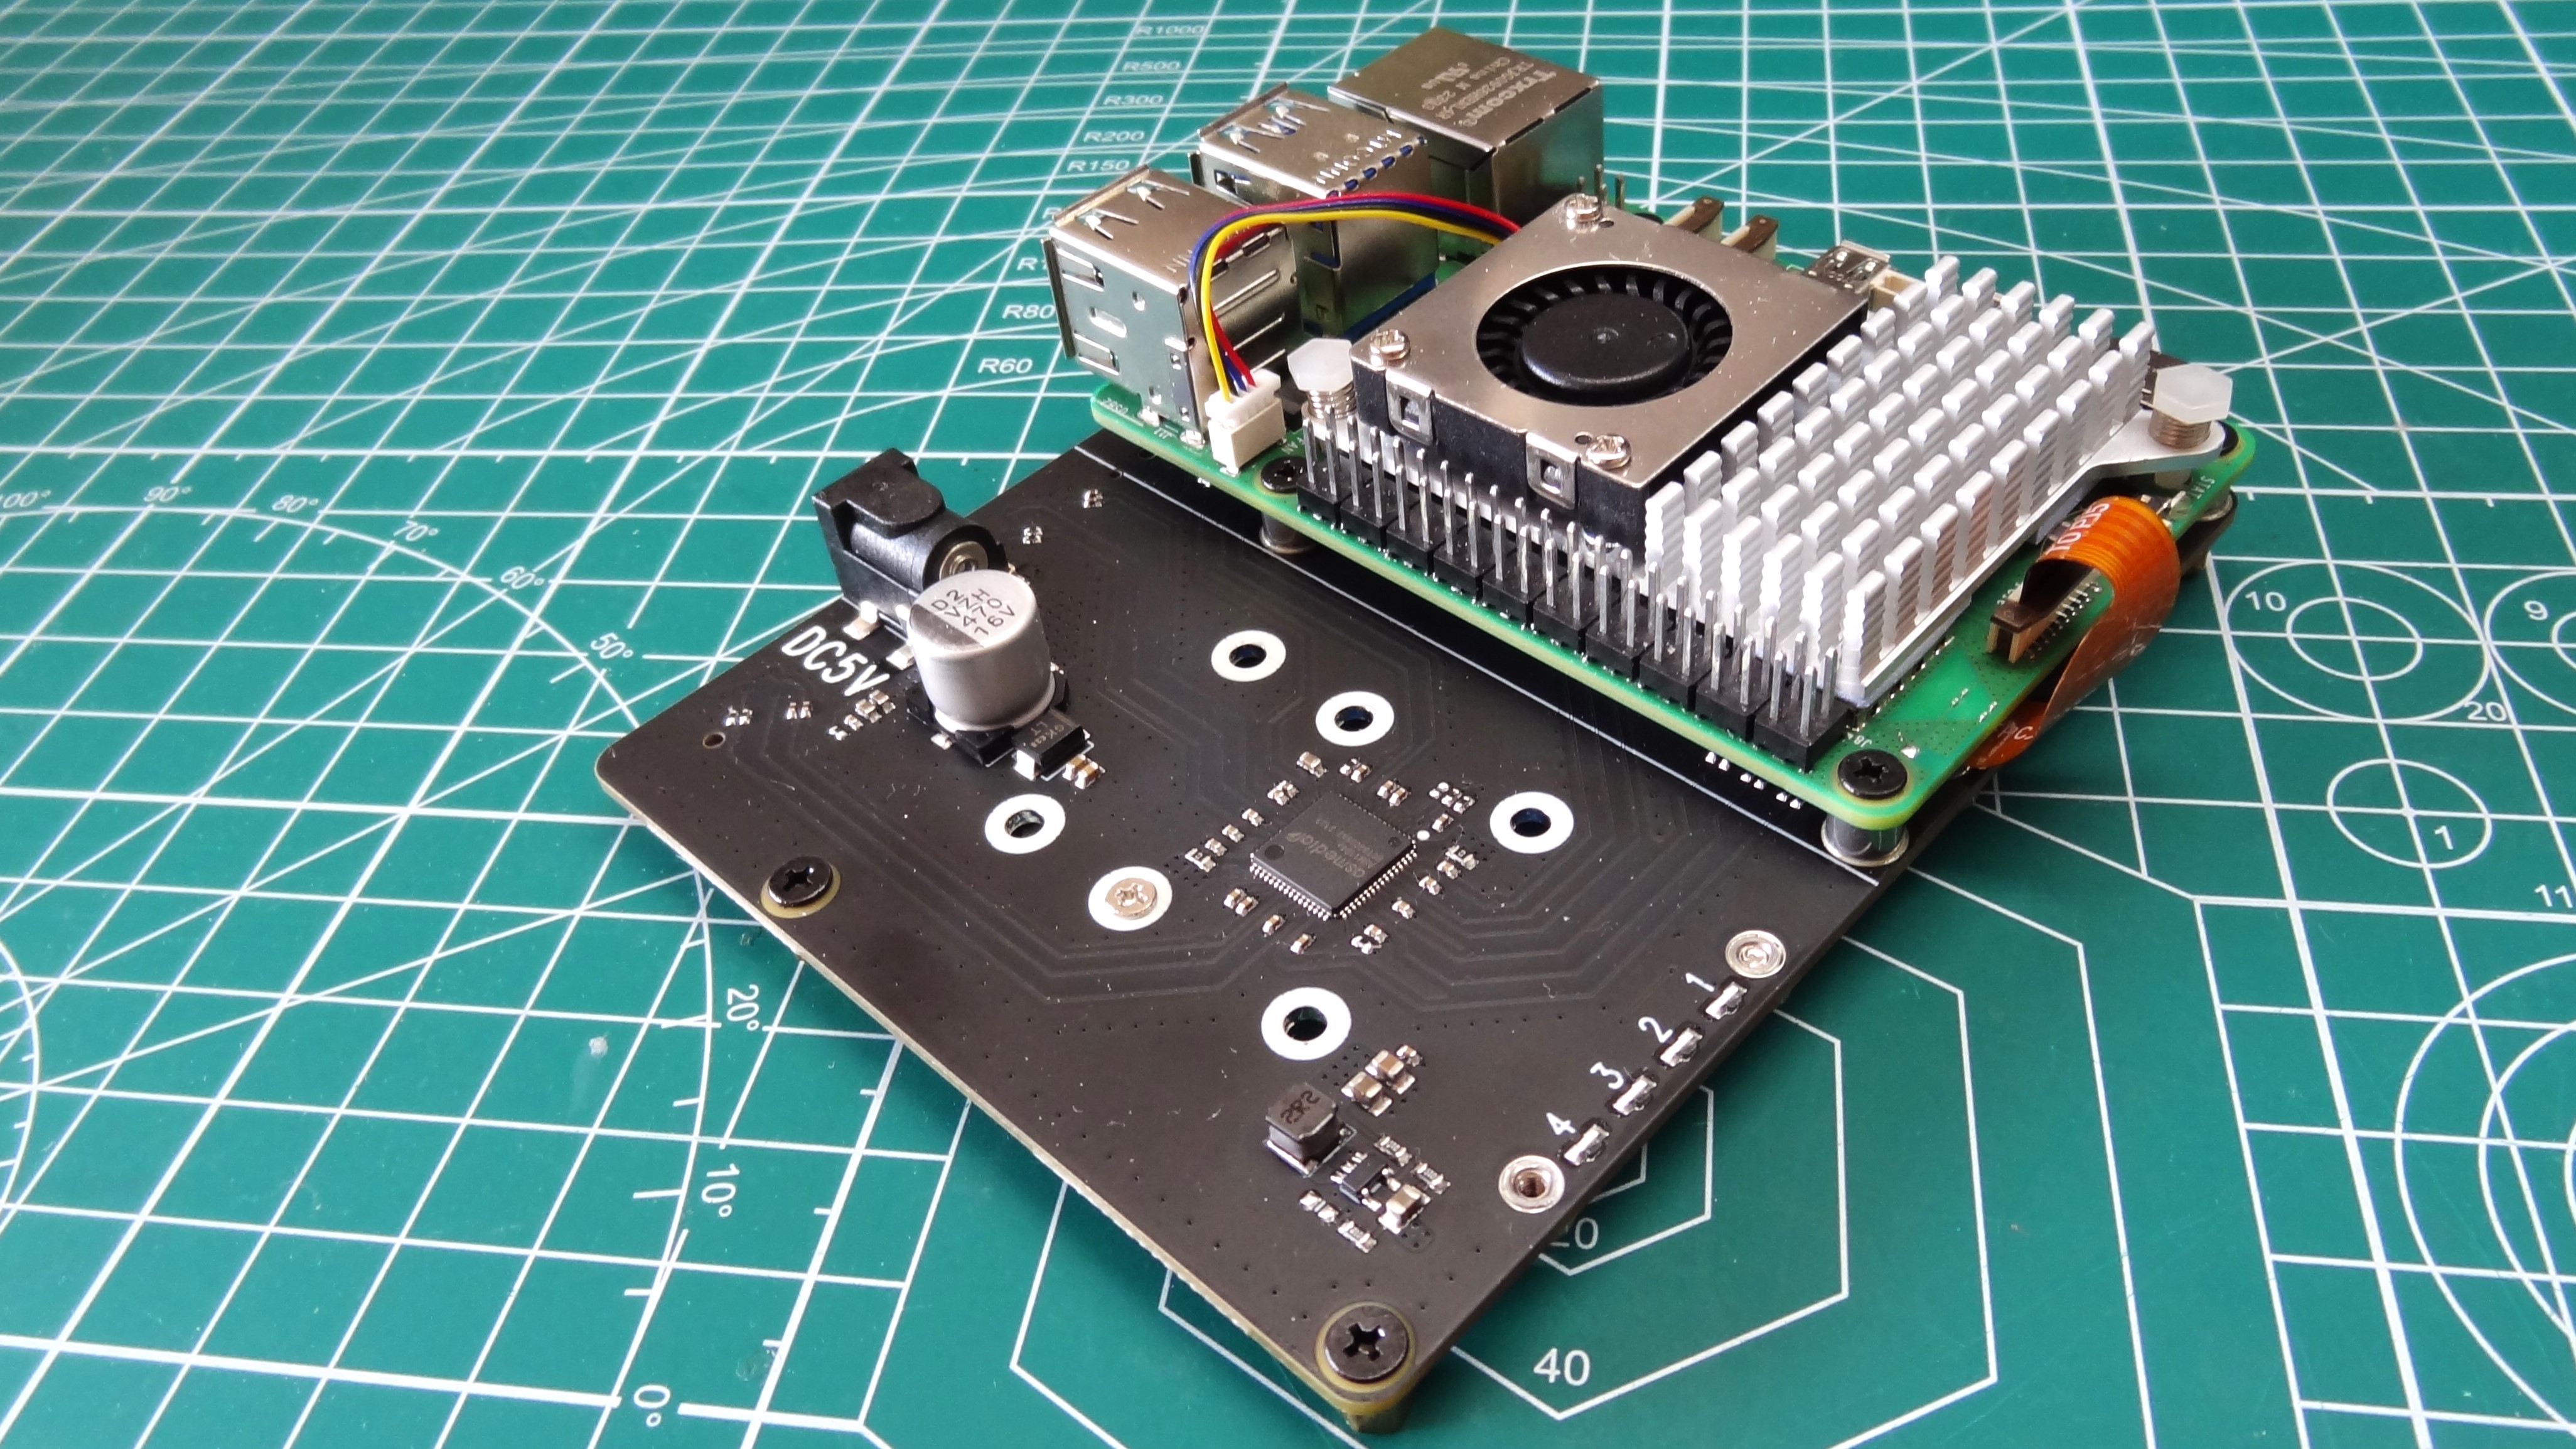
The biggest design choice of the X1011 is that all of the NVMe drives are underneath the main board. The included M2.5 brass standoffs provide some clearance for the drives to receive an air flow. But we would swap them out for taller standoffs, especially if you plan to use drives with heatsinks. The Raspberry Pi 5 connects to the top side of the board, this means that we can use any of the current crop of coolers.
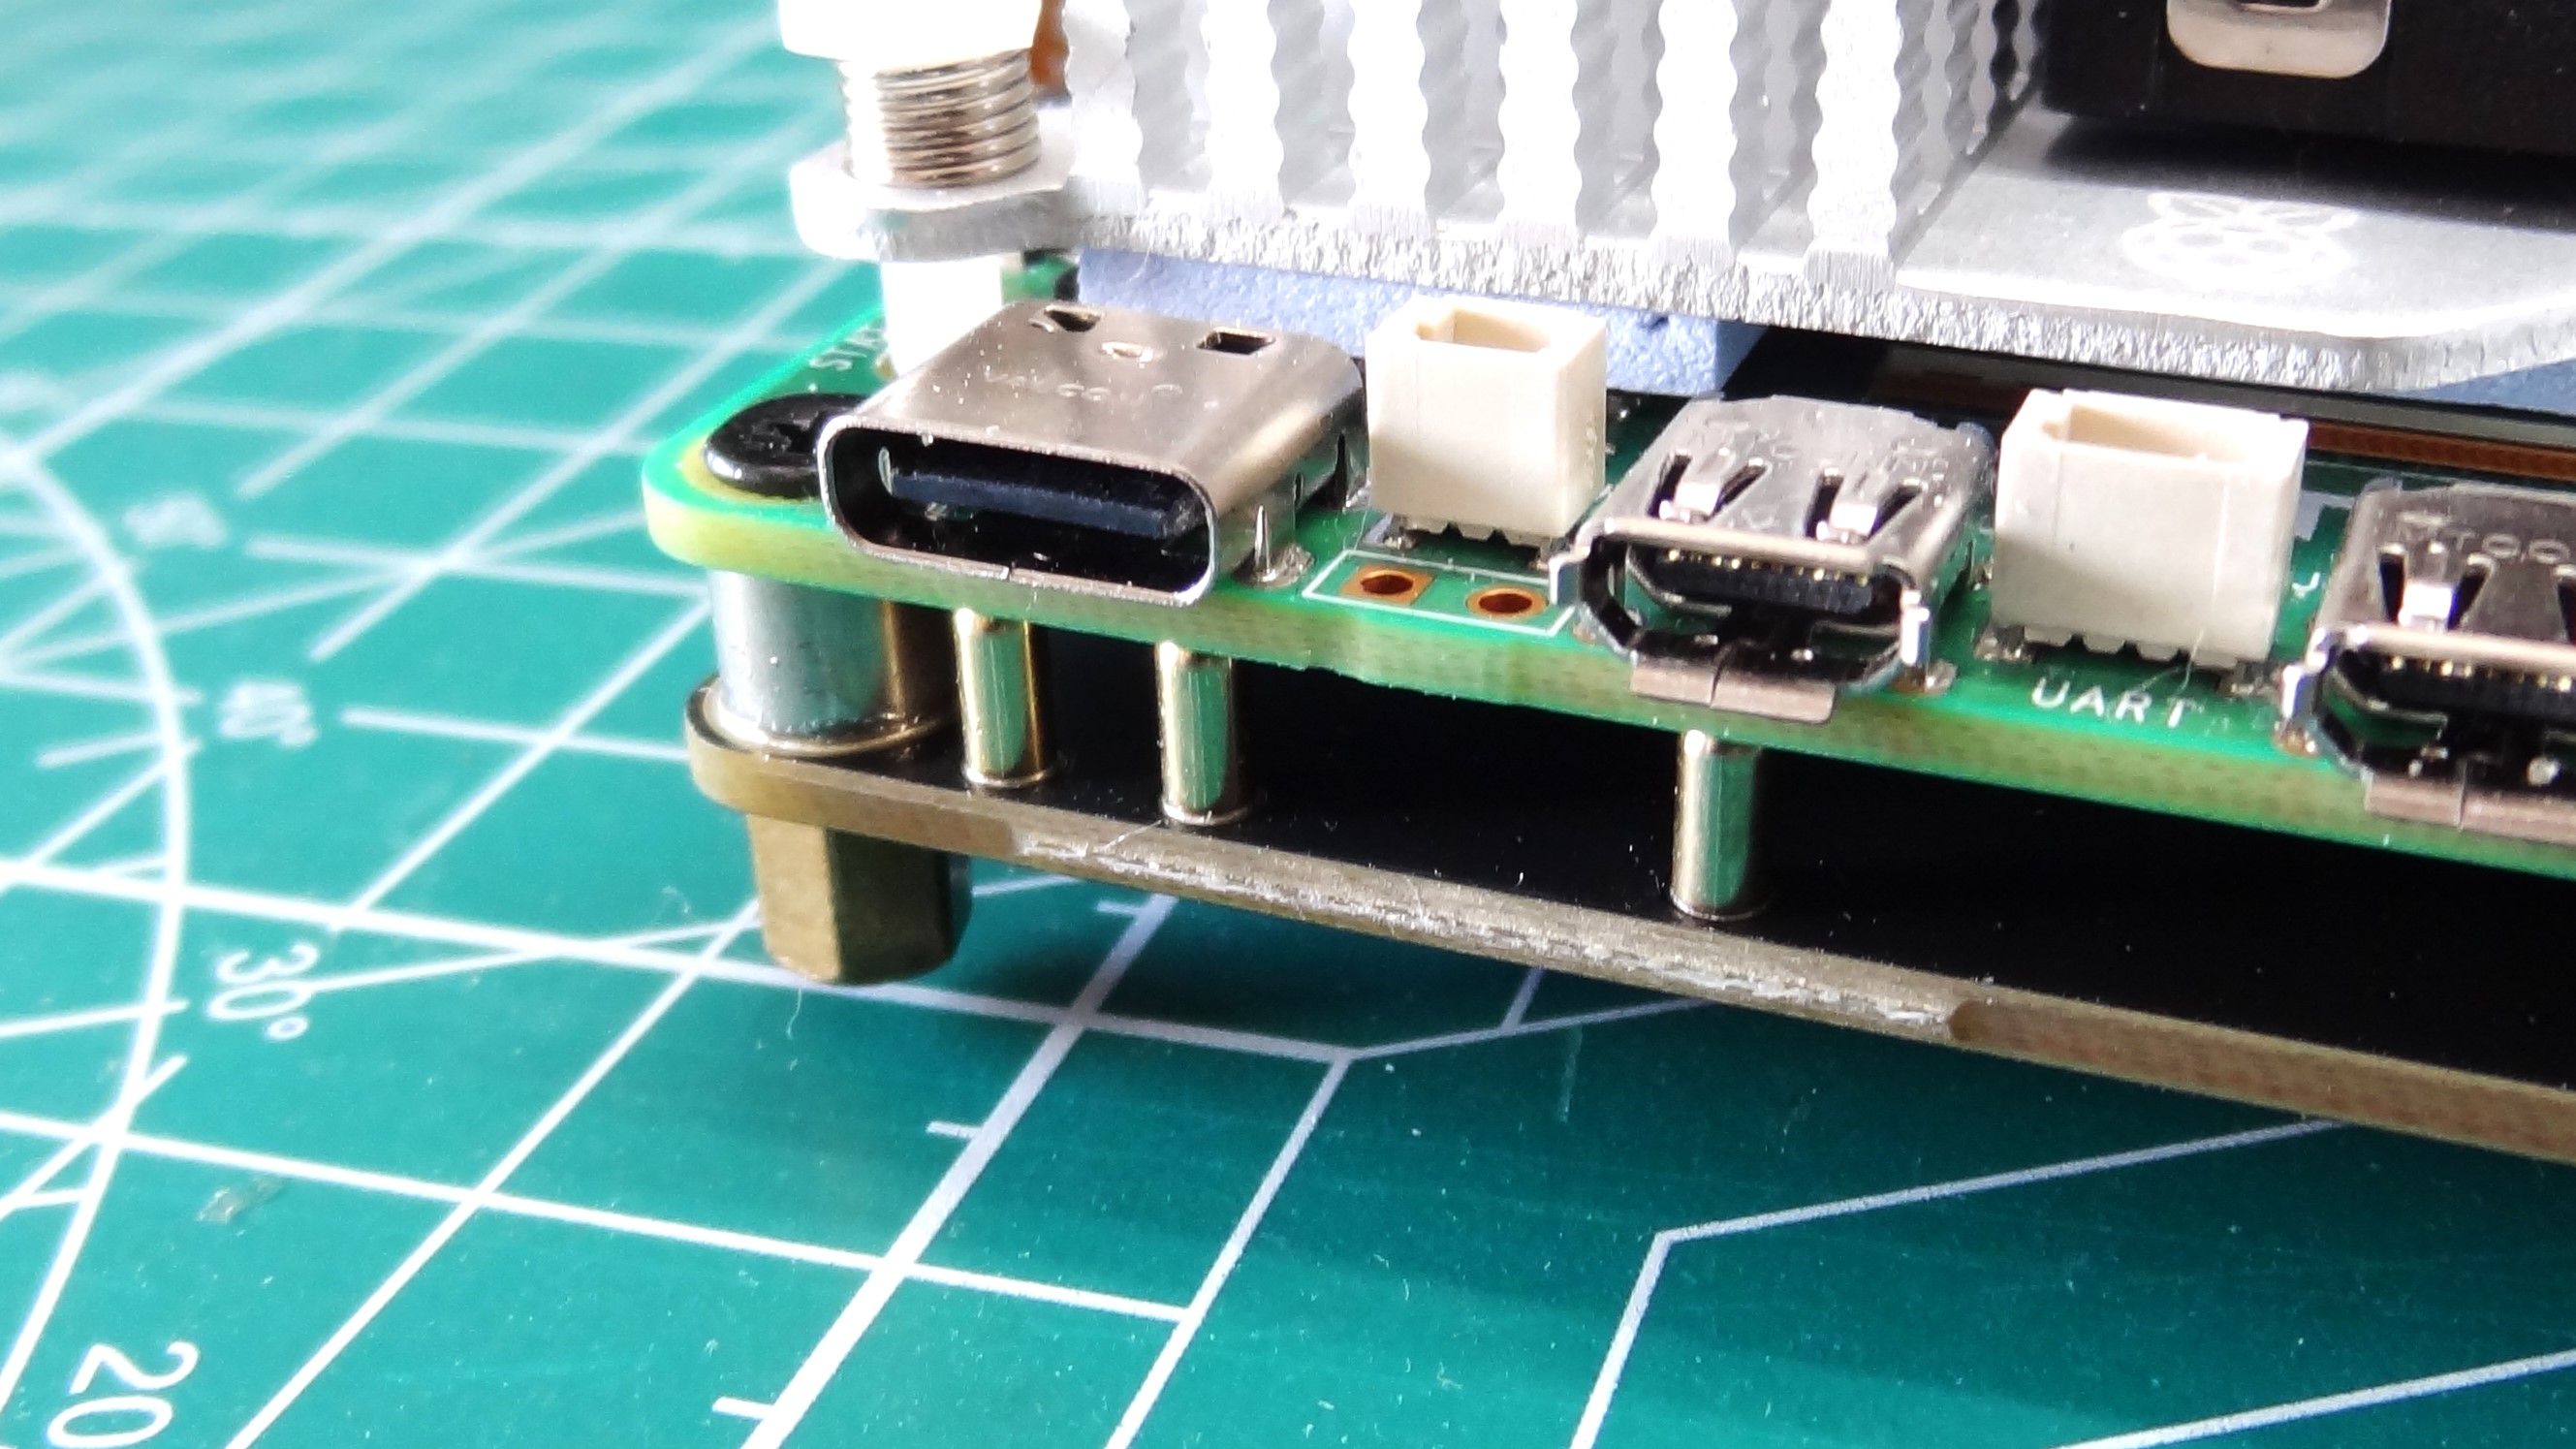
The only connections between the Raspberry Pi 5 and the X1011 being the PCIe connection for the drives, and pogo pins that make contact with test points. These test points inject power into the Raspberry Pi 5 via the USB C port. Where does this power come from? The dedicated DC barrel jack of the X1011 provides the power for every drive and your Raspberry Pi 5. We used a Mean Well 5V 4A DC power supply (not included) and everything worked. You can’t use a USB-C power brick at the same time as the 5V DC input. That would be bad news. You can power the entire thing from USB C though, we’d recommend the official Raspberry Pi 5 27W PSU. It has the power that you will need for all those drives.
The 109 x 87.2mm PCB is big enough for all of the drives, but still small enough to integrate into a 3D printed case (you can buy a metal enclosure directly from Geekworm) that you could fabricate on thebest 3D printers. As for connecting your drives, here is a personal issue. SSD1 and 2 are secured with screws that are under the Raspberry Pi 5. This means that to change these drives we have to remove the Pi to gain access. Not a deal breaker, but irksome. I also found that one of my 2280 drives was ever so slightly too long for the 2280 screw points. This meant that I had to get creative with my bag of random screws.
Geekworm X1011 Performance
Just like Pimoroni’s NVMe Base Duo, we have to divide our bandwidth by the number of attached drives. The ASM1184e is only PCIe Gen 2, so there is no point enabling Gen 3 on the Raspberry Pi. This limits the bandwidth to around 450MB/s on the Raspberry Pi 5, divide that by the four 256GB drives that we have attached and we get 112.5MB/s read speed, something that our tests confirmed.
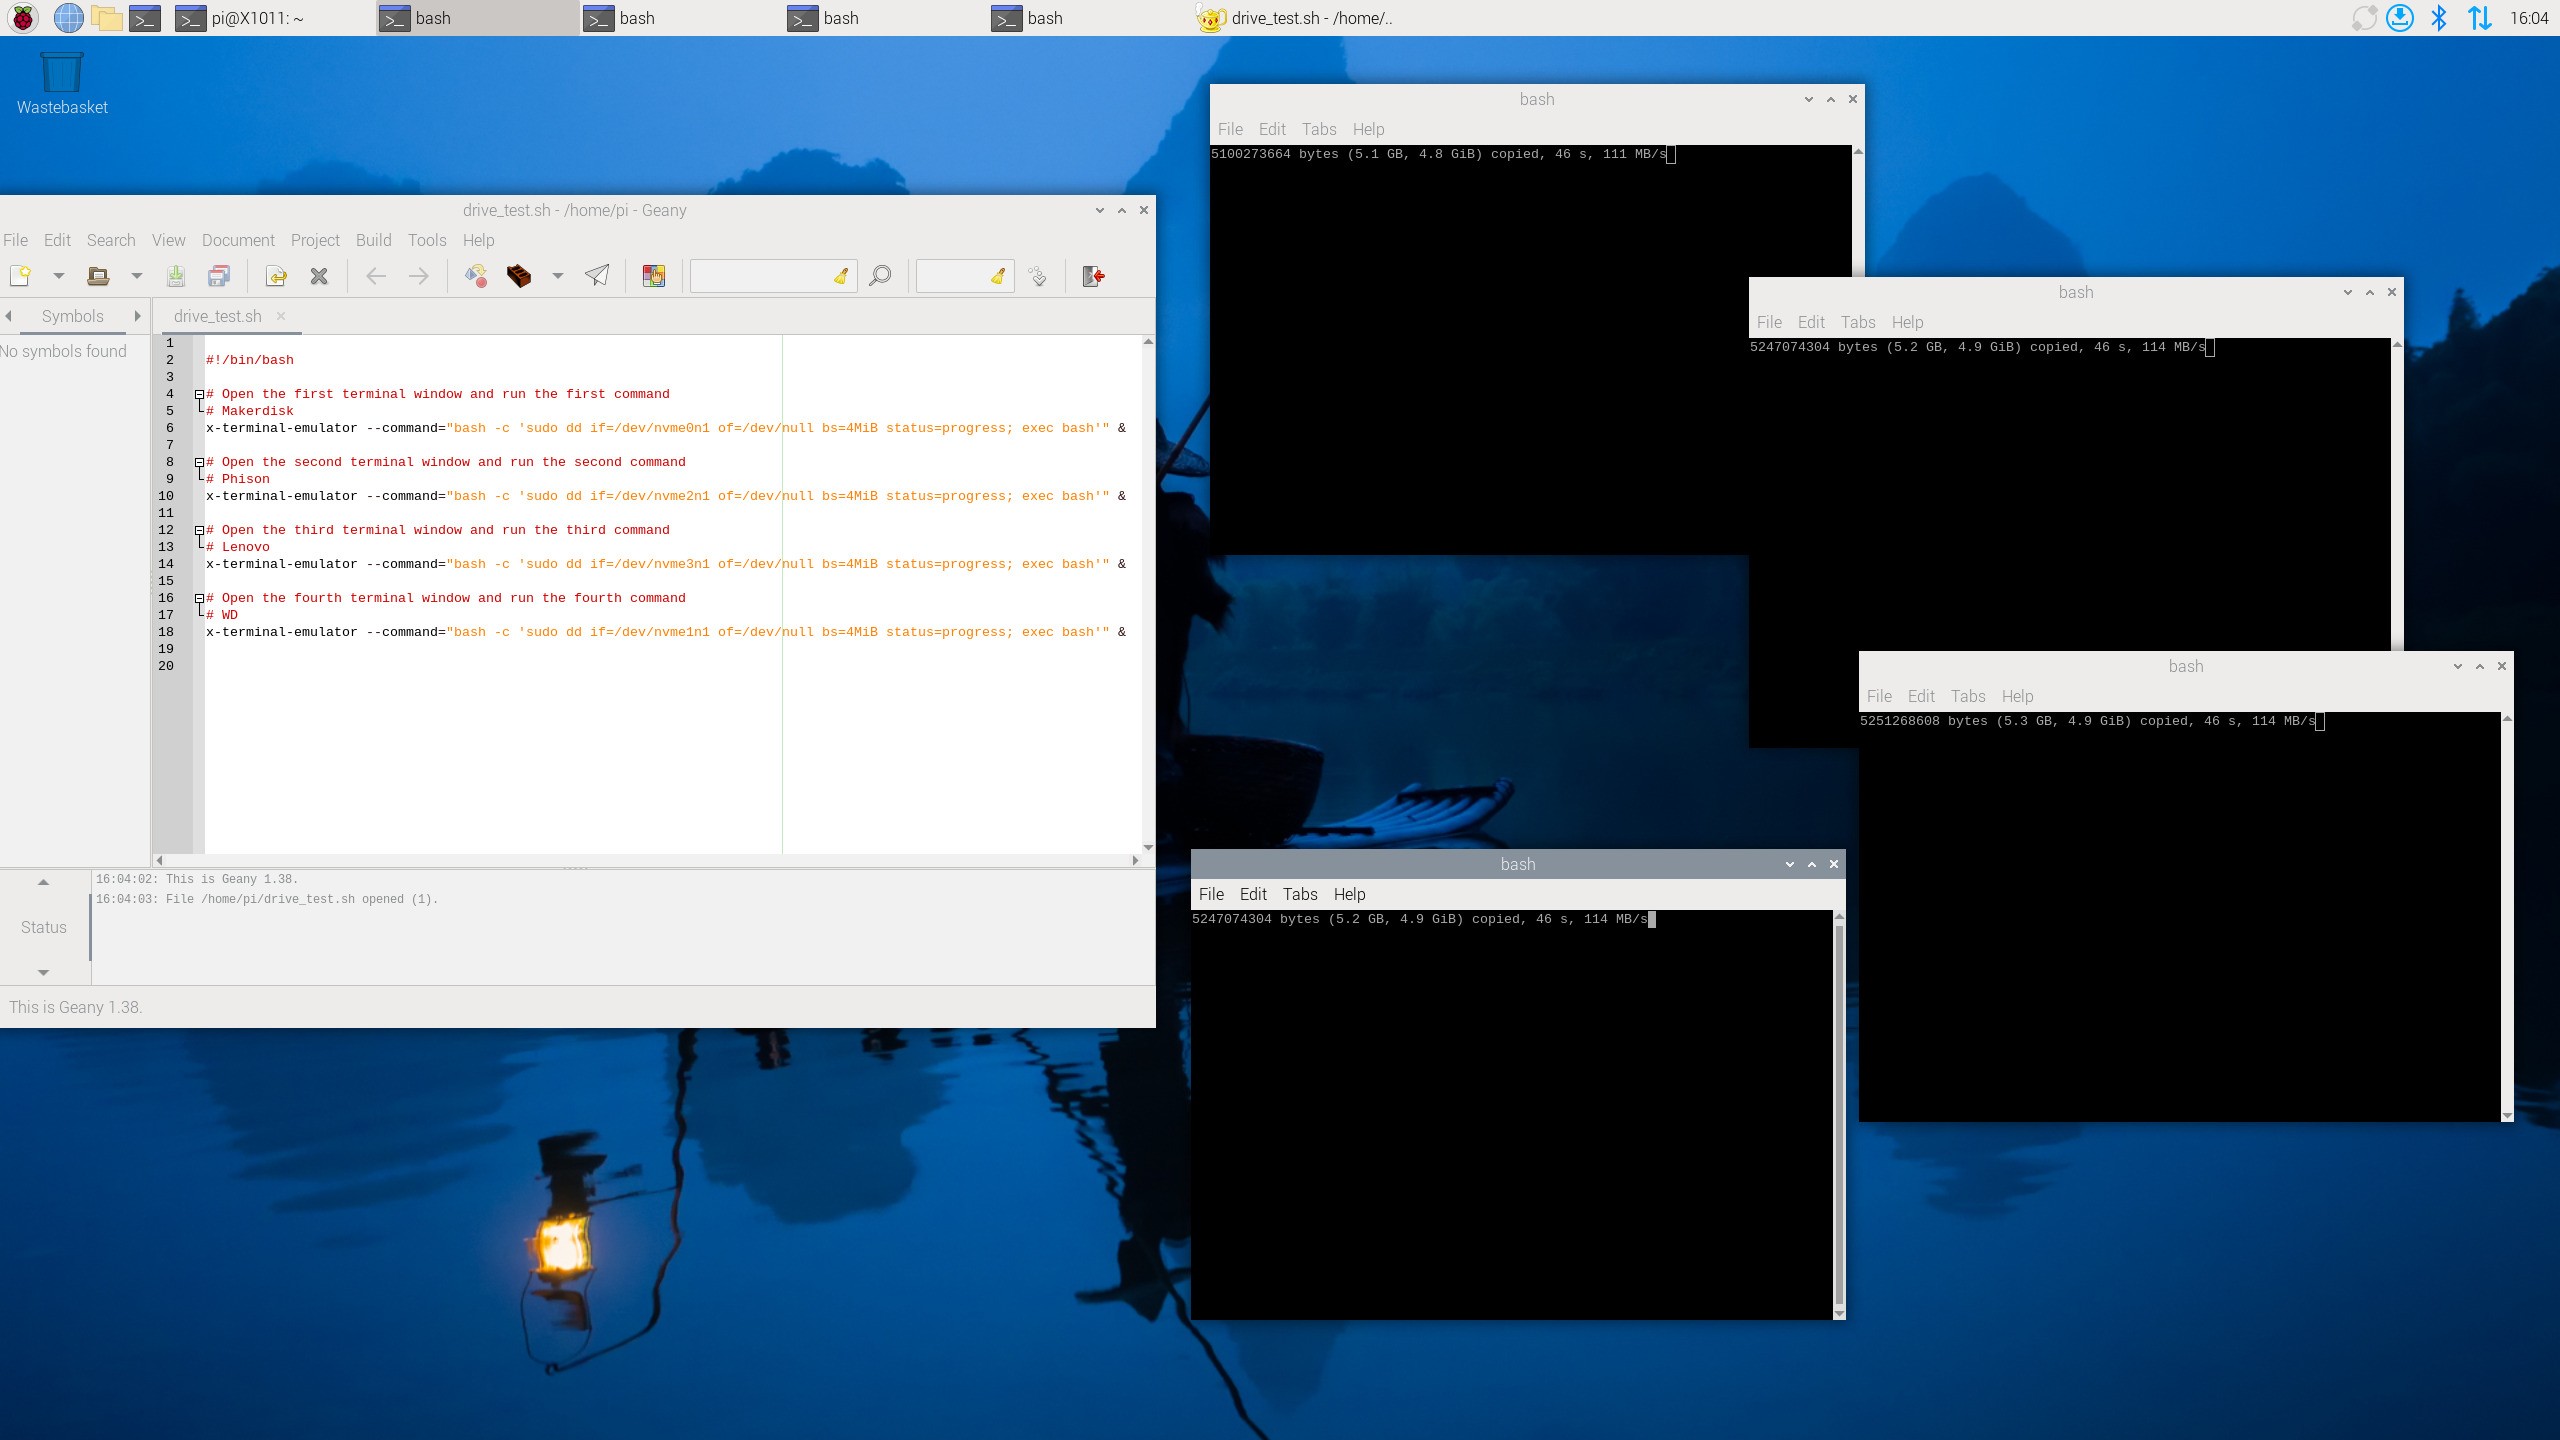
Using a Bash script to simultaneously read the entirety of each drive to /dev/null/, gave us a maximum of 114MB/s, not exactly high speed but when we factor in that the most likely use case for the X1011 is as a NAS (Network Attached Storage), then we can forgive these slower speeds. Unless you are building your own data center, the 114MB/s drive speed limit won’t mean much over a Gigabit Ethernet connection.
We tested downloading an Ubuntu 24.04 ISO directly from the X1011 to our Windows 10 PC using a gigabit Ethernet connection. Over this connection we saw 110MB/s using just one drive on the X1011. This is inline with our setup which uses powerline networking. Using iperf we see 945 Mbits/sec transfer, divide this by eight, and we get 118.125MB/s, the maximum connection speed possible between the two devices.
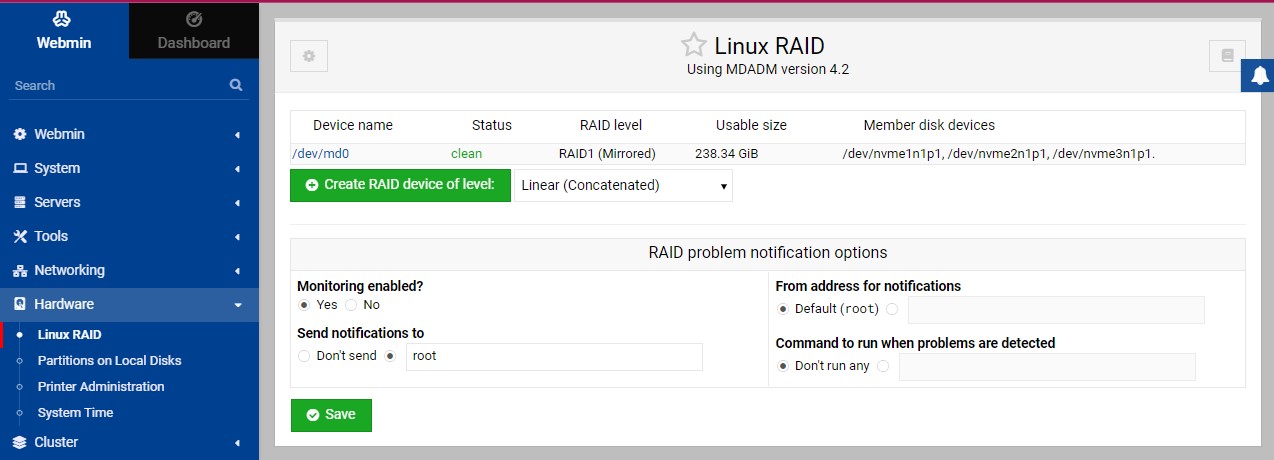
With all of these drives the idea of running a RAID array is at the front of our mind. We can confirm that you can run a RAID array using the X1011, obviously with the bandwidth limitations in mind. We tested a simple RAID 1 mirror setup using a software RAID setup. Three of the drives (2,3 and 4) all of the same 256GB capacity were mirrored to create a single 256GB drive, but with mirrored copies of files and directories.

We used Webmin to create the RAID array, which was relatively straightforward. If you would like to use all four M.2 slots for RAID storage, then you can. Just boot from micro SD.
We also used Webmin to create a Samba (SMB) file server with the RAID drives as the source. The 256GB RAID 1 drive was available to our Windows 10 machine, enabling us to share files over the network.
DIY AI?
Ok the short answer, we couldn’t get our Hailo-8L NPU to work with the Geekworm X1011. We managed to make it work with Pimoroni’s NVMe Base Duo, but somehow the X1011 would not play ball. We installed all of the software to run the officialRaspberry Pi AI Kit, rebooted and searched for the device via dmesg. Nothing. We dug out the review micro SD card supplied with our Raspberry Pi AI Kit review unit. Booted from that and nothing again. Something is not right somewhere, but we can’t quite trace the issue.
If you want NVMe storage and AI capabilities, go for Pimoroni’s NVMe Base Duo. That works. For now, we can’t say the same for the X1011.
Port Access
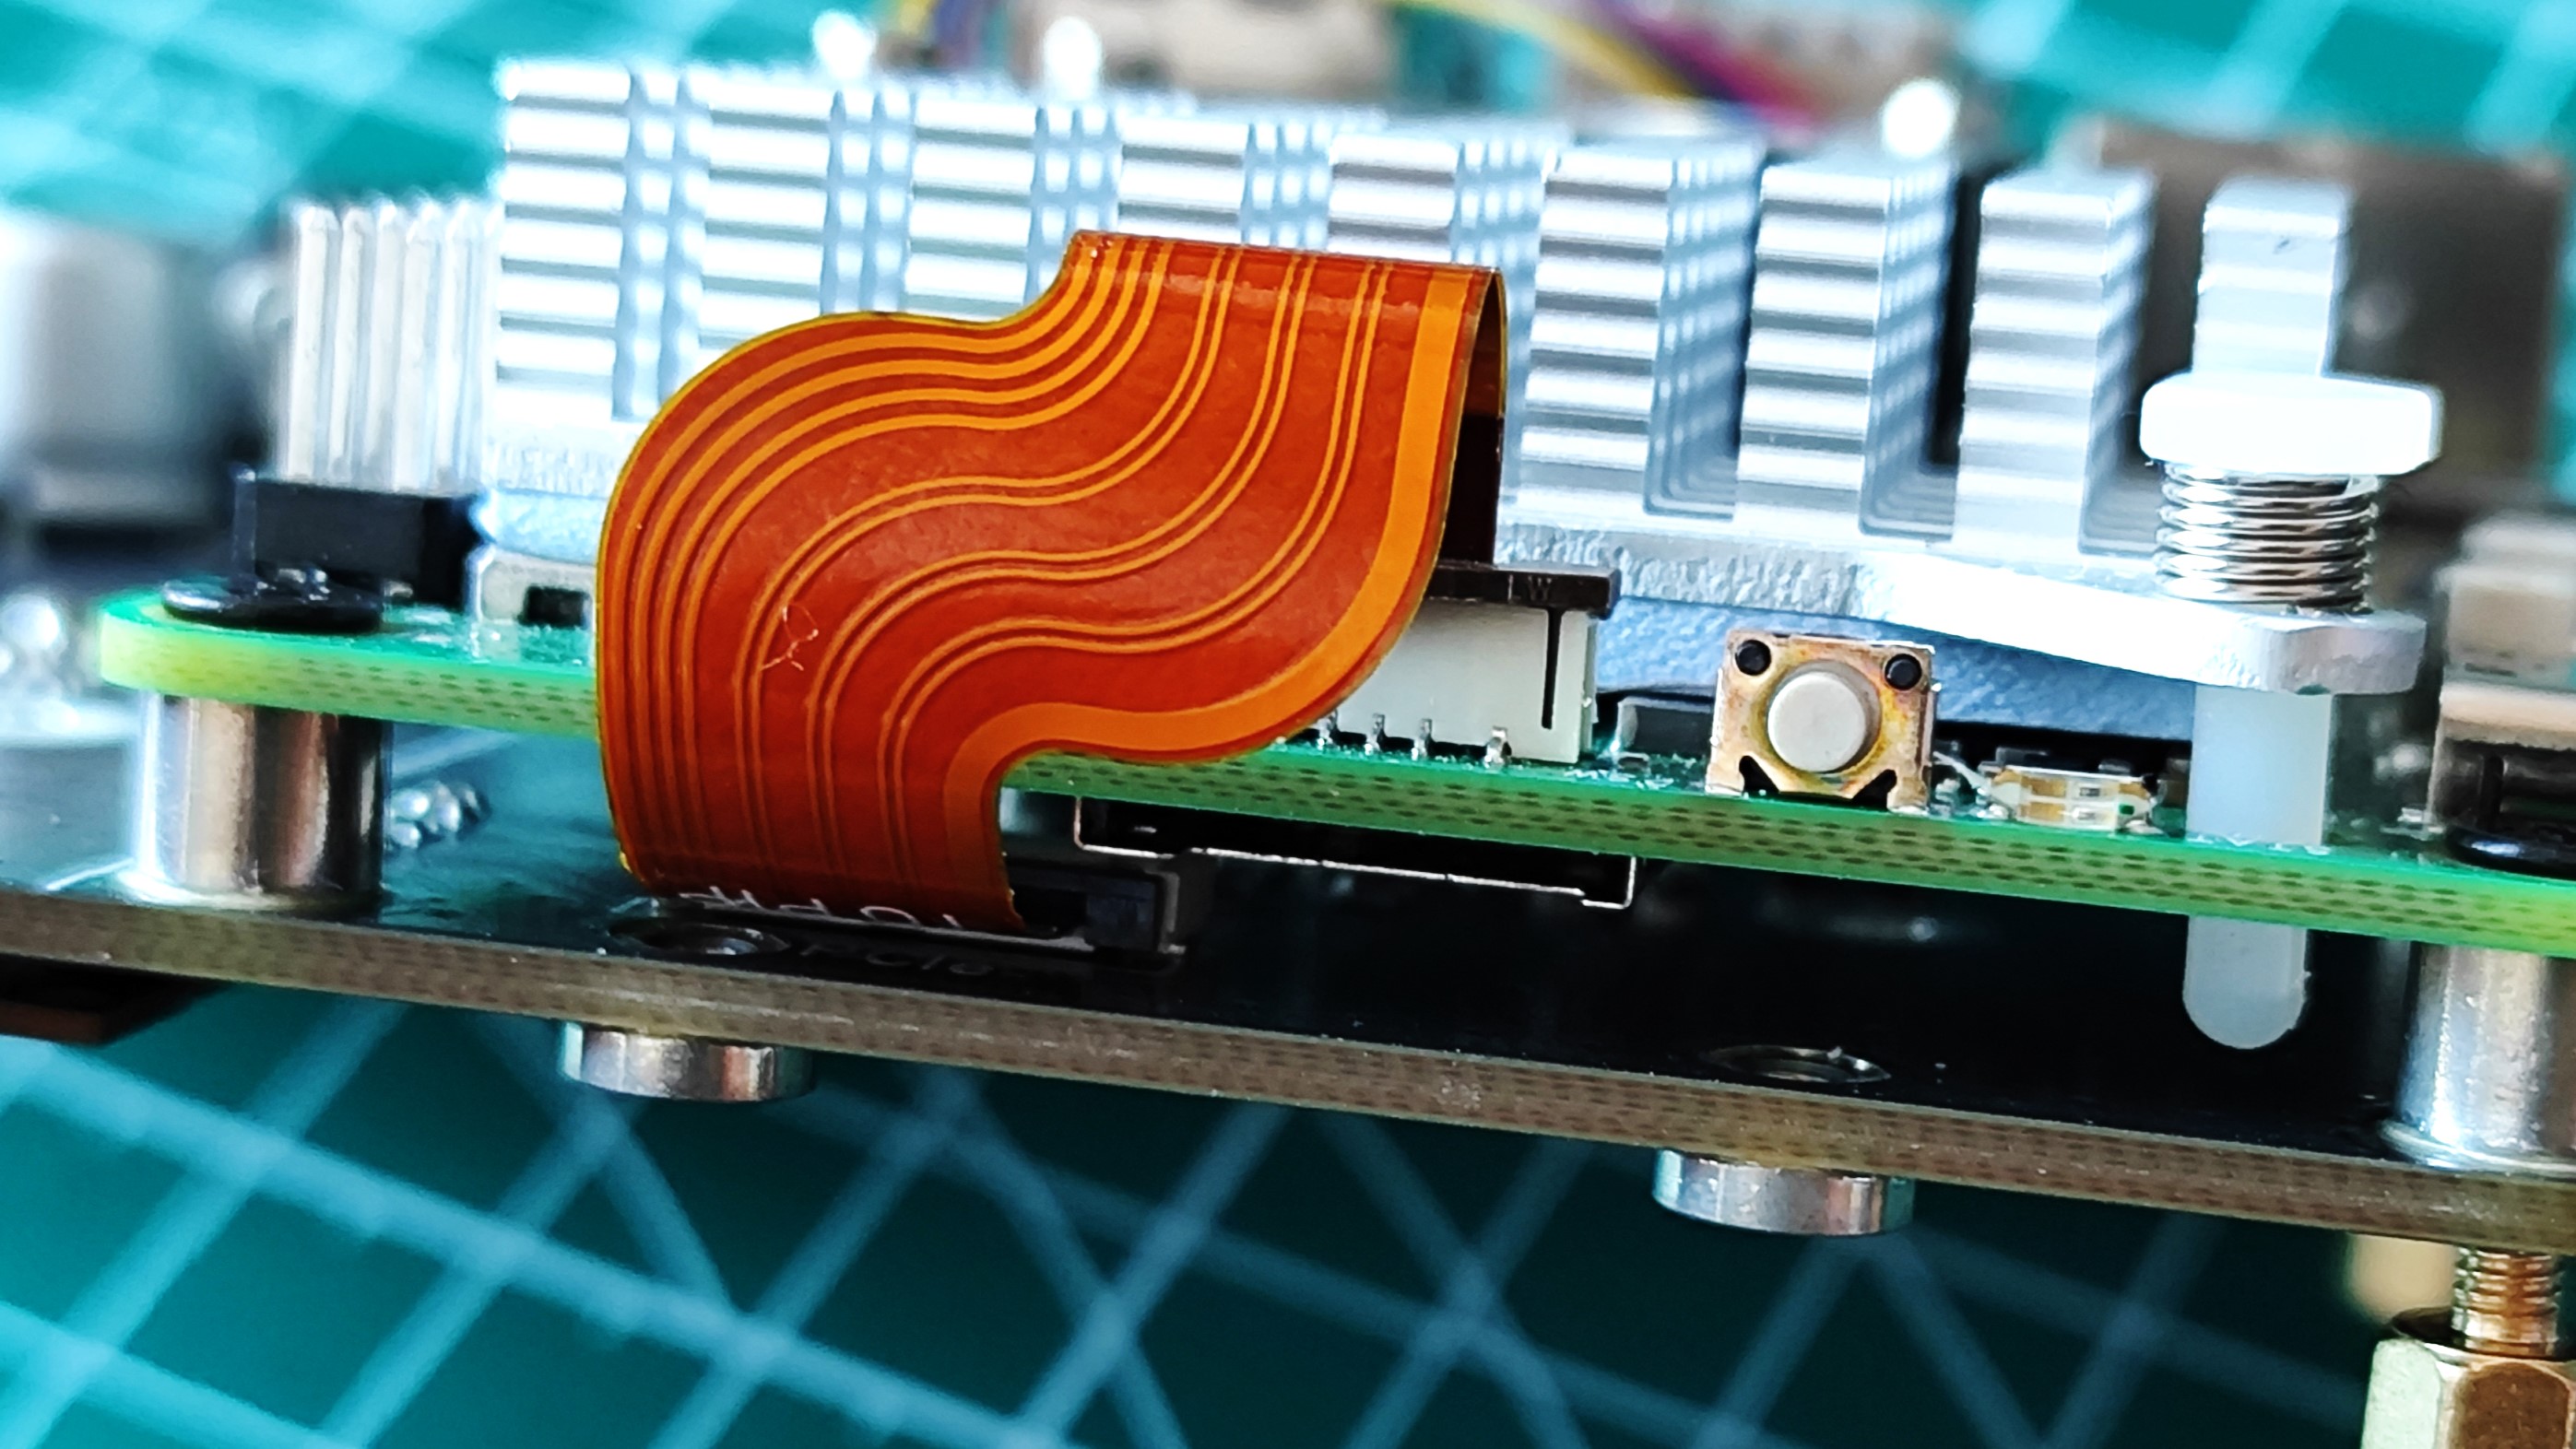
Overall, the X1011 does not block access to any ports. As the PCB sits underneath the Raspberry Pi 5 we have unfettered access to the ports. There is sufficient space between the PCIe cable and the micro SD card slot to keep access clear, should we wish to use micro SD cards
Who is the Geekworm X1011 for?
If you want to build your own NAS device based upon the Raspberry Pi 5, then the X1011 should be on your list. The slower drive bandwidth is mitigated by the Gigabit Ethernet of the Raspberry Pi 5. Loading this up with a range of high capacity drives and a corresponding case would make this a tiny NAS with a lot of power.
Bottom Line
The Geekworm X1011 is niche and it has its flaws but it is remarkable what the Raspberry Pi 5’s PCIe interface can do. If you want speed, then go for thePineboards HatDrive! Nano. You only have space for one drive, but it is fast! If you want more storage than speed, then from the two multi-drive boards we have tested, you have the choice of thePimoroni NVMe Base Duoand this.
We’ve got another Pineboards multi-drive board to test. The Pimoroni NVMe Base Duo “only” supports two M.2 devices, whereas the X1011 supports four. A small DIY NAS device can be easily made with the Geekworm X1011. Just don’t expectenterpriselevels of performance. This is the board to build that NAS, tucked away in your home / lab that just works in the background.
Les Pounder is an associate editor at Tom’s Hardware. He is a creative technologist and for seven years has created projects to educate and inspire minds both young and old. He has worked with the Raspberry Pi Foundation to write and deliver their teacher training program “Picademy”.
