Using asecond screen or an external monitorto perform multiple tasks on our system has become a norm. It has not only provided us with a bigger view but also made our work much easier and more efficient.
However, it can sometimes be difficult to connect a second monitor to your PC. One of the common issues is the appearance of the error“Your PC Can’t Project to Another Screen. Try Reinstalling the Driver or Using a Different Video Card.”
This occurs when you try to project your screen to another monitor. As mentioned in the error itself, it is usually due to faulty or outdated graphics drivers. But once in a while, it occurs because ofimproper connection to the graphics card,monitor, or PC.
How to Fix PC Can’t Project to Another Screen Error
First of all, you should see the status of the cables and ports on your Monitor and the system.
After switching the ports, pressWindows + ‘P’to project your screen in your desired way.
If the issue still persists, let’s get to the solutions right away.
Update or Reinstall Graphics Driver
Most of the time, this error is caused by problems with the display drivers installed on your PC. Especially when you upgrade your Windows to a newer build, then the earlier driver versions can be incompatible with the new build.
So, you shouldupdate the graphics driversin your system.
Restart your system and try to project your screen again.
However, the mentioned way to update the graphics may not always work. So, you should tryreinstalling the graphics drivers manuallybydownloading them directly from the manufacturer’s website.
You should be able to project your PC to another monitor now.
Perform a Clean Installation of the Graphics Driver
If the existing graphicsdriver is corruptedor inappropriate configurations are set up, then simplifying, updating, or re-installing the drivers may not work. The cache and existing settings still remain in the system, causing the issue.
So, you shoulduninstall the existing driverand perform a clean installation of the graphics drivers again.
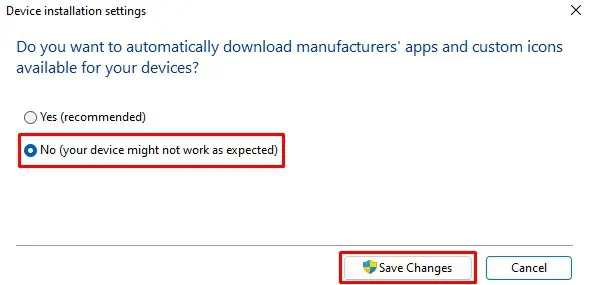
Prevent Windows From Installing Drivers Automatically
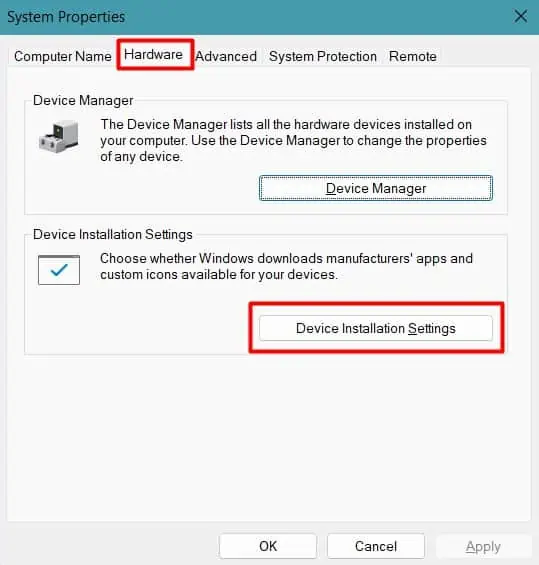
As the graphics drivers are essential software for the PC, the system will install it automatically after you uninstall the driver. This automatic installation does not always ensure updated software. It can also interfere with the clean installation process.
So, you will have to disable this setting first.
Remove the Existing Driver and Install the New One
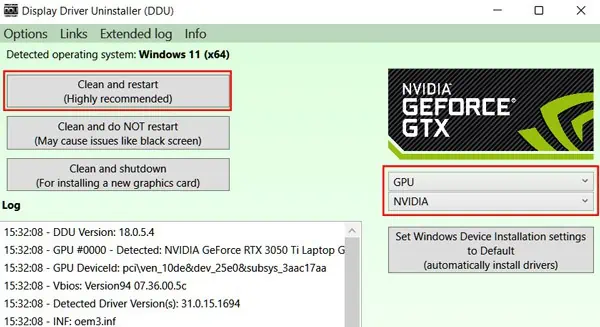
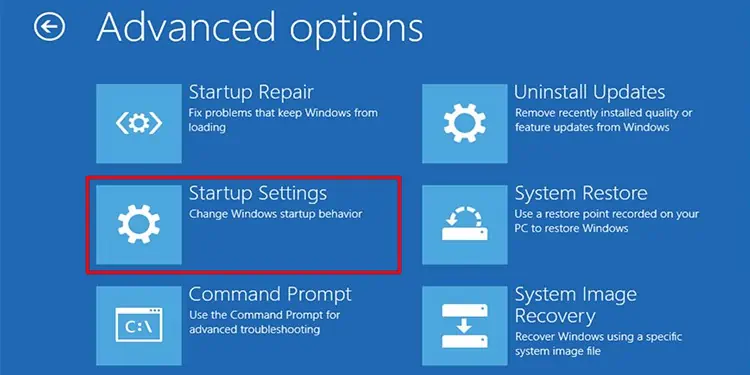
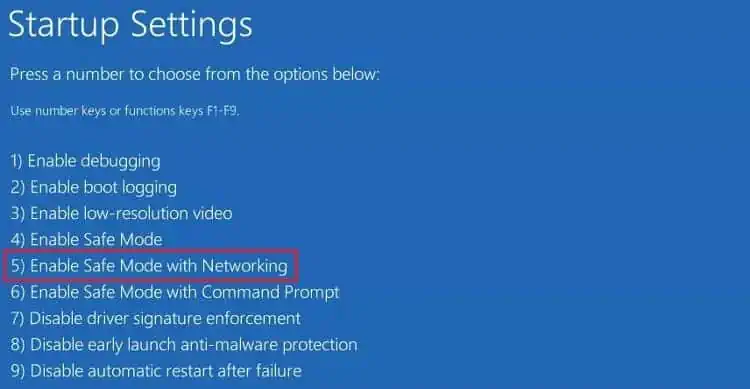
Uninstalling the driver directly from Device Manager does notremove its cacheand registry entries. You will have to use Display Driver Uninstaller (DDU) program to clean all these files from your PC.
But, it is recommended to use DDU insafe mode. So, let’s move on to uninstalling the existing driver.
Upon restart, all the configurations and registry entries of the drivers along with the driver will be completely uninstalled.
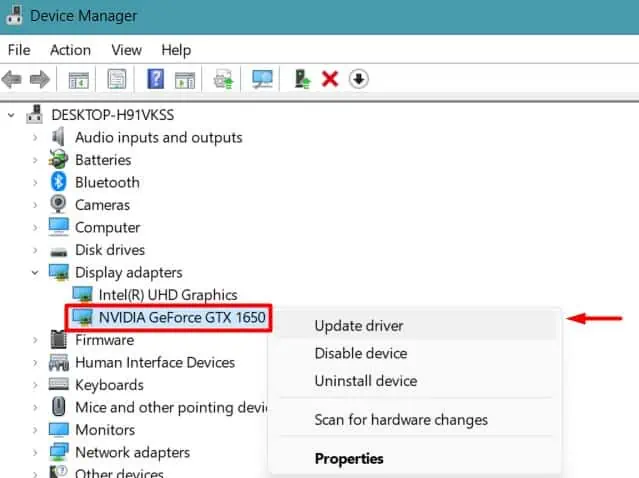
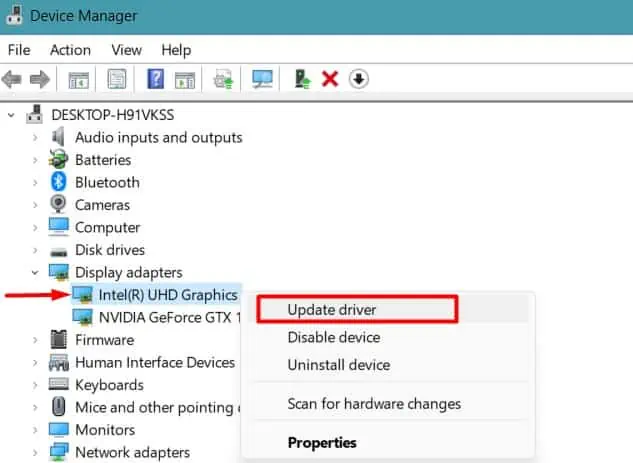
You should nowdownload and install the latest driverby following the similar way mentioned earlier.
Check whether you can project your PC to another monitor now. You can follow the same process for theintegrated graphicsas well if it does not work out.
Perform Windows Update
Windows usually fix bugs in their OS and even drivers by providing new updates throughWindows Update. Furthermore, if you have recently upgraded your Windows, then the required updates may also be pending. Thus, you should install all the updates available for your PC to fix the issue.
Restart your PC and project the screen to the external monitor again. It should work now without any issues.