If you have ever wondered how each computer component communicates with the motherboard, it is all because of BIOS. The motherboard’s BIOS controls each hardware component connected to the motherboard.
On top of that, BIOS also allows you to change the hardware settings according to the requirements. And if you are using your system for gaming, you’re able to adjust BIOS configurations such that it uses every bit of hardware resource, maximizing your gaming performance.
Before We Begin
In this article, we have only mentioned BIOS settings that are universal across all motherboards. However, finding the exact settings can be difficult as the naming might be different depending on the motherboard manufacturer.
Furthermore, if the PC has a newer motherboard, some BIOS settings are only accessible once you update the BIOS. So we recommend that youupdate the BIOSfirst.
Enable Memory Profiles
When you are running a game, the CPU constantly communicates with the RAM to process the necessary game files. Faster RAM speed means the CPU can access these files much faster and you may get a slight FPS boost.
By default, the system uses the base RAM speed. Meaning, if you have purchased a RAM stick with a speed of 4100MHz, the default BIOS configuration does not allow the motherboard to use the RAM at said speed. To ensure this is not the case, we need toenable other memory profiles.
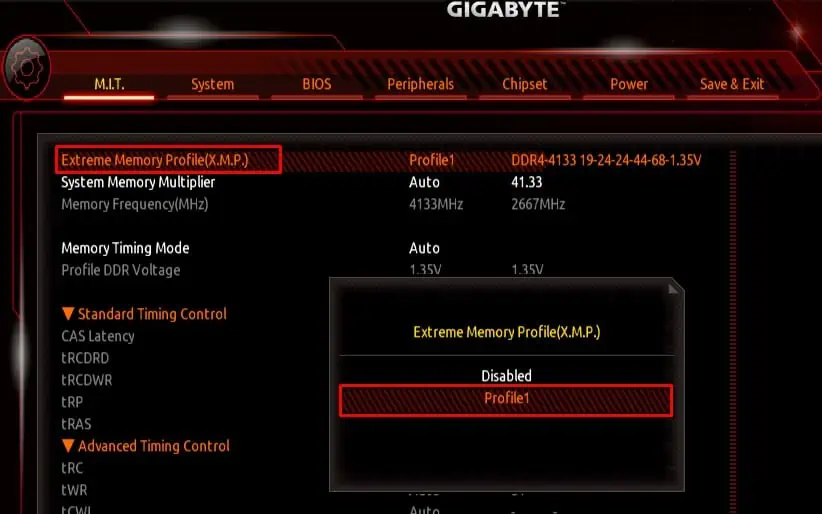
Changing memory profiles allows your motherboard to utilize the advertised RAM speed.
Once you enable and change the XMP profile, the RAM should run at a higher frequency and you will get a slight boost in FPS and faster load times. However, your system temperature may increase. Check yoursystem’s temperatureand adjust your fan speed accordingly.

If your computer still uses the previous RAM speed even after enabling the XMP profile, it could be that the CPU does not support the higher RAM speed. In that case, the RAM will run at a max speed that is supported by the CPU.
Adjust Fan Speed
Running any games, especially the AAA titles, puts a heavy load on your system. More workload generates higher temperature, and higher temperature means the system will start to throttle and it negatively impacts your in-game FPS.
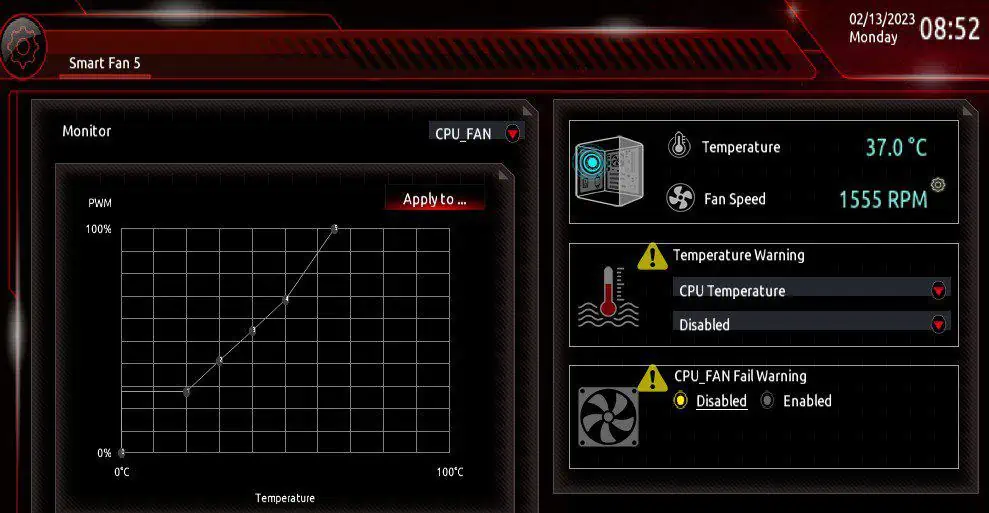
To counter this, the computer fans run at a high RPM (Rotation Per Minute). Sensors on your motherboard continously monitors the system temperature and the BIOSadjusts the fanRPM using the same data.
By default, the fans connected to the motherboard run at a preset RPM. Depending on your system, this preset fan speed may not be enough to keep the system cool. So it is best that you change the internal fan RPM to keep the system temperature cool.
Enable TPM and Secure Boot
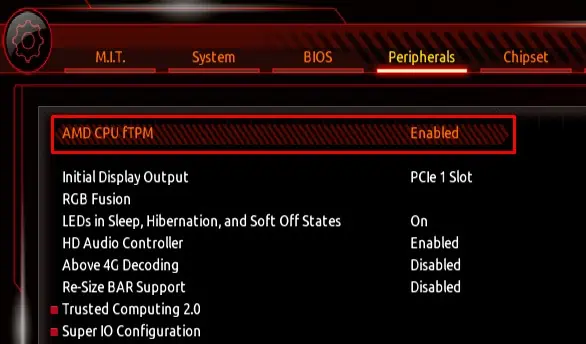
TPM does not improve your system’s gaming performance but adds an extra layer of security to your system.Enabling TPMencrypts data on your system and fends off people that might be trying to access it. Besides, some Operating systems require this setting to be enabled for installation.
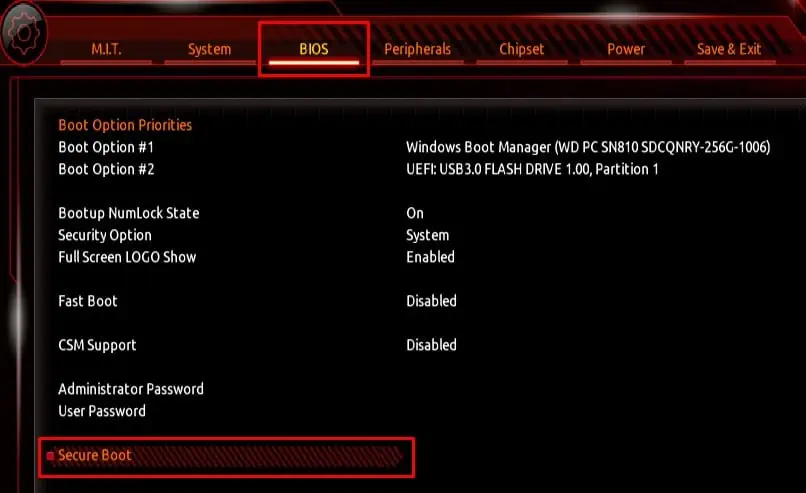
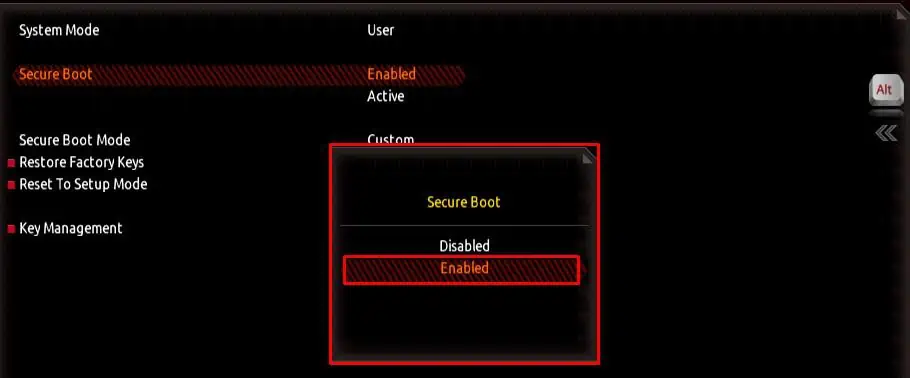
Furthermore, games with their own anti-cheat system will require you toenable Secure Bootin order to run. So, it is best that you enable both TPM and Secure Boot.

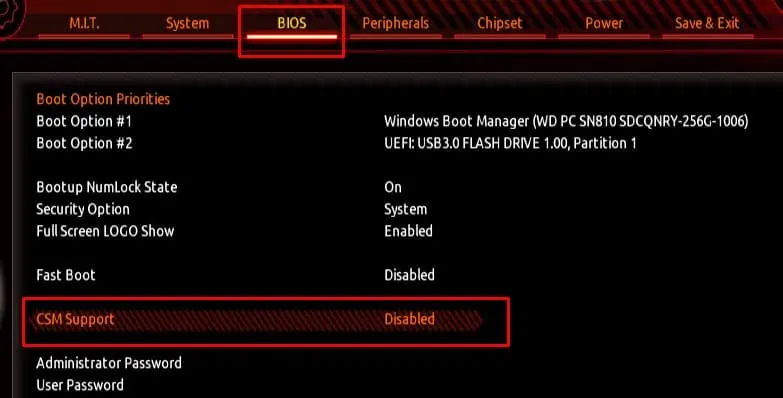
Disable CSM
CSM (Compatibility Support Module) is a part of UEFI firmware that allows the motherboard to support older hardware and operating systems. CSM like TPM does not have any effect on the system’s gaming performance but you might need to enable or disable it depending on your computer.
If you have an older OS that does not support UEFI, it is best you use CSM BIOS mode. If your system has the latest OS and hardware, you can disable CSM. Furthermore, there are cases where the hardware does not support CSM.
Besides this, your motherboard will not display some settings like Secure Boot with CSM enabled. If you have a system with the latest components, it is best that you disable CSM.
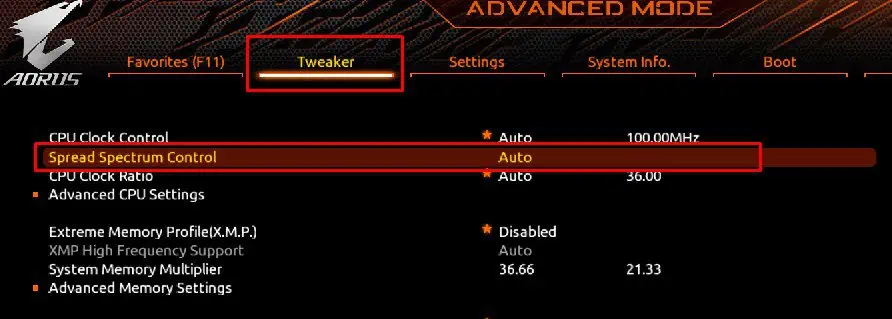
Spread Spectrum
Spread Spectrum affects the system’s clock speed. It does this by changing the BCLK (Base Clock) value to increase or decrease the CPU and memory clock speed.
Most motherboards have BCLK values of 99.8, 100.2, 100.5, 100.7, and 100.8. The formula to determine how BCLK affects performance is BCLK-100. BCLK of 99.8 means the CPU and memory clock speed drops by 0.2% (99.8-100=-0.2). BLCK of 100.8 means the clock speed increases by 0.8%(100.8-100=+0.8).
From the above calculation, readers might come to the conclusion that you should always enable Spread Spectrum and set BCLK to the highest value. Although that is true to some extent, we recommend that youdisable Spread Spectrum when overclockingas variation in clock speed is not ideal when you are overclocking the system.
To find the Spread Spectrum settings in BIOS,
Change C-States
The CPU runs in different C-states depending on its operating mode. C0 is the operating/normal state. The higher C number means CPU goes into deep power down mode. The higher the C-state, the longer it takes to return to C0 mode.
C1-C3 cuts CPU workloadby lowering CPU clock signals.C4-C6 lowers the CPU voltage. The enhanced mode can do both functions for a C state simultaneously.
If you are overclocking the system it is best that you leave C-states disabled. The system may face instability in CPU core voltage (Vcore) when enabling C-states on an overclocked system. This means a random system shutdown or even aBlue Screen of Death (BSOD) error.
Overclocking CPU
Depending on the CPU, you can boost its performance by overclocking it. When you overclock a device, it runs at a higher frequency. But, the temperature and the voltage required to run the device will also increase. The basic principle of overclocking a CPU is increasing its clock speed and simultaneously raising its voltage while keeping its temperature to a limit.
Not all CPUs support overclocking.You need a CPU that is overclock-ready. You do not need to worry about this if your system uses AMD CPU.All AMD processors are overclock-ready. However, not allIntel processor supports overclocking.
If you have an Intel CPU, check your CPU model and refer to the internet or the manufacturer’s website to check if it supports overclocking.
Check Temperature and CPU Usage
Before starting,note the CPU temperaturewhen idle and when the CPU is on full load.In idle, the CPU should not reach above 45 degrees. If the system is above 50 degrees on idle, we recommend not overclocking the system.On full load, it should not go above 80 degrees.
You can either use a hardware monitor application or the BIOS itself to check CPU temperature. As for CPU usage, you can check the current CPU usage from the Task Manager.If the CPU usage is above 90% on idle, we suggest not overclocking the system.
Install Benchmark Application
Benchmark application stress tests your entire system and gives you a score of how the PC performed. When overclocking, you’re able to use the obtained score to determine whether the CPU is performing better after overclocking.
You can use any free benchmark applications like CineBench, GeekBench, RealBench, etc.
Overclocking the CPU
Once you are certain that your system meets the requirement, you can now start theCPU overclockingprocess.
If your system constantly crashes after overclocking and you can’t seem to revert the change, you can simplyreset the BIOSto revert any changes made to it.
Once the system is stable during the benchmark, perform a stress test. If the system crashes during a stress test, keep lowering the CPU speed and voltage until the system runs the test without crashing.
After the system is stable, the FPS on your games should also increase.
