Downloadable 3D slicers offer the advantage of running locally without an internet connection, ensuring you can work even when there is no connection. However, they have limitations, especially when it comes to hardware requirements. For example, some require more computing resources, which might not be compatible with older or less powerful devices.
Additionally, they can be inconvenient for those who work in collaborative settings or those who want the flexibility of slicing their files using multiple devices without installing the software on each device. This is where online 3D slicers step in as the best alternative. They eliminate hardware constraints and allow you to slice your files anywhere with an internet connection. There are many available, but we shall describe six common ones. They come with pre-configured profiles for the majority of thebest 3D printers. Without further ado, let’s have a look at them.
1. REALvisionOnline
REALvisionOnline
REALvisionOnline has a user-friendly interface ideal for beginners who need simplicity and advanced users who want detailed customization options. The slicer supports a wide range of file formats, and you’re able to rotate, scale, and even slice multiple objects without installing any software. It comes with pre-configured profiles of around 49 3D printers, and there is also an option to request your 3D printer to be added if it’s not listed.
To slice 3D models in REALvisionOnline, you’re able to follow the steps below.
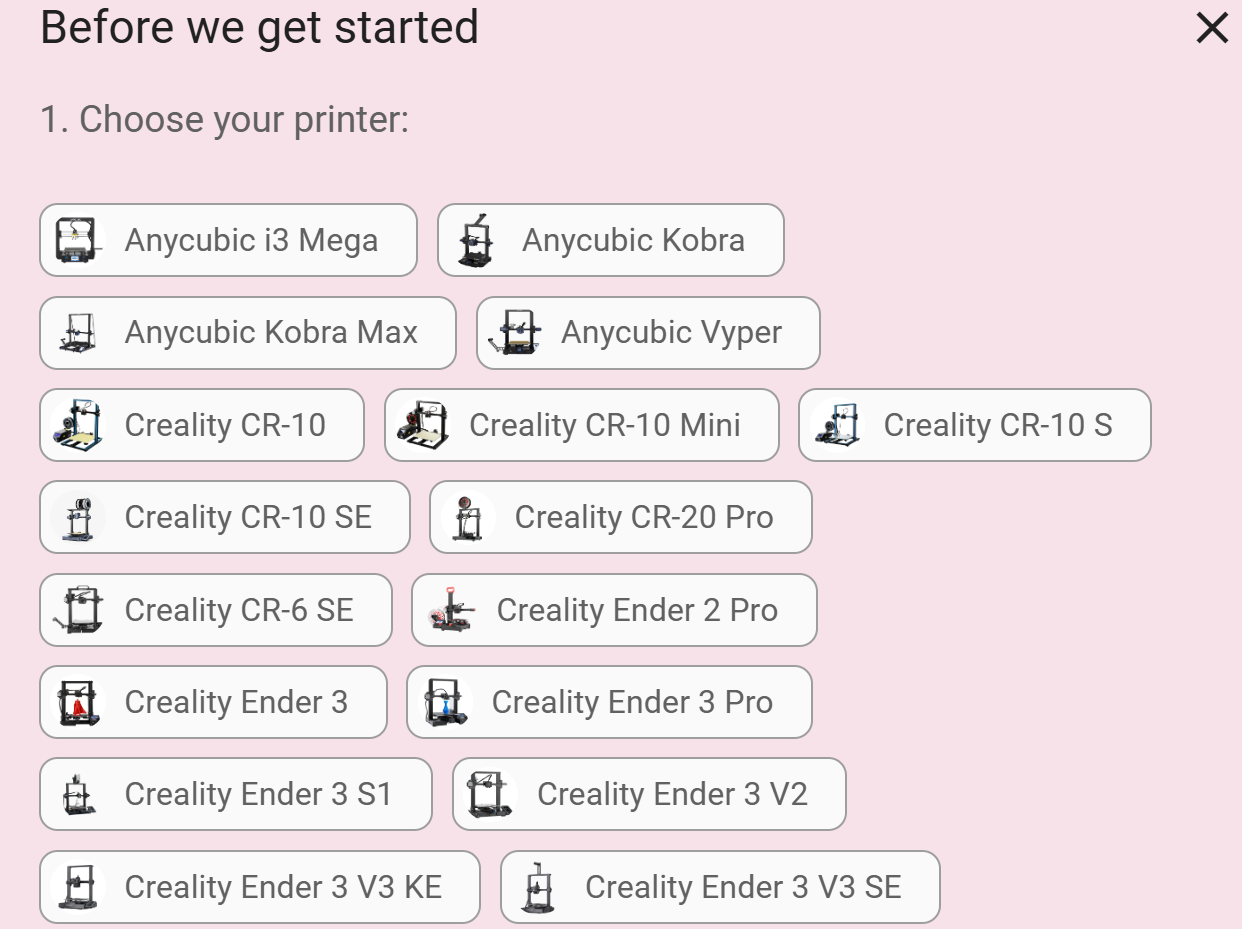
2.Choose your 3D printerfrom the new window that launches.
Scroll down to see all the 3D printers available. If you don’t see yours, click on the link at the end of that window and you will be redirected to a form that you will fill with the details for your 3D printer and they will add it.
Get Tom’s Hardware’s best news and in-depth reviews, straight to your inbox.
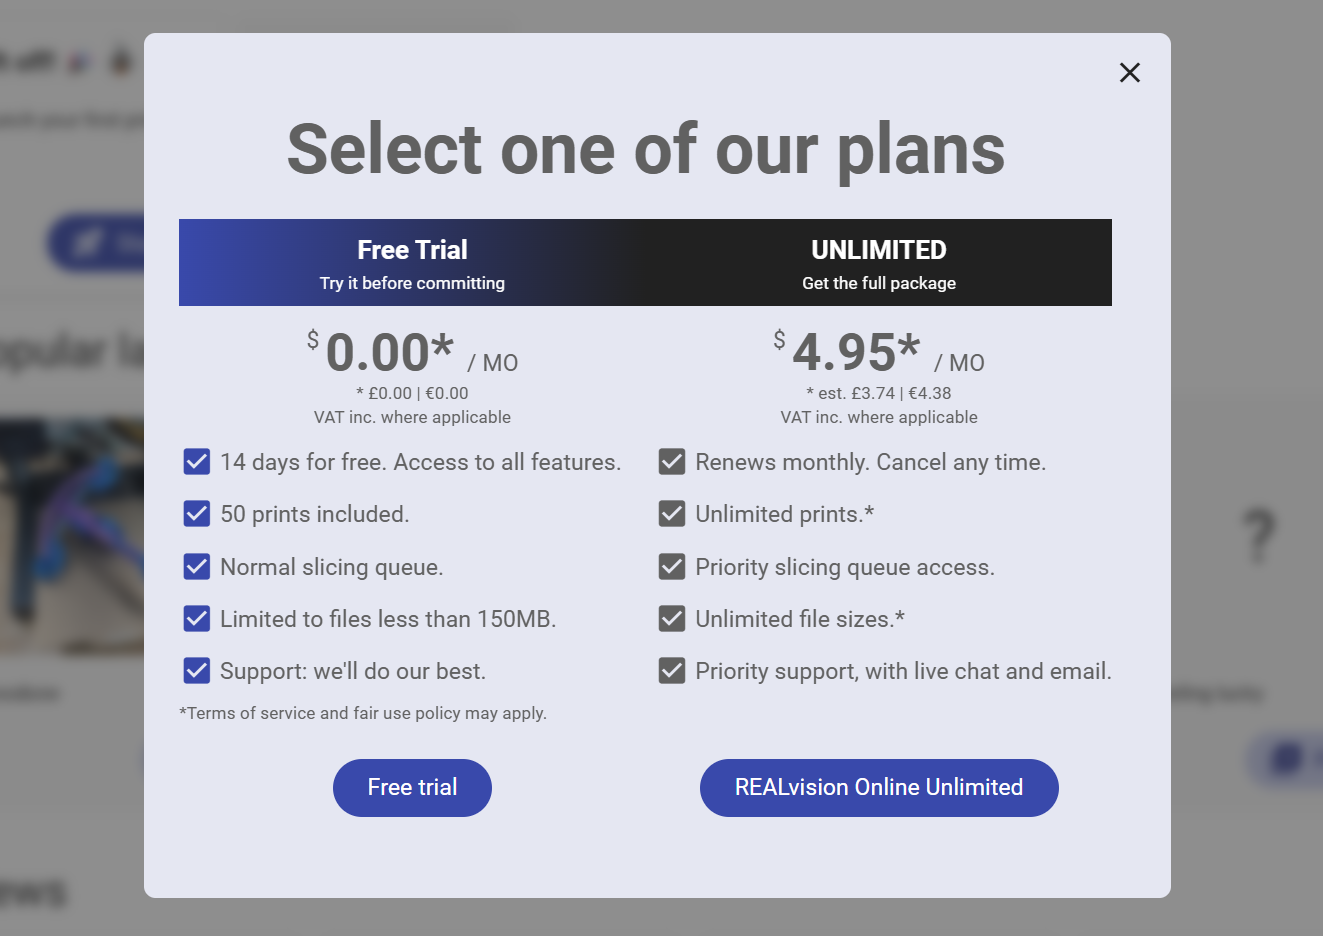
- Select one of the plans. That is, a free trial or the unlimited version that costs only $4.95/m.
5.Import your 3D modelto the platform by dragging and dropping it into the workspace, or double-click it. There is also an option to add more files by clicking onAdd more filessection.
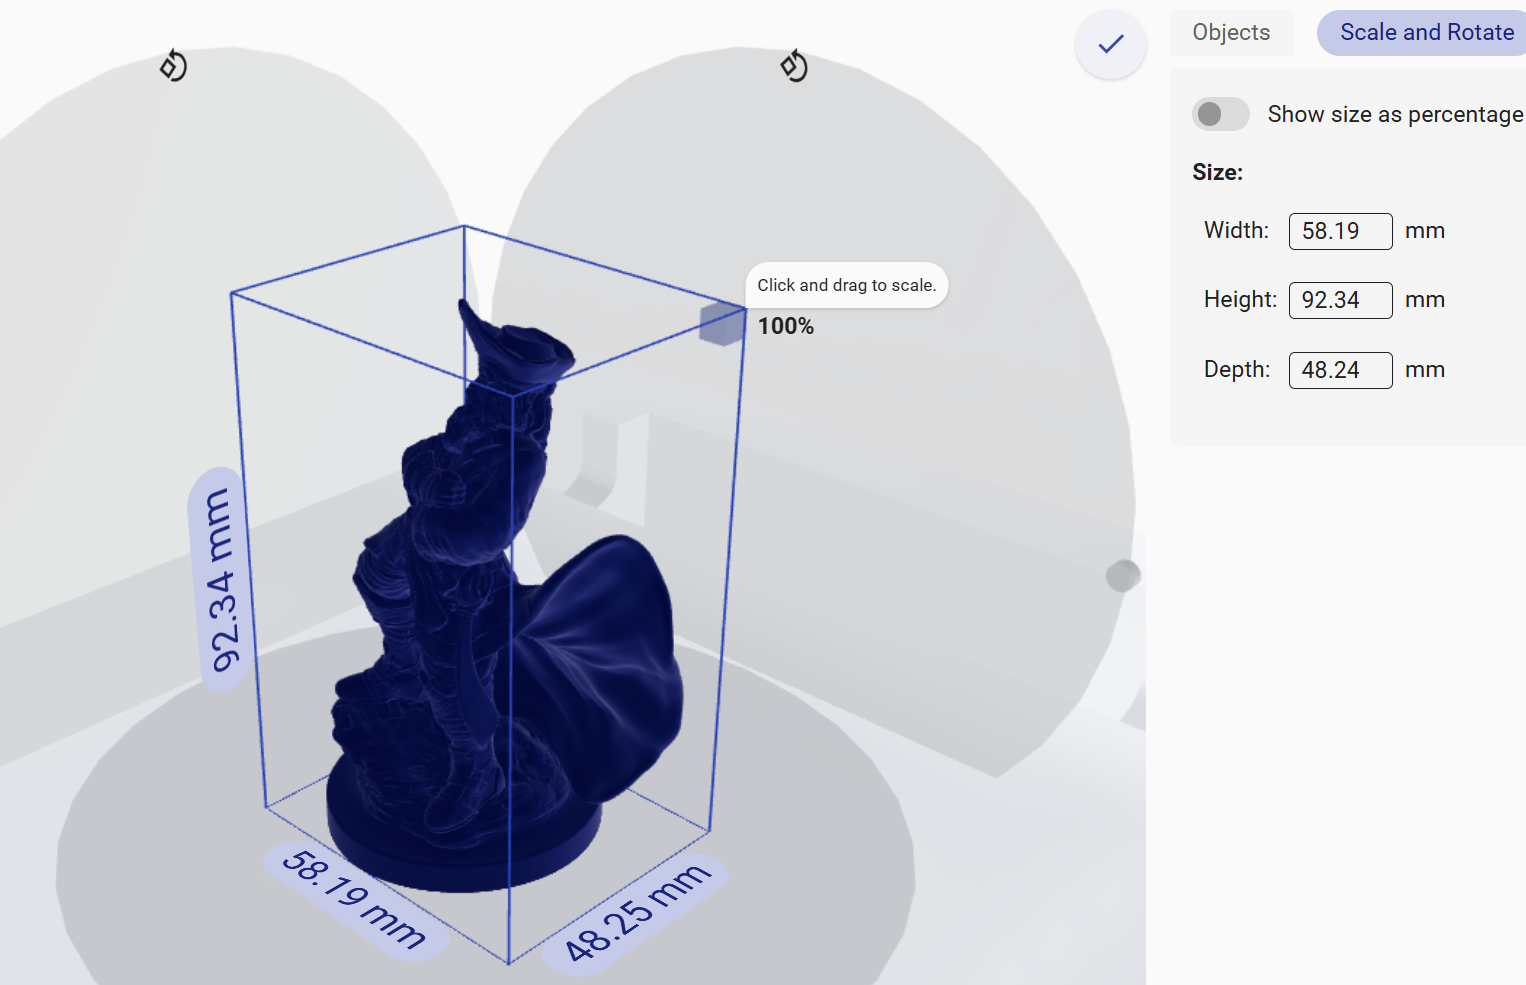
6.Position the objectby clicking and dragging.
7.Rotate by double-clickingto resize or rotate. You will see a new interface launching with options to select the width, height, and depth sizes on the right.
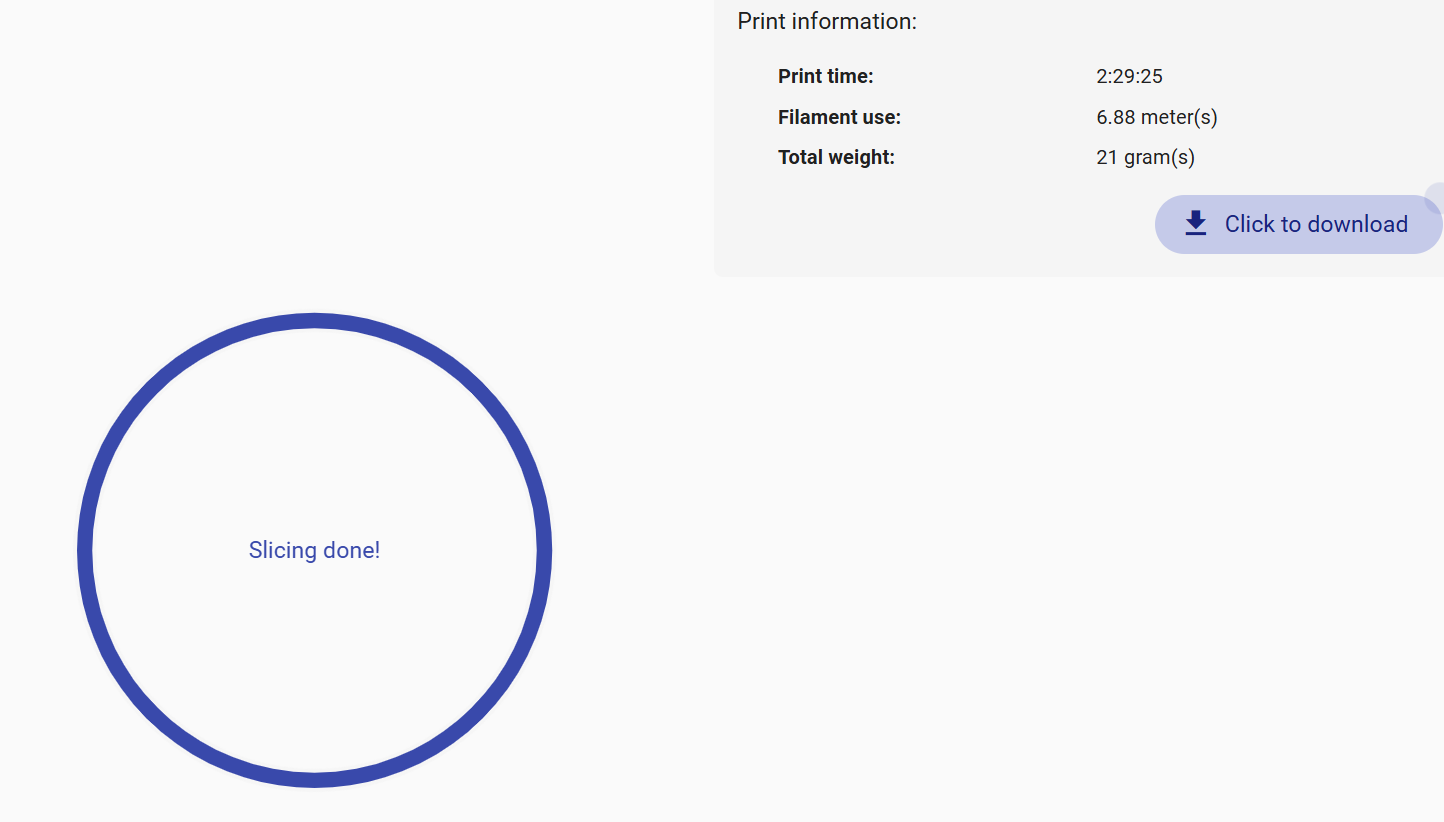
Once you apply your settings and you are ready for 3D printing, clickPrintfound at the bottom right section. Once the slicing process is complete, clickClick to downloadto get your G-code to send to your 3D printer.
In addition to slicing ability, REALvisionOnline also includes a built-in repair tool that is useful in fixing any issues with your design without having to install any other software. It also comes with many learning resources, like the maker academy, which makes it easier to master how to use the slicer with ease.
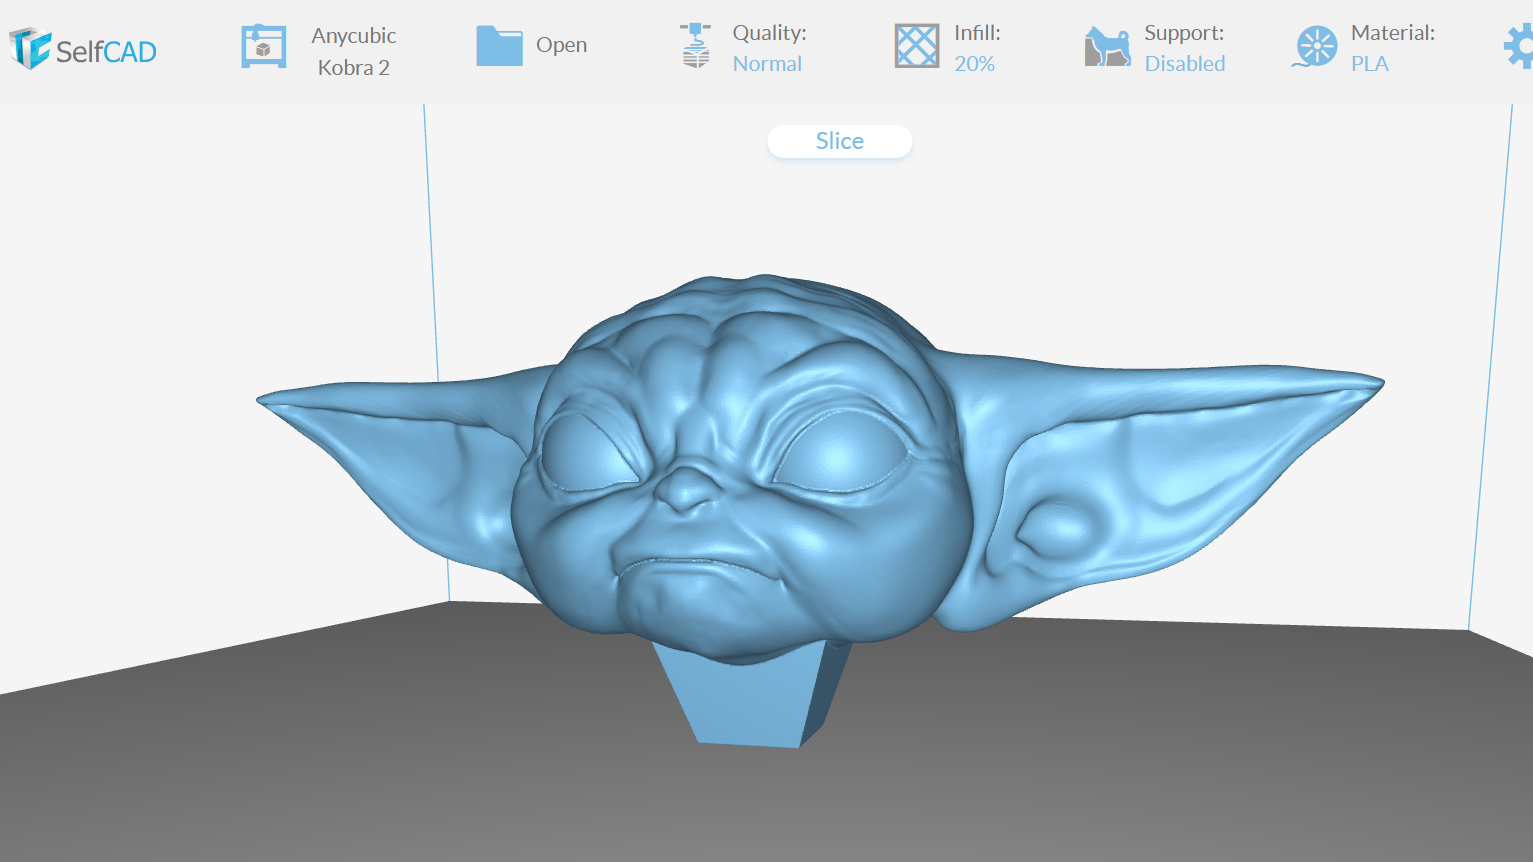
2. SelfCAD
SelfCAD is 3D design software that comes with its own online slicer, so you don’t need to switch between different programs to design or slice your files. The software has a free version, which is limited in functionality, and the paid version costs $14.99/m, but the slicer is entirely free. SelfCAD slicer is also compatible with most of the common FDM 3D printers and if you don’t find your 3D printer, you can request and they will add it.
you may import files to SelfCAD in most 3D file formats. After importing to SelfCAD, you can use the Magix fix tool to check if it has any errors and fix them before you slice to ensure that it’s ready for 3D printing. Follow the steps below to learn how to use the software.
1.VisitSelfCAD websitethencreate an account or loginif you have already registered. Start a new project, then launch the editor.
2.Import your 3D modelby going toFile > Import. You can also use the various tools of the software to design your file from scratch instead of importing it.
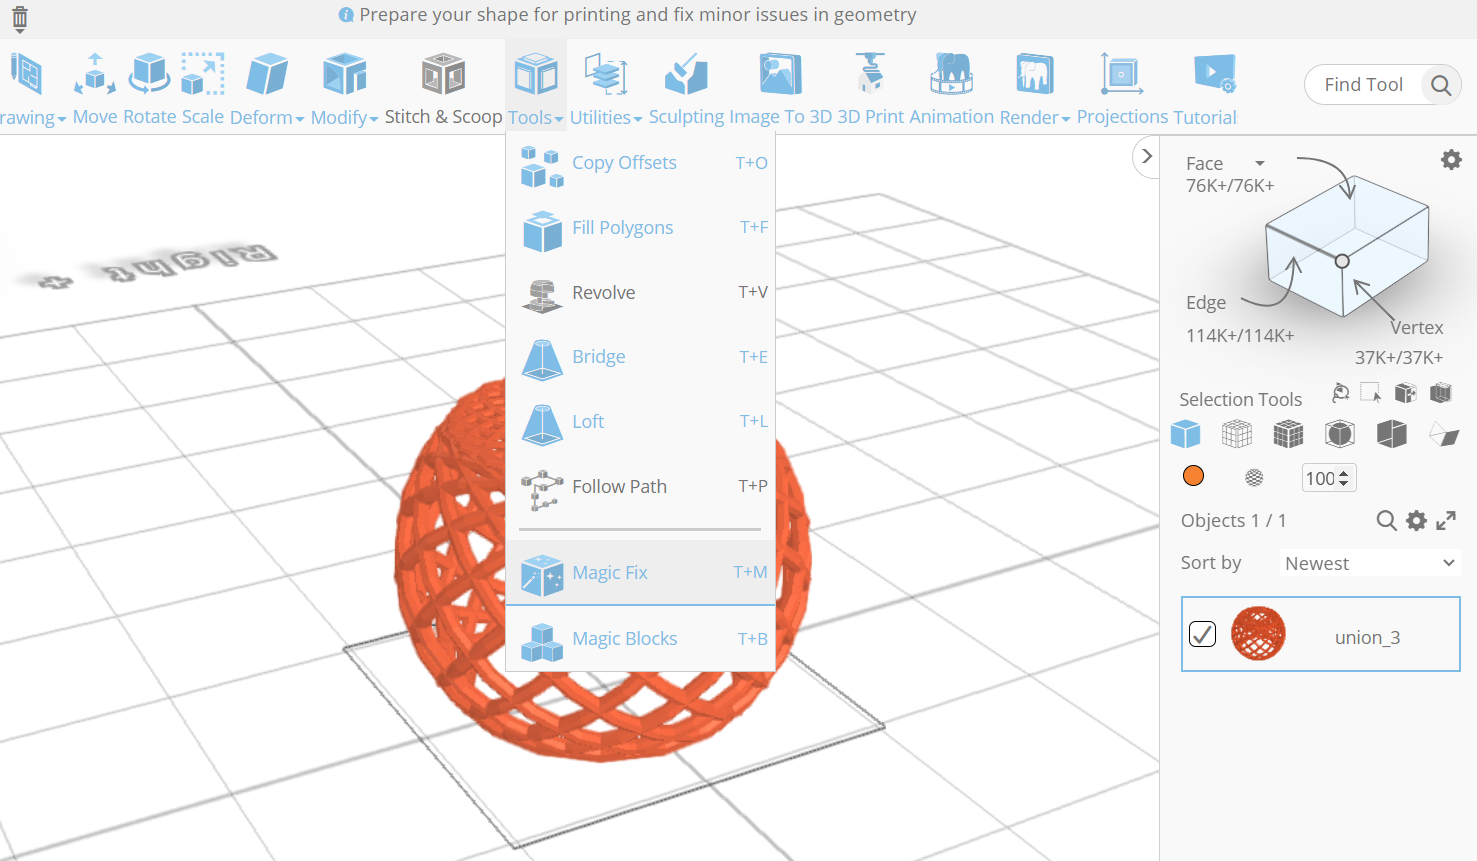
3.Select the object, thenchooseMagic Fixfrom theToolssection and use it to check if your design has any errors.
You can also check if there are nonmanifold edges by using theFlip normalstool found in theUtilitiessection before using the Magic fix tool to fix. If the file has any manifold issues, you will see a notification and you can go ahead and fix it. If there is none, you can proceed to slice.
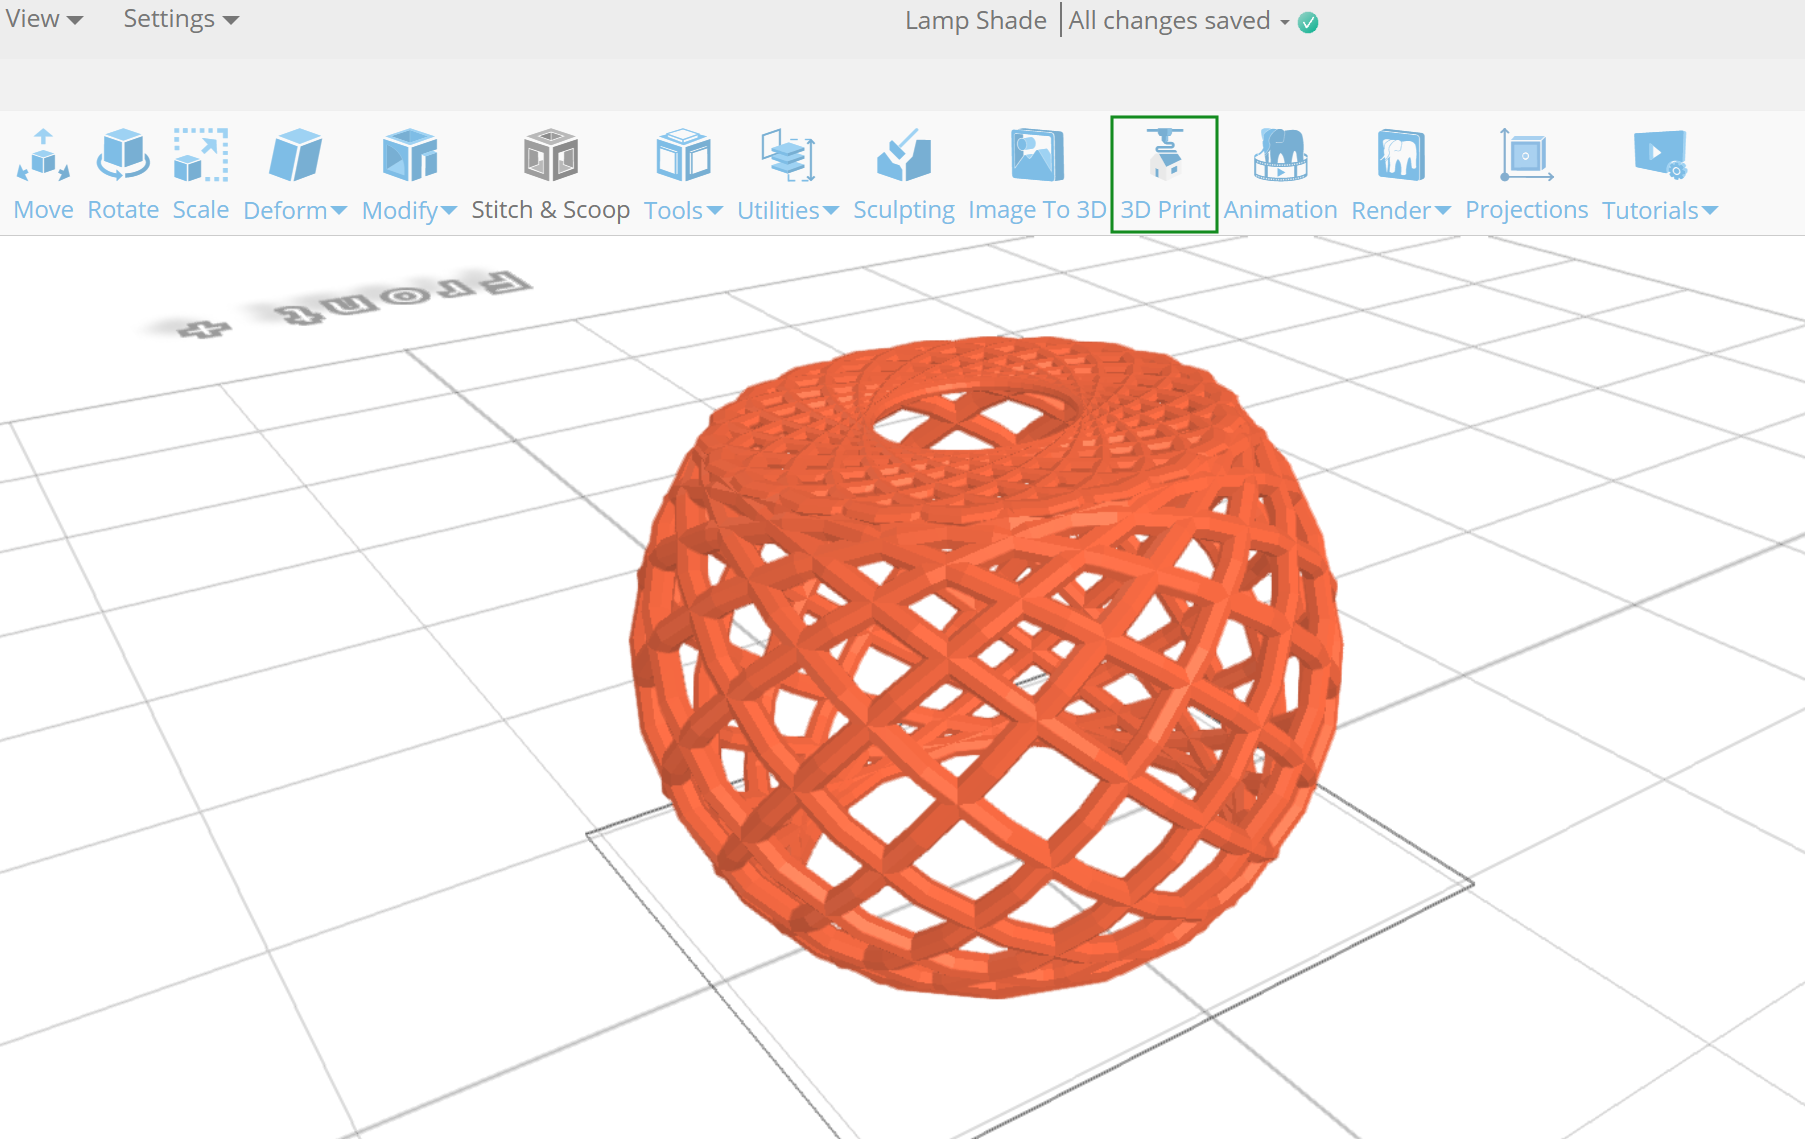
4.Click3D printtool to access the slicer.
- Select your 3D printerfrom the tab that launches, and you will see the slicer interface.
When you click the object, you will see an option to rotate, resize, and even change the orientation of your 3D print.
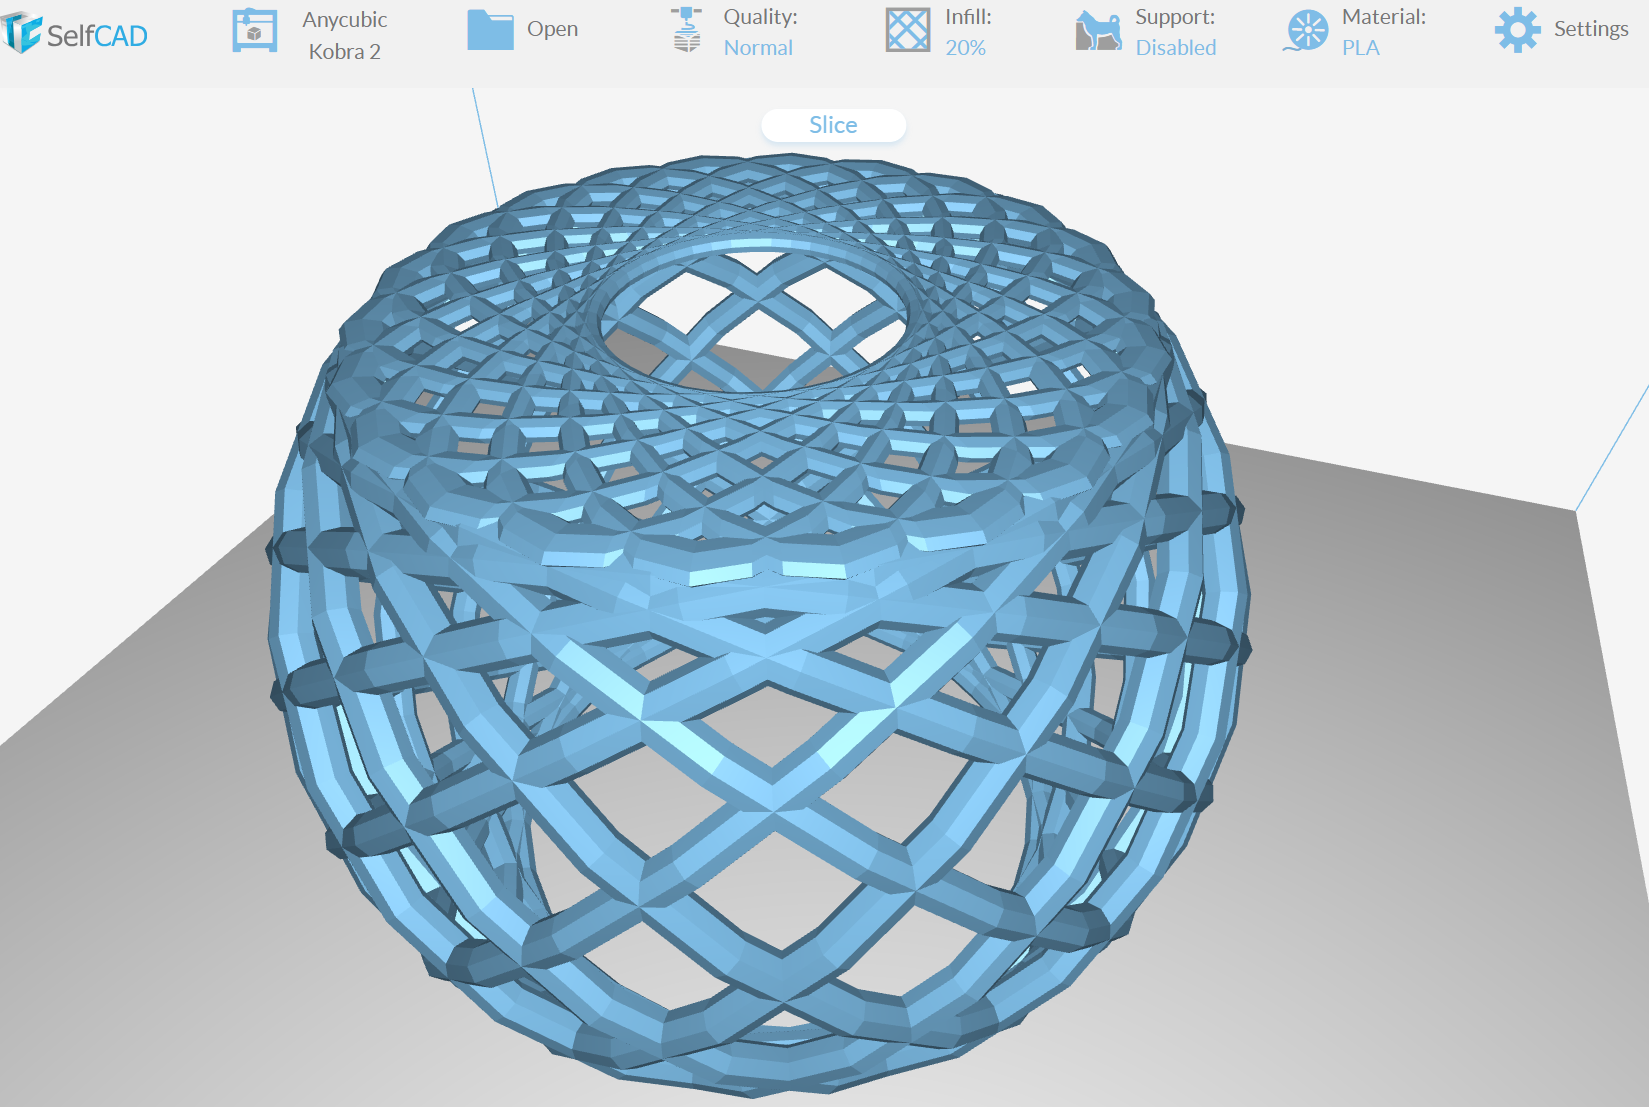
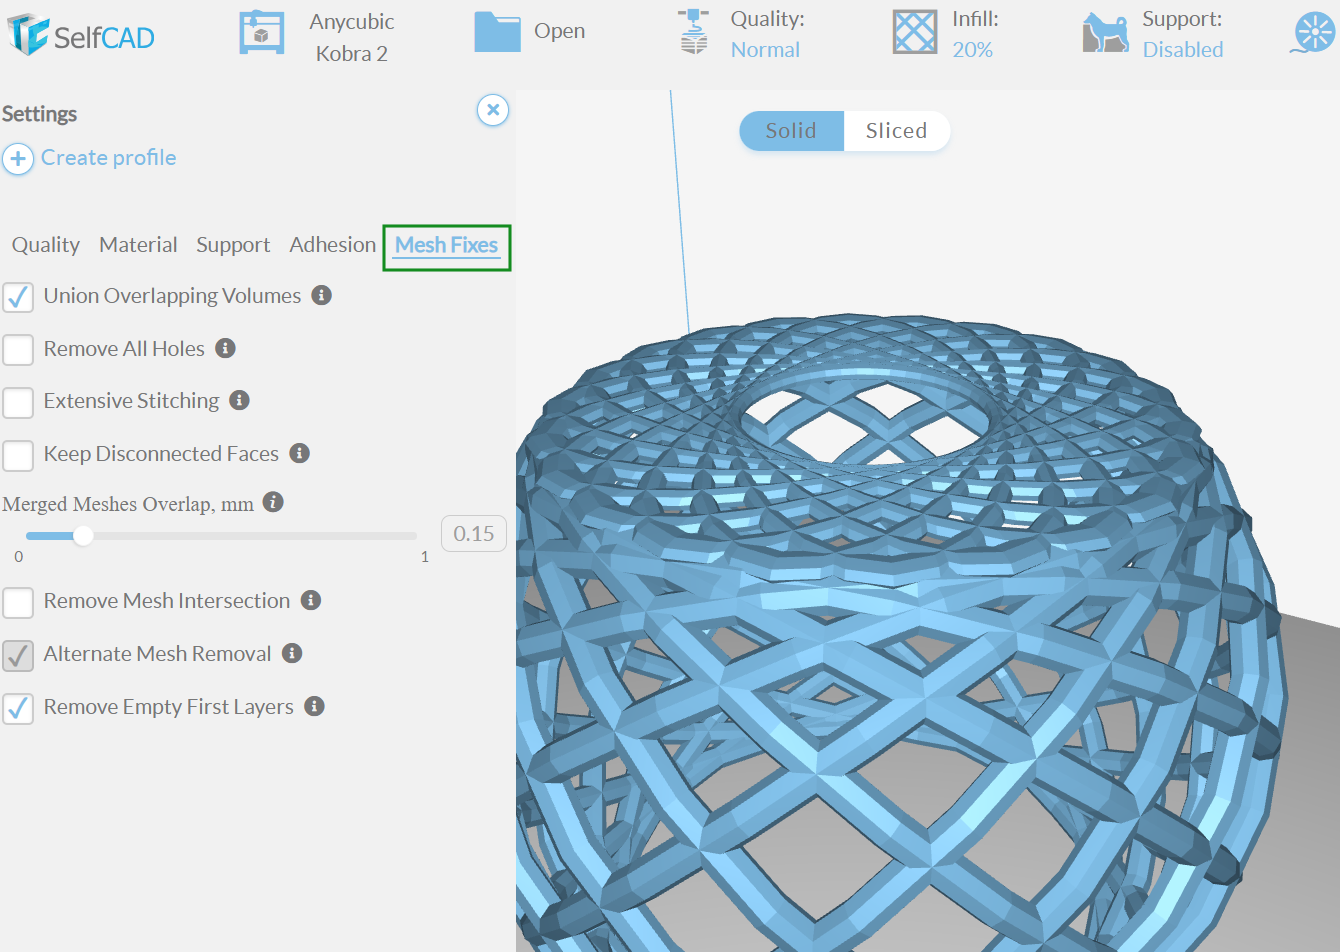
6.Choose the material, infill, and even supports settings from the top menu. You can access additional settings from theSettingssection. One of the key settings of SelfCAD slicer is theMesh Fixesoption which, just like the Magix fix helps to rectify any errors in your mesh, like fixing overlapping and disconnected faces and removing holes and empty layers.
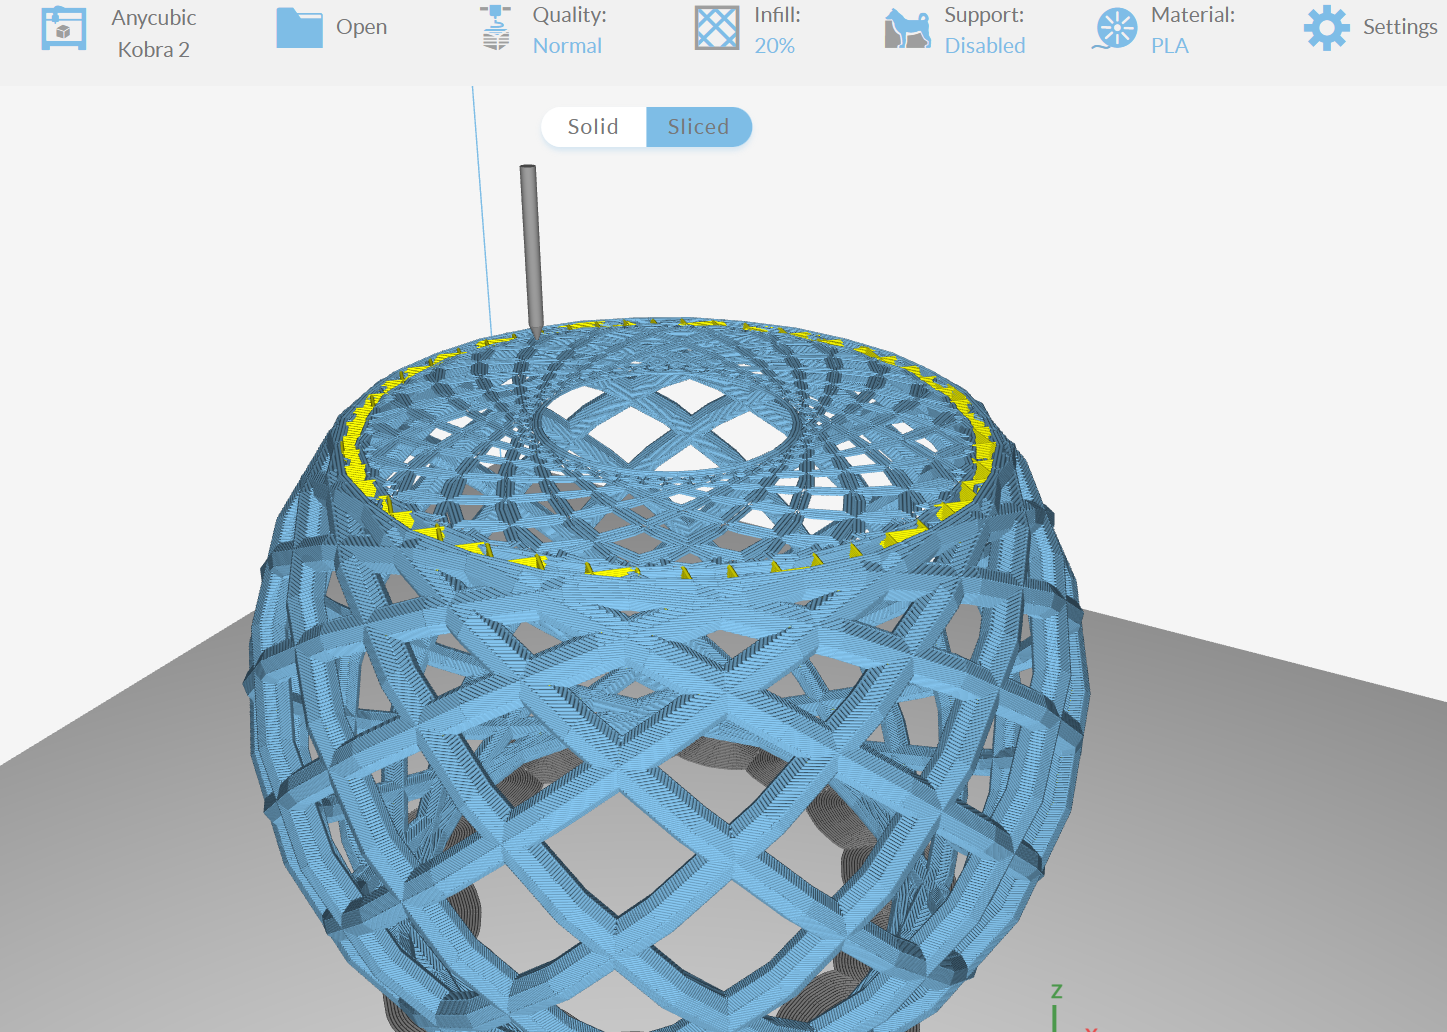
7.ClickSlicewhen you have applied the settings, and you can preview your design and see how it will be 3D printed.
You will also get to know the size of the filament you will need as well as the time it will take to 3D print. Download the G-code by clicking onSave the G code.
3. AstroPrint
AstroPrint
AstroPrint was specifically designed to simplify the 3D printing workflow by offering an interface for users to manage multiple 3D printers and monitor 3D prints from anywhere. It supports various 3D printers and you can slice your files using a variety of 3D slicers like Cura and this gives you the flexibility to use the tools that you are already familiar with but now on the cloud and no need for powerful local hardware. You can customize print settings and fine-tune settings like layer height, infill patterns, and supports. Follow the steps below to learn how to use AstroPrint.
1.VisitAstroPrint websiteand.
Select your 3D printerby going toPrinter Profilethen select the 3D printer from the drop-down menu.
Import your 3D modelbyclickingonExternal STL Uploader.You can also get 3D models from AstroPrint or Thingiverse’s design library. There is also an option to open 3D slash software and start creating your file before importing it into the software. To get 3D models directly from Thingiverse, you have to authorize it and when you have done so, you will be able to browse Thingiverse library directly on AstroPrint.
After importing your file, you will see an option to view your file in 360 degrees and also an option to edit it.
4.Editthe file byclickingon the Edit option.
you may move, scale, rotate, and even cut the object. There is also an option to change the orientation and properly position your file.
- Click Printwhen you finish editing and you will see an option to save your file before being redirected to the page where you will choose the material profile, and you will also see other advanced slicing settings.
6.Click Sliceto slice the file, or you can print directly from AstroPrint if your 3D printer is connected to the platform byclickingPrint.
4. Kiri:Moto
Kiri:Moto
Kiri:Moto is a free and open-source 3D slicer that supports FDM and resin 3D printers. you may also use it to prepare CNC machining and laser cutting files. Just like other 3D slicers, Kiri:Moto gives you the option to control various slicing parameters for FDM and resin 3D printing, as well as the ability to control cutting paths, depth of cuts, and engraving settings. Follow the steps below to use it.
2.Importyour 3D object by going to theFiles > Importsection.
3.Left-clickandHoldthe mouse to rotate and move the file around the workspace.
4.Adjustthe print settings on the left section of the workspace andclickSliceon the top-left section of the workspace.
5.ClickPreviewto see how your design will be 3D printed, and if everything is okay,clickExportto download G-code.
5. SliceCrafter
SliceCrafter is a cloud-based slicer developed by IceSL. It has a simple yet powerful interface and is ideal for those who want to slice quickly without compromising the key print settings. It comes with unique features like the ability to properly slice nonplanar layers, which usually results in bad surface quality in the prints. It also has an anisotropic appearance infiller tool that allows you to recreate any image as a printed flat surface, and you’re able to freely orient the direction of the infills appropriately to achieve the desired appearance. What’s more interesting about this slicer is the ability to specify settings per layer instead of the entire print. In addition to 3D slicing capabilities, SliceCrafter comes with basic 3D model editing tools. Follow the steps below to use this slicer.
4.Applythe necessary settings and when you finish,clickSlicethensave the G-code.
6. Canvas
Canvas
Canvas has been designed for multi-color and multi-material 3D printing, though you can still use it to slice single material files. In addition to being useful for 3D slicing, you can also use it to paint your designs and control your 3D printers digitally. It comes with 3D printer profiles of the most common versions, and you can also add your printer profile if you don’t see it. Follow the steps below to use it.
1.Go toCanvas3d websiteandregister an account.
2.ClickPrinterssection, then selectNew printerto choose your 3D printer. You will see an option to choose from the tested printer profile presets, import from popular slicers like Simplify3D, PrusaSlicer, or KISSlicer. You can also create a 3D printer profile from a blank profile.
3.Adddevices to Canvas from theDevicessection so that you can control them directly from the software when it’s online. The devices supported are those developed by Mosaic company, like Palettes for automatic material switching and print management.
4.Create a projectfrom theProjectssection and import your 3D model by clicking onObjectssection. When you do that, you will see an option to add a single-material design or multi-material model.
5.Rotate,scale,auto-arrange, andorientthe file from theToolboxsection.
6.Click Slicewhen you are done and you will see an option to either re-slice or download the G-code.
