Every device, including Surface laptops, come with unique Serial Numbers that identify the individual devices. You can use this identifier to check the current warranty status, which is useful whenever you encounter any issues with your Surface laptop. Apart from that, it’s also best to take note of the serial number, as it can be helpful in case your Surface gets lost.
On the Surface Device
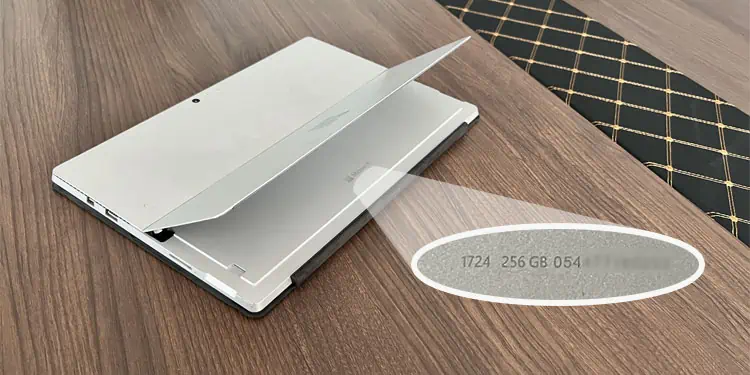
You can find the Serial Number under the stand on your Surface device. After you pull up the stand, you will see three numbers under the Microsoft logo or the base. From left to right, they are:
On other Surface devices like Surface Book, you may find the serial number near the hinge or on the keyboard attachment area.
Through the Surface App
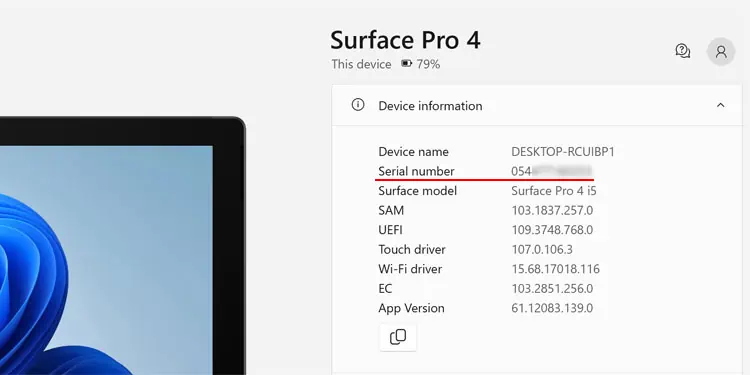
You can also find the information on the Surface device through the Surface App. This app also shows the Warranty validity and coverage while providing other services like basic troubleshooting or driver updates.
Using Command-line Interface
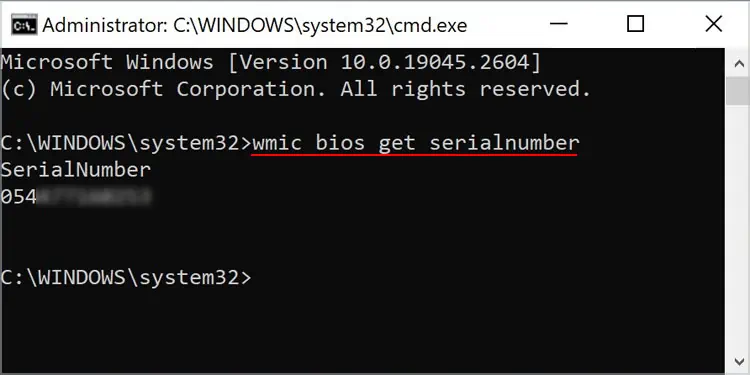
Another way you’re able to check the serial number on your Surface laptop is by using a Command-line Interface likeCommand Prompt or PowerShell. You need to use a Windows Management Instrumentation command-line (WMIC) command for this purpose.
You can also use the cmdletGet-CimInstance -ClassName Win32_BIOS | Format-List SerialNumberon Windows PowerShell for the same purpose.
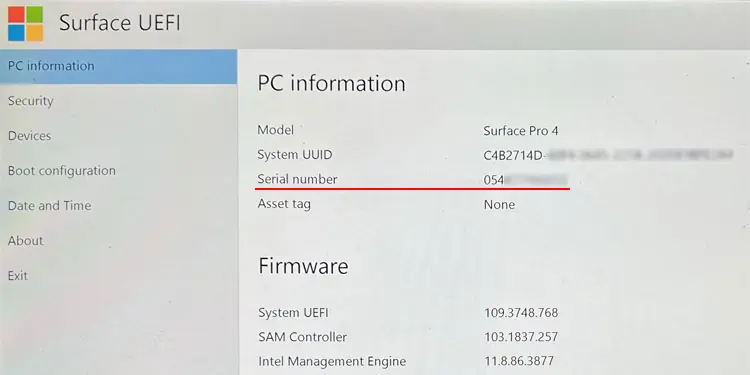
From the Surface UEFI
Your Surface UEFI interface also shows basic information on the device and the device firmware.
On the Original Packaging
The original package of the Surface laptop should also contain a sticker that contains some information on the device. If you still have this package, you can find the Serial number with the labelS/Nunder a barcode on the sticker.